1. Classroom Environment
Before diving into OpenStack, let’s take some time to explore the classroom environment. Understanding how things are currently configured is beneficial for your learning as you move forward in the class.
In this lab, we will explore this currently configured environment to help with the execution of future labs.
| Chapter Details | |
|---|---|
| Chapter Goal | Explore the classroom environment |
| Chapter Sections | |
1.1. Organizational Notes
All students have their own environments to perform exercises independently. The instructor will assign personal environments at the beginning of the class.
We will use virtual machines for OpenStack nodes. Whenever possible, we will provide analogies to what we would do in a real world scenario, such as a data center.
1.2. Working with Remote Environment
There are several options to access the classroom environment:
Web Browser with HTML5 support (Chrome, Firefox)
Use the following URL to access the classroom environment in the web browser:Real VNC Viewer (Linux, OS X, Windows)
Download and install Real VNC Viewer from the following URL:Screen Sharing (OS X)
For OS X you can use internal VNC client. Open Finder, press Command-K or from menu choose Go, Connect to Server and enter vnc://<server>:<port> in Server Address field.
TightVNC Java Viewer (any OS, requires Java SE version 1.6 or later)
Download jar file from the following URL:Use the following command to connect to the classroom environment:
java -jar tightvnc-jviewer.jar -host <host> -port <port>
In the web browser, you can bring up the menu by pressing Left Ctrl + left Alt + left Shift. In the menu, you can sign-out by clicking the Student button.
In Real VNC Viewer, we recommend to use the full screen mode, scale to window size and disable toolbar:

Important
Some VNC clients will complain about an unsecure connection. Just ignore the message, because we use temporary environments for each student, and we will tear down the environments after the course.
1.3. Working with Desktop
After logging in to the environment, you will see, that a lightweight desktop manager has been installed in the environment, where you can switch between virtual desktops and run applications.
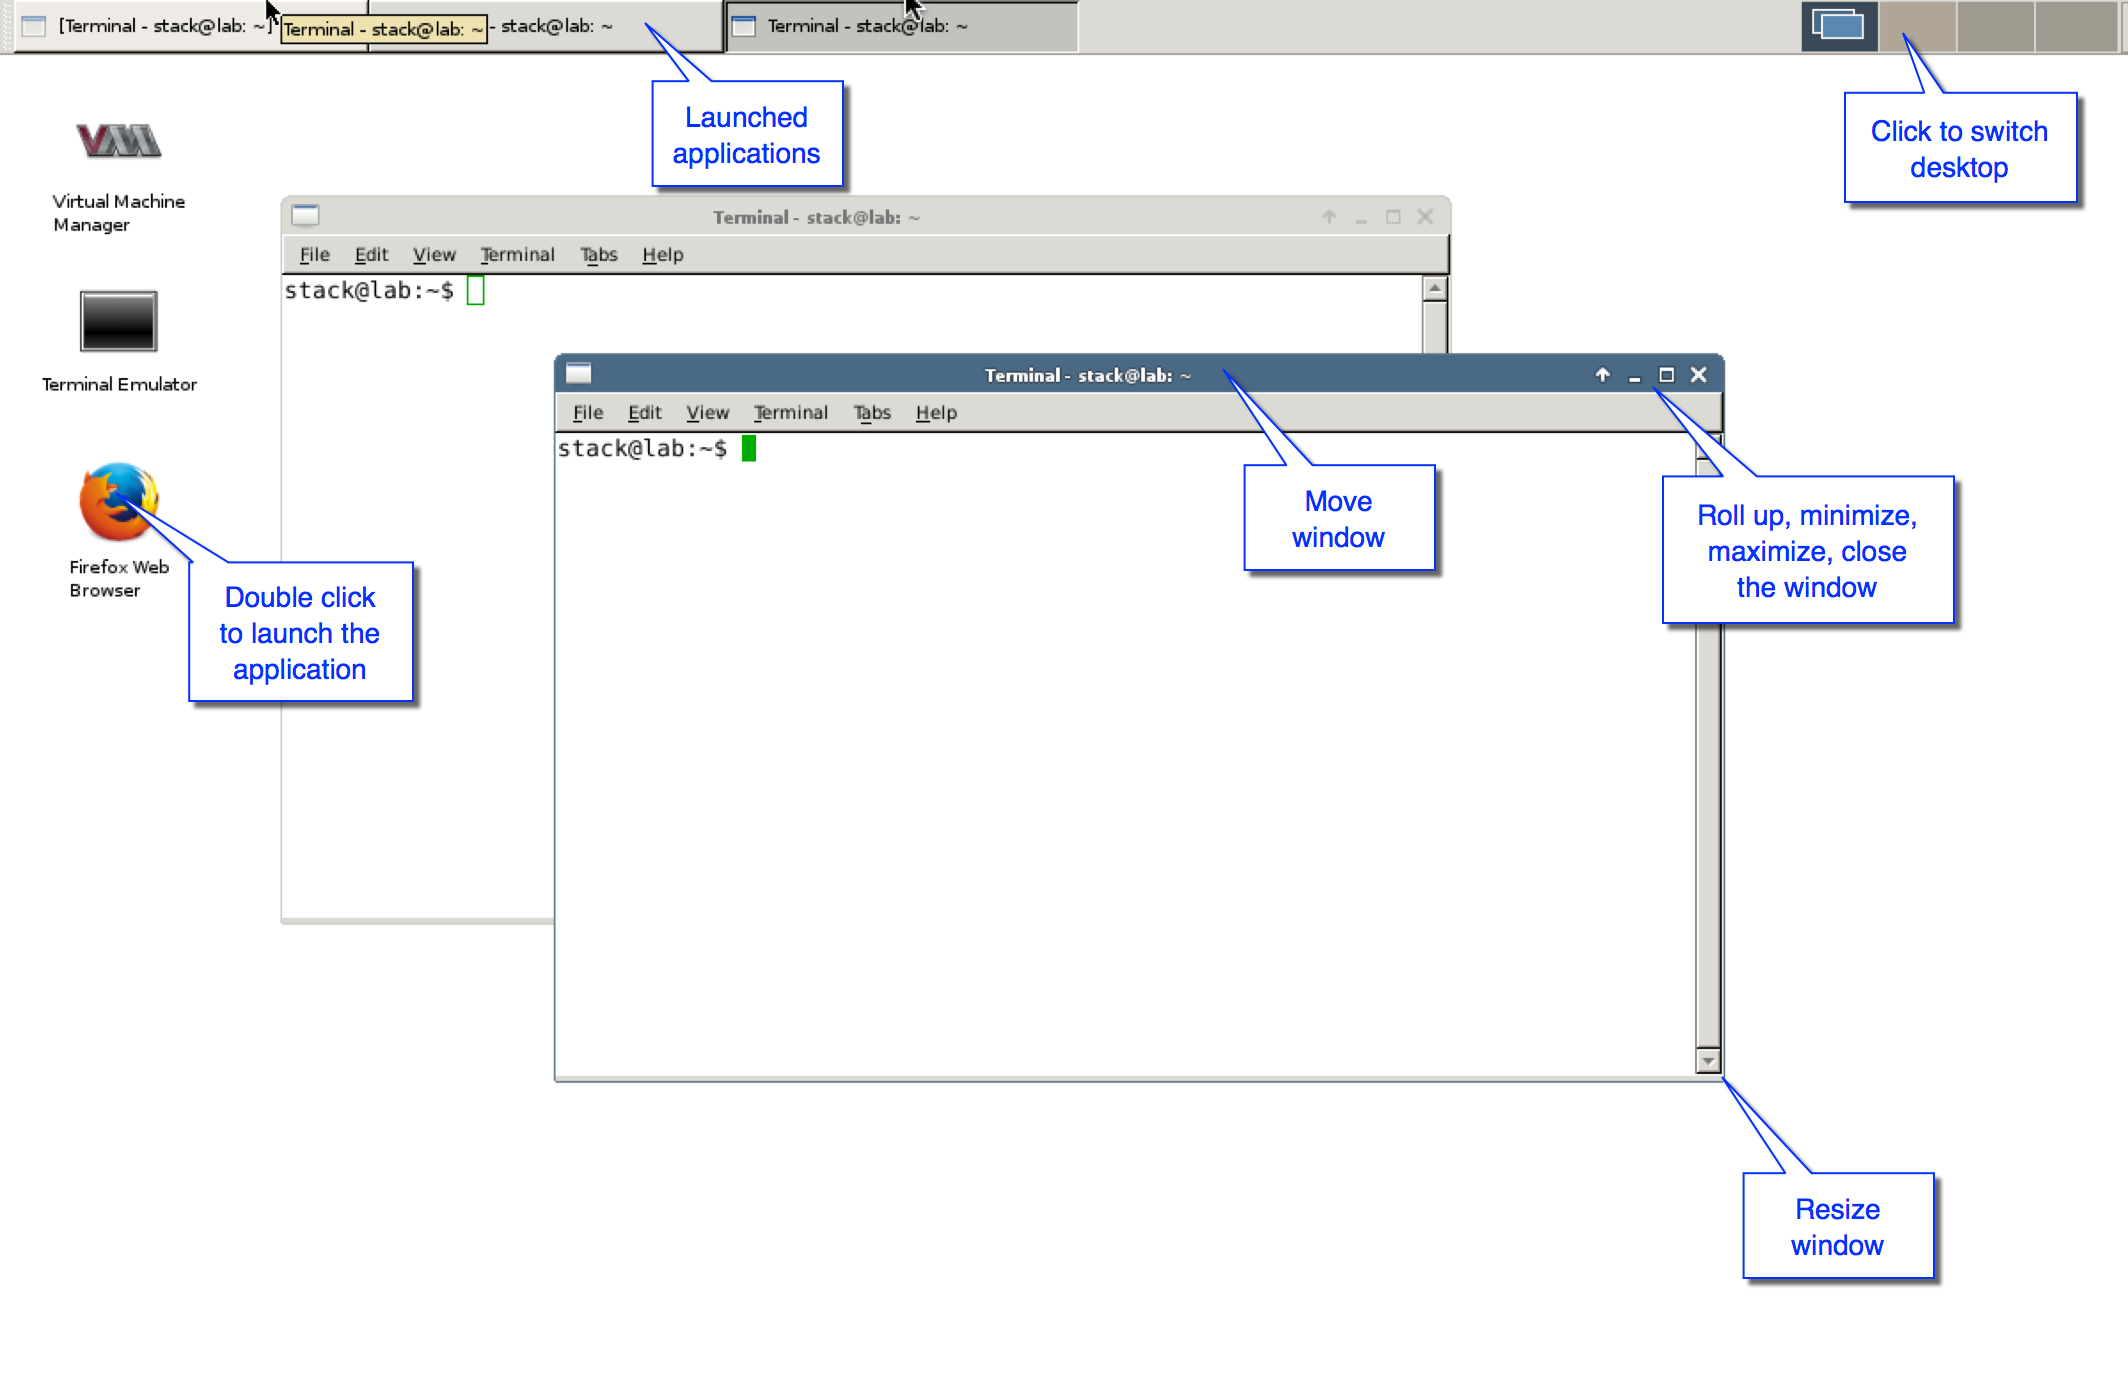
We recommend that you use different desktops for different applications to simplify navigation between windows. For example, you can use the first desktop for Virtual Machine Manager and its windows, the second one - for Firefox.
Click on desktop icons in the top right corner to switch the desktop. Double click on the application to launch it. Right click to access context dependent operations, such as Setting, Copy or Paste.
1.4. Working with Terminal Emulator
Terminal Emulator is often referred to as terminal or shell. You can use it as a regular shell in your environment: edit files (vi, vim, nano are available) and log in to the other machines, including virtual ones, using ssh.
To select a text in Terminal Emulator, press and hold down your left mouse button, extend the selection to the other end of the text, and then release the mouse button. Then, you can press the middle mouse button to paste the selected text to another window. Alternatively, you can use Copy and Paste actions, which are available in the context dependent menu (press your right mouse button).
1.5. Working with Firefox
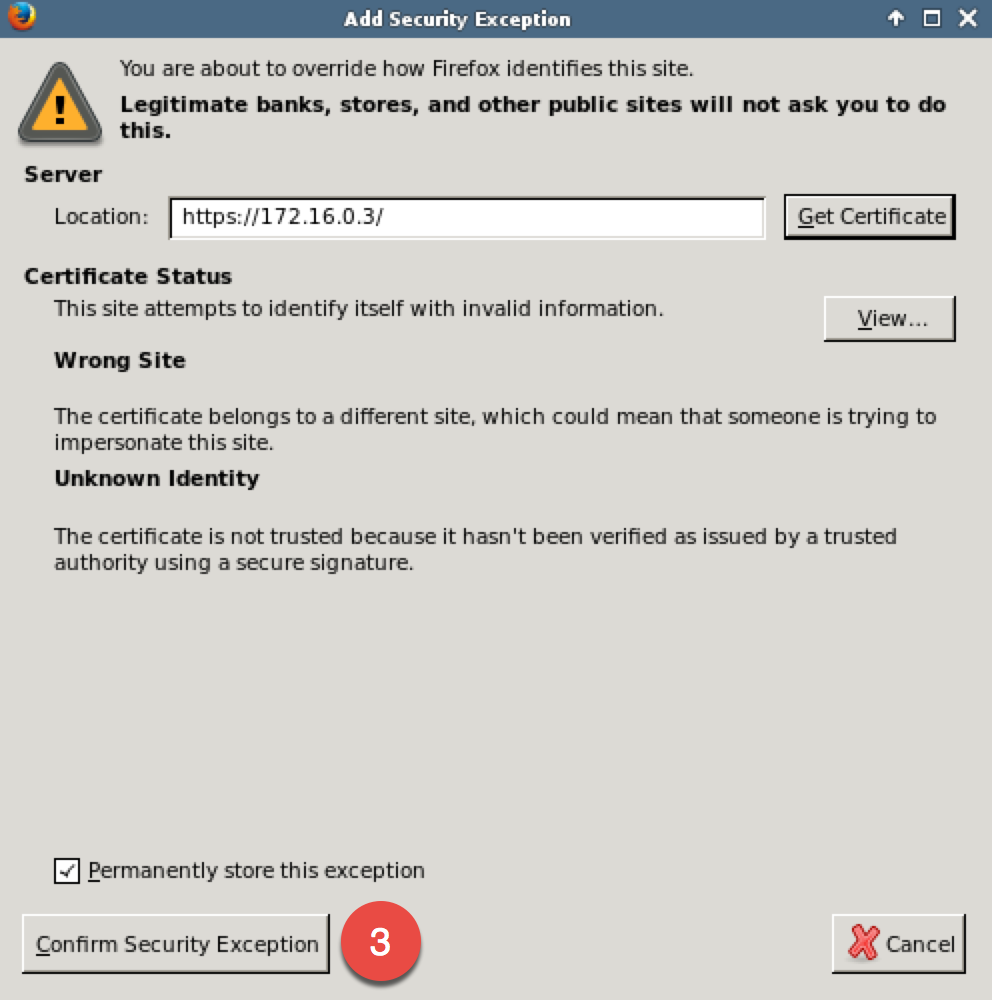
In some cases, we will use self-signed certificates to secure HTTP endpoint, so when you open such web pages for the first time, Firefox will complain about using untrusted connection. This is normal behavior for all modern browsers. Here are 3 simple steps to disable such message for the specific site.
Step 1 Open a site, secured by HTTPS and self-signed certificate. Firefox will show the message This Connection is Untrusted. Click on I Understand the Risks.

Step 2 Click Add Exception....

Step 3 In the next window, make sure, that Permanently store this exception is checked on and then click Confirm Security Exception.
Note
1.6. Working with Virtual Machine Manager
Virtual Machine Manager is an open source graphical tool to manage VMs. It primarily targets QEMU/KVM, but can also manage Xen and LXC (Linux containers). It allows you to create a new VM, configure and adjust VM resource allocation and virtual hardware. An embedded VNC and SPICE client viewer presents a full graphical console to the VM.
Double click on Virtual Machine Manager application or run virt-manager application in Terminal Emulator.
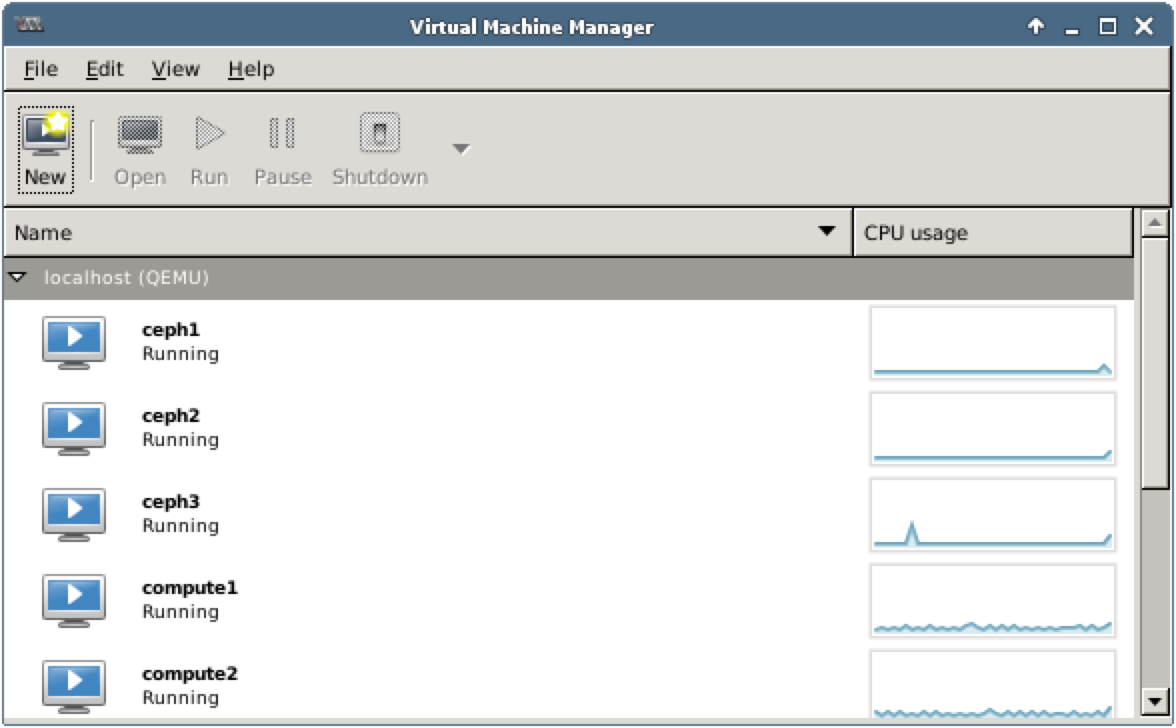
From menu choose Edit, Connection Details to open the Connection Details window, where you can manage virtual networks, storage pools and volumes.
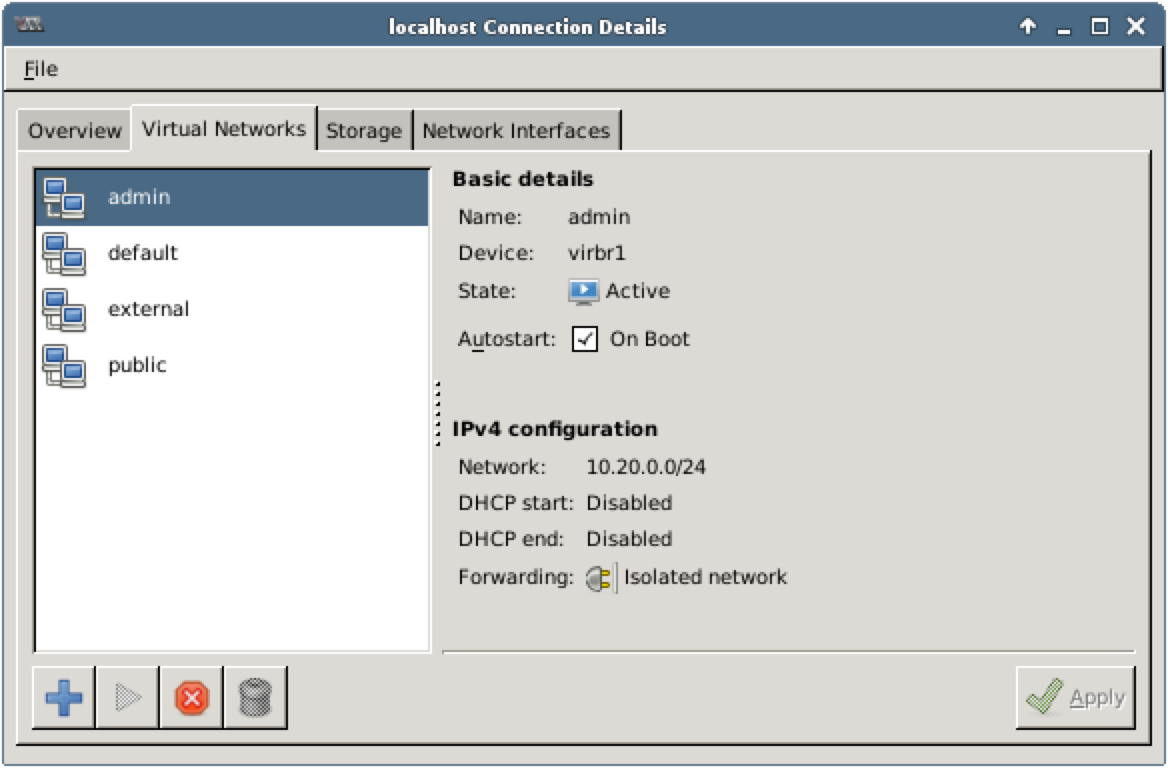
From menu choose Edit, Virtual Machine Details to open the Virtual Machine window for the currently selected VM, where you can manage VM details (Details button), manage its state (Run, Pause, Shut Down buttons) and view its console. Alternatively, you can double click on VM from the list to open the same window.
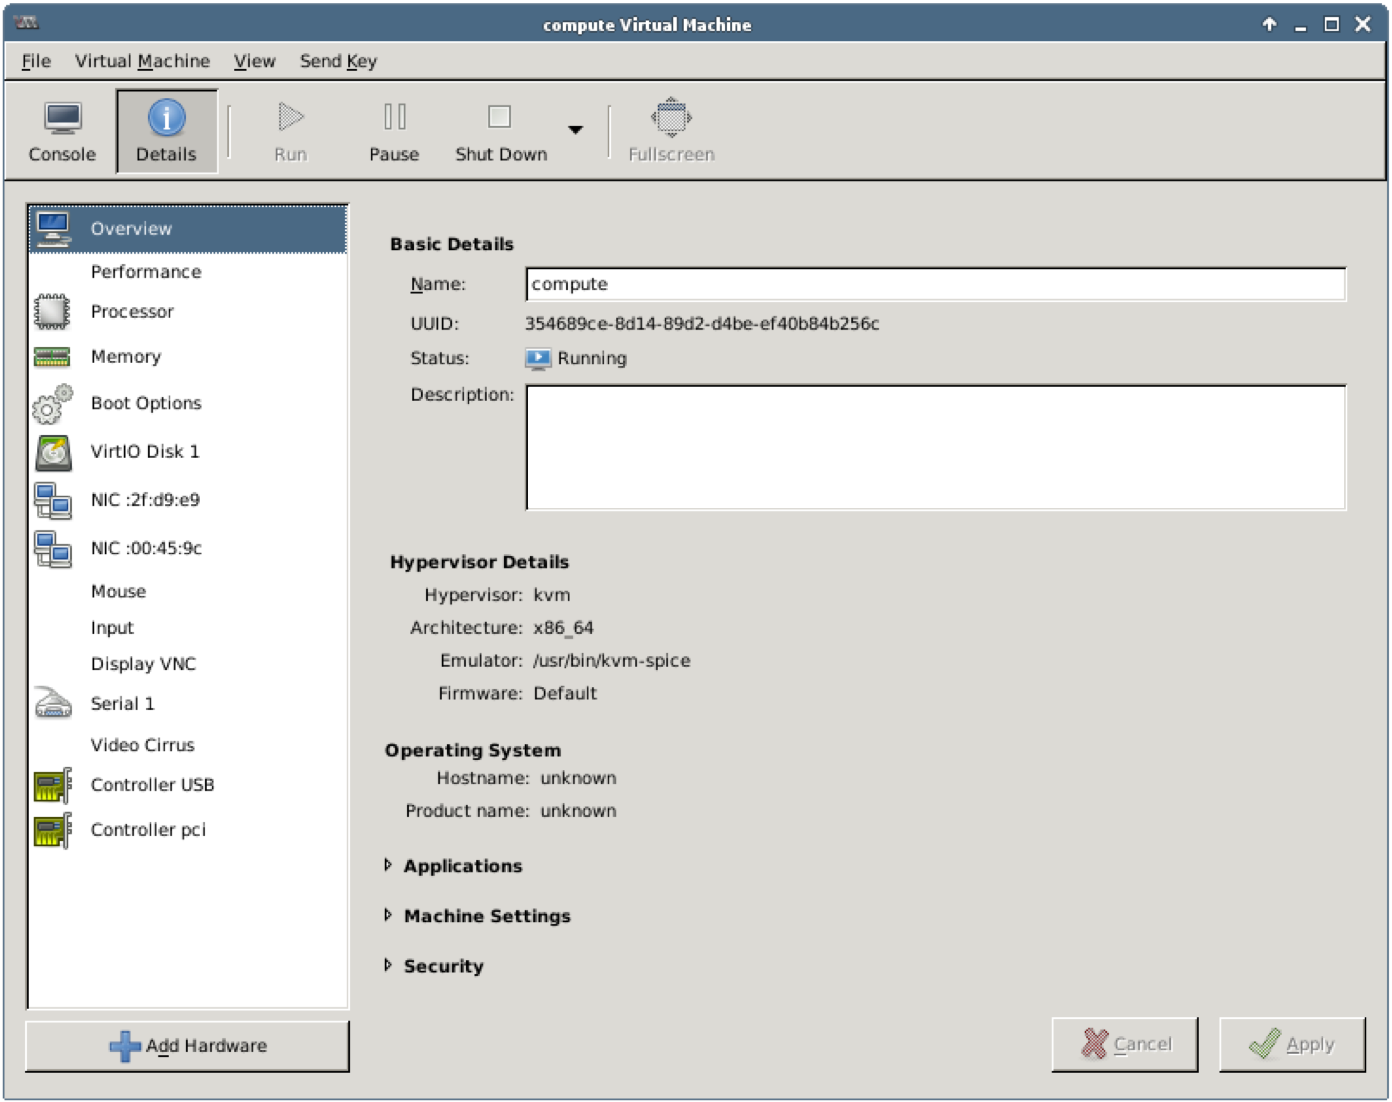
If you click on your mouse button inside the VM console, then the console will grab the mouse pointer and you will not be able to use your mouse outside of the console window. To check if the console grabbed the pointer, check its window title to see if the title contains Press Control_L+Alt_L to release pointer. To release the pointer, press left Control and left Alt (left Control and left Command on Mac) keys simultaneously, as the title says.

1.7. Users and Passwords
In various sections of this guide a username and a password is necessary to log in. Where applicable, this guide will remind you of which credentials to use. Below is the summary reference table:
| User Name | Password | Description |
|---|---|---|
| root | r00tme | Fuel Master node user with admin privileges |
| admin | admin | Fuel UI user with admin privilege |
| admin | admin | Horizon user with admin privileges |
| cirros | cubswin:) | User for instances based on CirrOS image |
1.8. Frequently Asked Questions
This list contains frequently asked questions that pertain to the environment or exercises.
I cannot connect to the environment using my VNC viewer.
Check that you are using the correct IP address, port and password. Check that you are using compatible VNC viewer from the list (1.2. Working with Remote Environment). Check that your local firewall allows outgoing connections to the specified port.
Firefox complains that the connection is not trusted, what should I do?
Please read section 1.5. Working with Firefox for a workaround.
My mouse stopped working in the remote environment.
Check if the Virtual Machine Manager grabbed your mouse pointer (1.6. Working with Virtual Machine Manager). Press left Control and left Alt (left Control and left Command on Mac) simultaneously to release the pointer.
How could I copy a selected text to the clipboard or/and paste a text from the clipboard?
Some VNC clents do not support sharing the system clipboard with VNC session. However, to complete the steps provided in this document, you can use copy and paste functions directly in the VNC session. The electronic version of this document is available directly in your environment: press Home button in Firefox (or just open a new Firefox session) to open the electronic version. Then you can use standard techniques to select a text and copy it to the clipboard. Pasting a text from the clipboard depends on the application: in many cases you can click on the middle mouse button (if you have one) to paste a previously selected text to the current cursor position (you do not even need to press Ctrl-C and Ctrl-V).
The specific step failed, or I cannot initiate the next step for some reason
The environment allows you to be flexible in choosing names, IP addresses and other parameters for the steps in this course. However, the chapters in the course are connected to each other in such a way that the results from one chapter are required for the next one. We highly recommend that you use names, IP addresses and other parameters exactly as they are specified in the steps below. Also, using the same parameters will help us identify the issue. We highly recommend that you execute all the steps as listed. Please do not skip any steps or make any additional unspecified steps, such as changing the default password.
If one specific step failed (for example, you have received unexpected error message), or you cannot initiate the next step for some reason, please check that you executed all previous steps exactly as they are specified. In most cases, you can go back several steps, for example, deleting a VM and creating a new one.
If you feel as you executed all the steps correctly, ask the instructor. Be sure to let them know of any variations you may have made to the standard flow. The instructor will help you solve the issue, and in the worst case, can revert the whole environment to the one of the predefined state, so you can continue working with the class.
Checkpoint
- Receive a lab environment assignment
- Use VNC client or web browser to access the environment
- Explore the functionality available in the environment
- Read frequently asked questions