3. Fuel Installation
Fuel is an open source application that deploys multiple OpenStack environments from a single interface.
In this chapter, you will install Fuel in an empty environment and create virtual networks, which are required to deploy an OpenStack environment in the next chapters.
| Chapter Details | |
|---|---|
| Chapter Goal | Install Fuel |
| Chapter Sections | |
3.1. Prerequisites
Check that the following prerequisite has been met:
- You have access to the lab environment
3.2. Create Virtual Networks
In this chapter, you will create virtual networks, which will be used by the Fuel Master node and target nodes in the following exercises. The reason why we create networks before installing Fuel is because we will use them to configure the Fuel Master node during its first boot.
We will use Neutron with VLAN segmentation, which is the default networking type in Fuel 7.0. The Fuel Master node and target nodes require a minimum of 2 NICs to use Neutron VLAN topology. We will create the following networks:
Admin (PXE) network
The Fuel Master node uses this network to provision and orchestrate the OpenStack environment. It is used during installation to provide DNS, DHCP, and gateway services to a node before that node is provisioned. Nodes retrieve their network configuration from the Fuel Master node using DHCP, which is why this network must be isolated from the rest of your network and must not have a DHCP server other than the Fuel Master running on it.
Public network
The public network provides VMs with connectivity to the globally routed address space. The public network also provides Virtual IPs for public endpoints, which are used to connect to OpenStack services’ APIs. Finally, the public network provides a contiguous address range for the floating IPs that are assigned to individual VM instances by the project administrator. For security reasons, the public network is usually isolated from other networks in the cluster.
Fuel external network
The Fuel Master node uses this network for Internet connectivity.
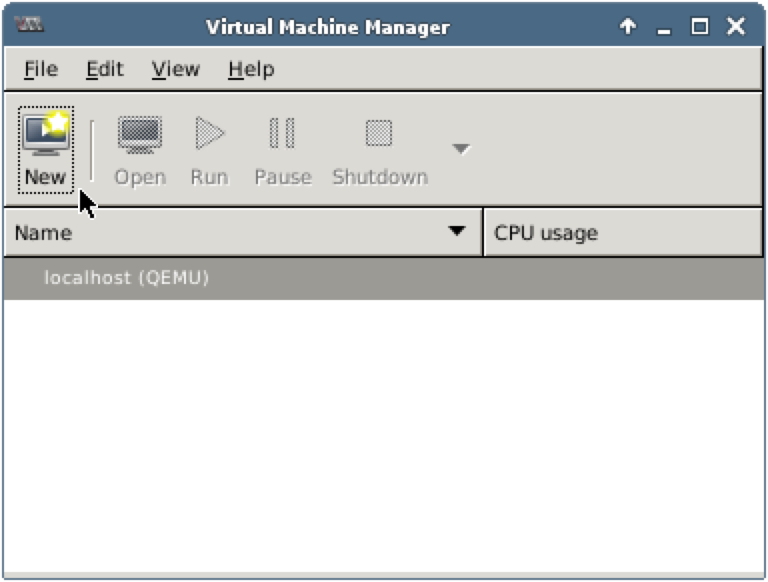
3.2.1. Open Virtual Networks window
Step 1 Launch Virtual Machine Manager. From the main menu, choose Edit, then Connection Details to open Connection Details window.
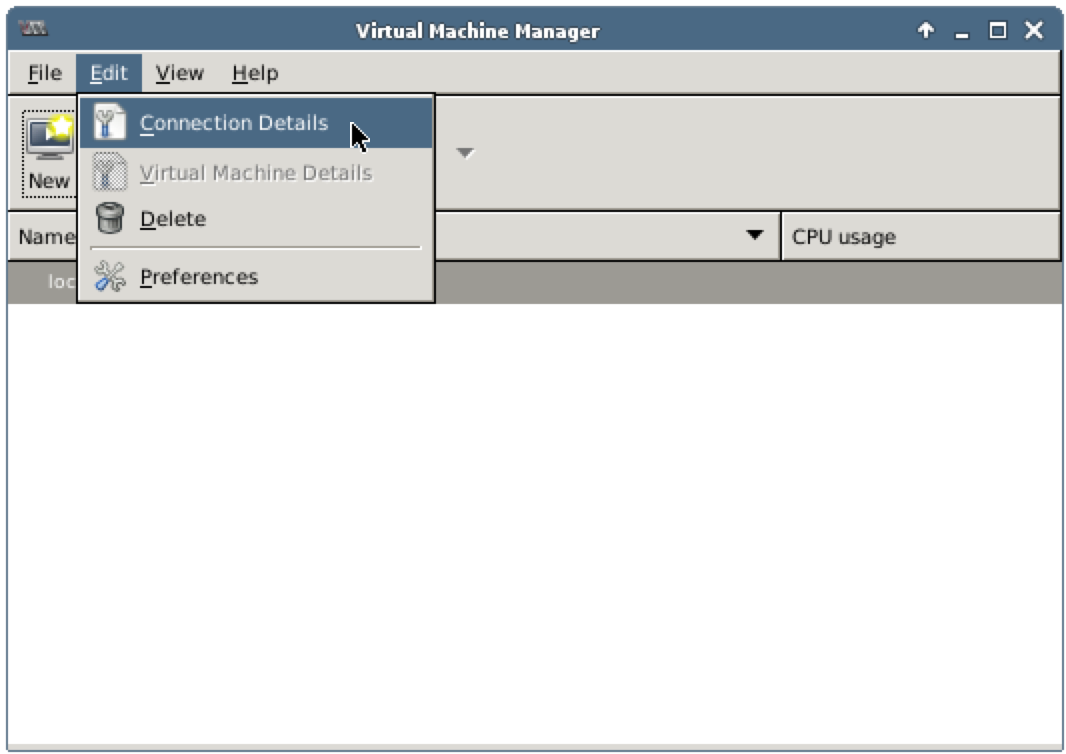
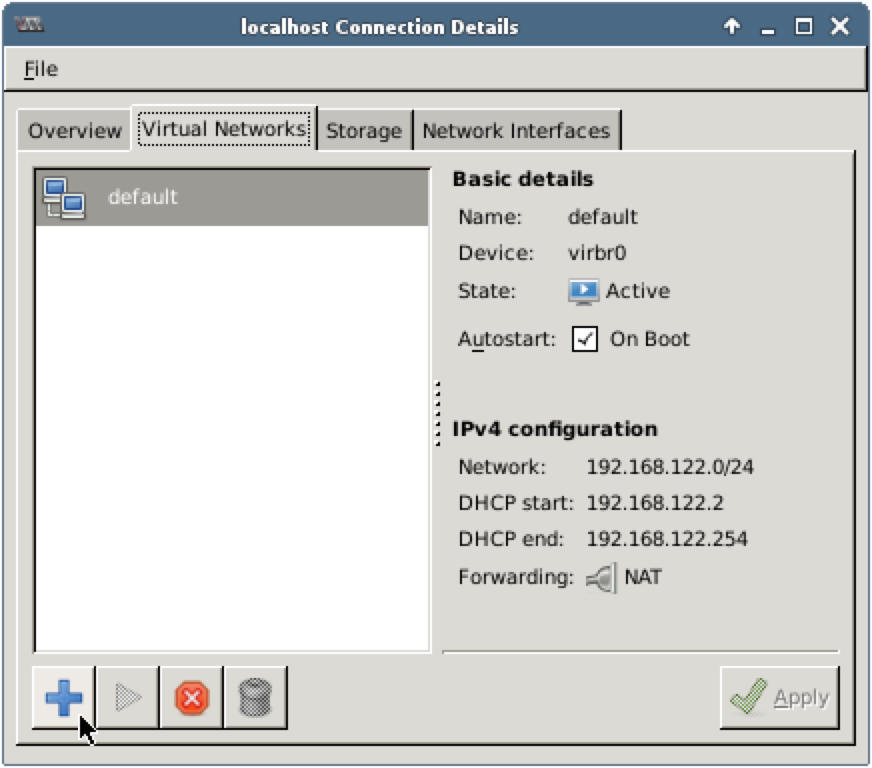
Step 2 In the Connection Details window choose Virtual Networks tab.

3.2.2. Create Admin Network
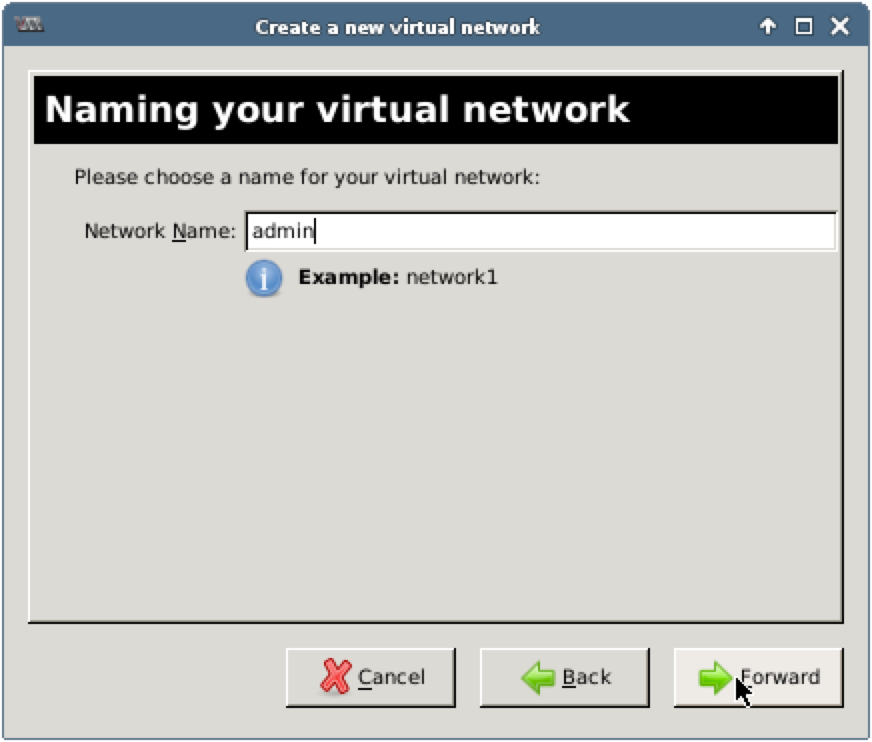
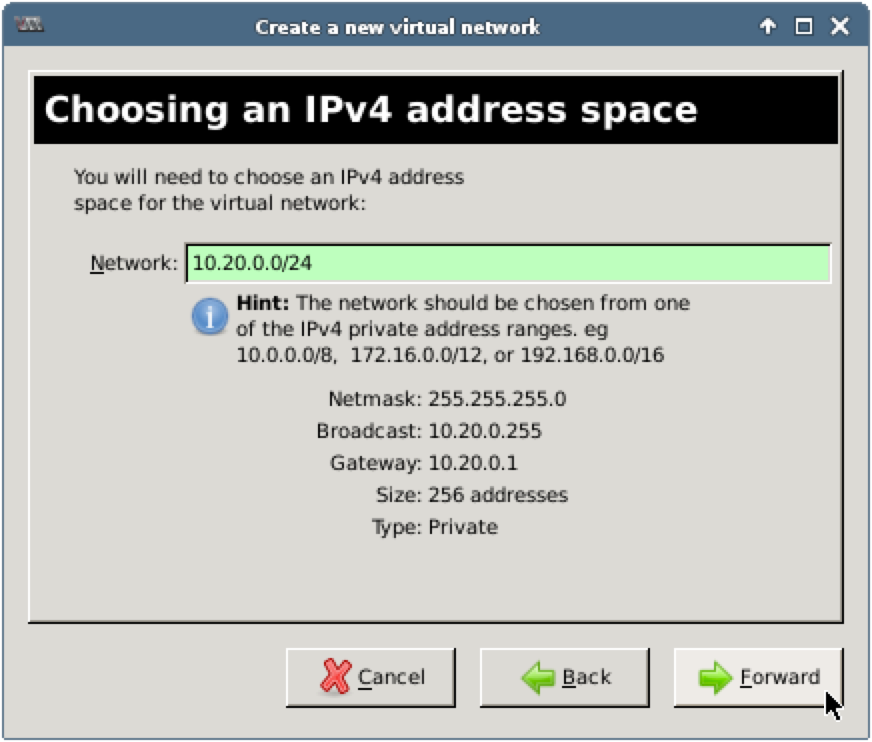
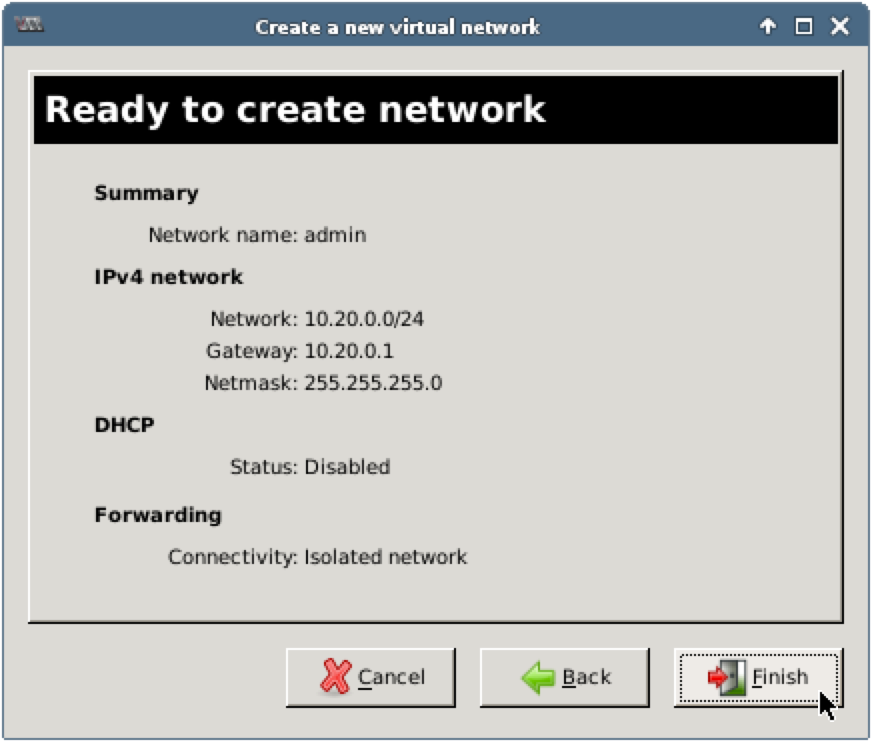
Name: admin
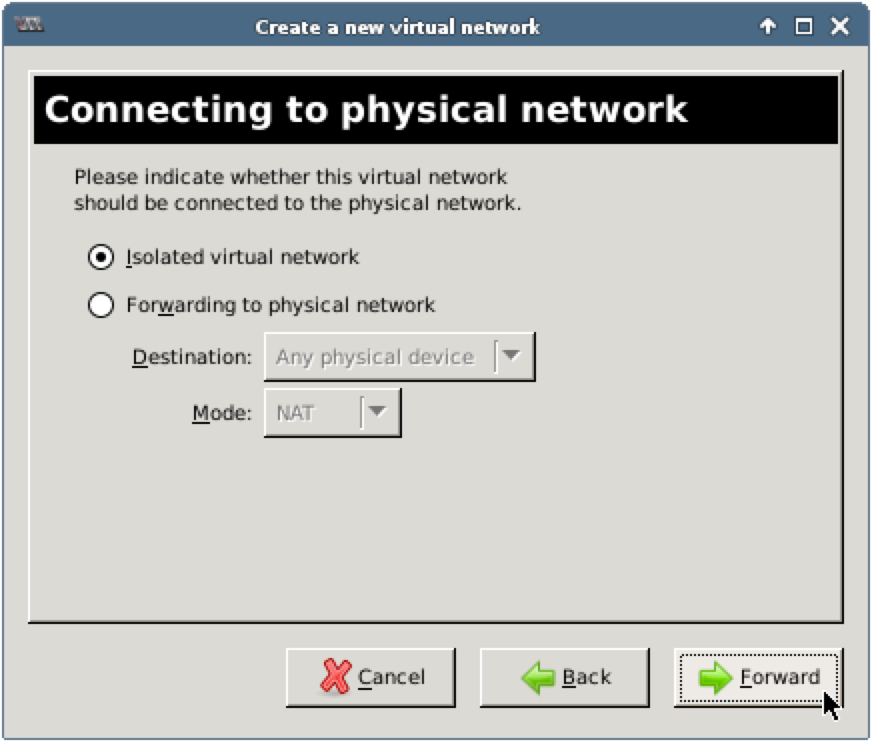
Mode: isolated network
Network: 10.20.0.0/24
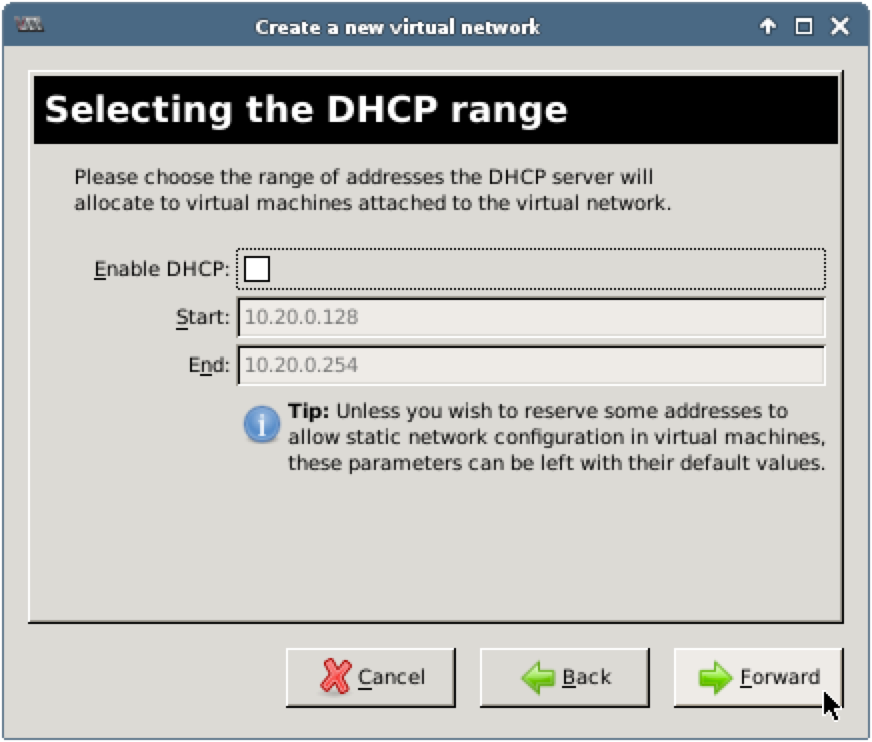
DHCP: disabled
Step 1 Press the Add Network button in the bottom left corner to create a new network.
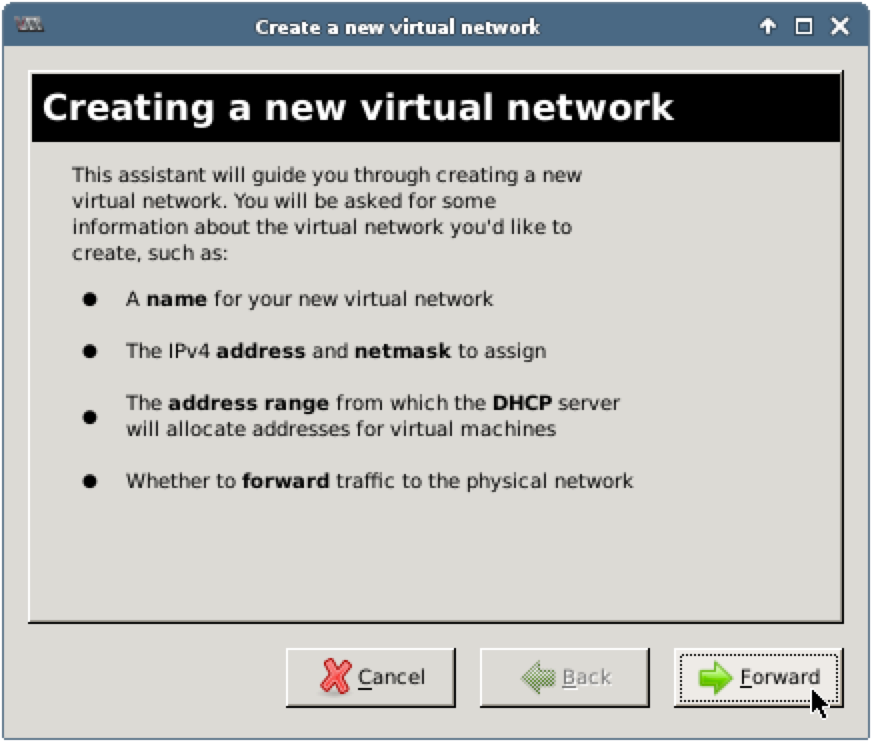
Step 2 Press the Forward button to go to the next step.
Step 3 Enter admin in the Network Name field and press Forward.
Step 4 Enter 10.20.0.0/24 in the Network field and press Forward.
Step 5 Uncheck Enable DHCP and press Forward.
Step 6 Choose the Isolated virtual network option and press Forward.
Step 7 Check network parameters and press Finish.
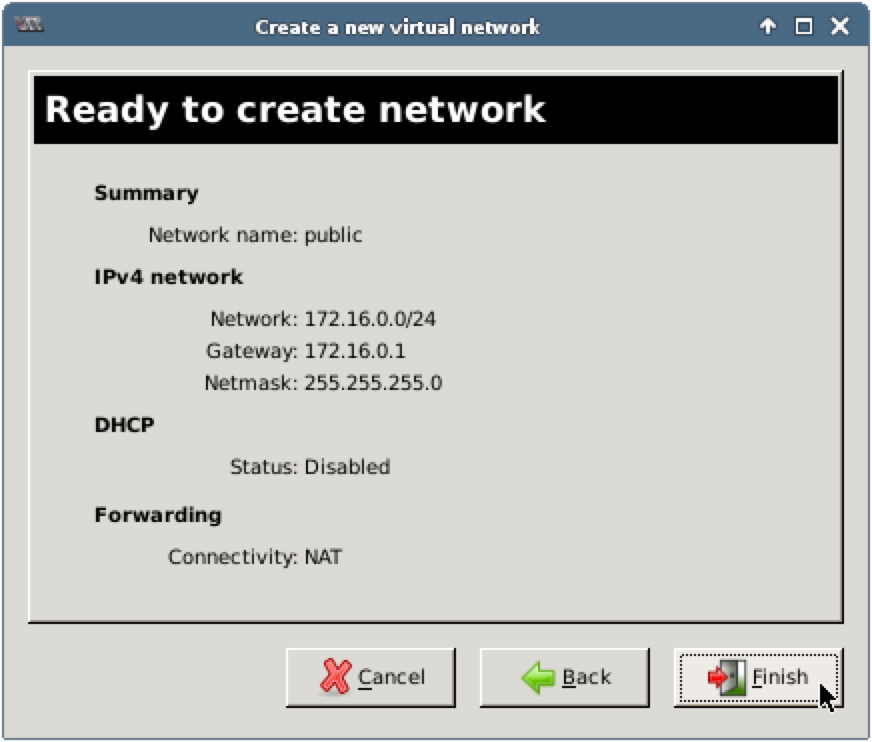
3.2.3. Create Public Network
Name:     public
Network:  172.16.0.0/24
Mode:     forwarding to physical network (NAT)
DHCP:     disabled
Repeat all of the steps from the 3.2.2. Create Admin Network section with the following changes:
Step 3 Enter public in the Network Name field.
Step 4 Enter 172.16.0.0/24 in the Network field.
Step 6 Choose the Forwarding to physical network option.
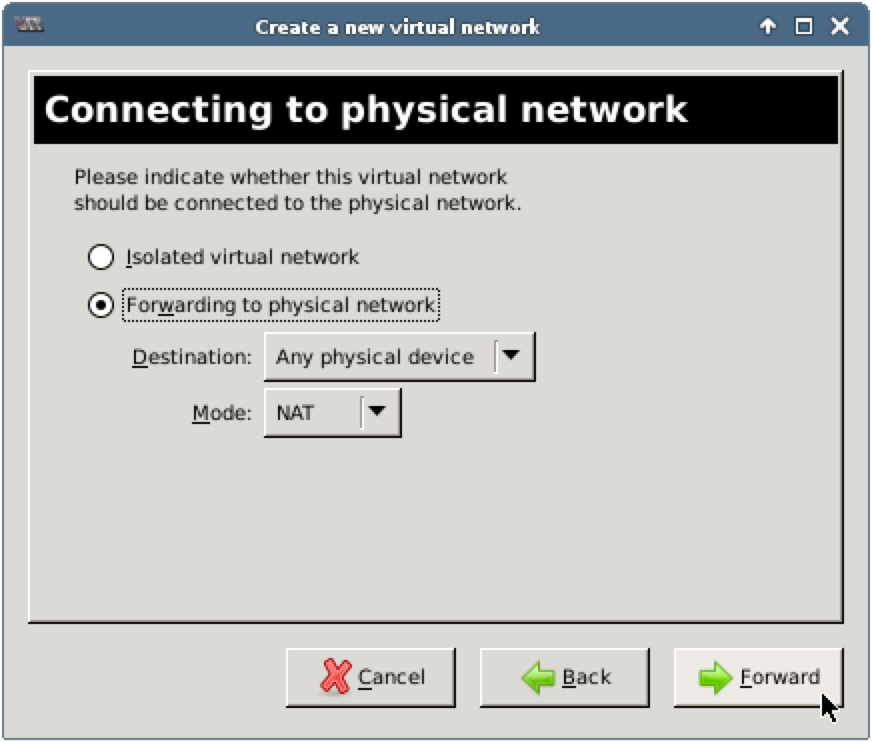
Step 7 Check network parameters and press Finish.
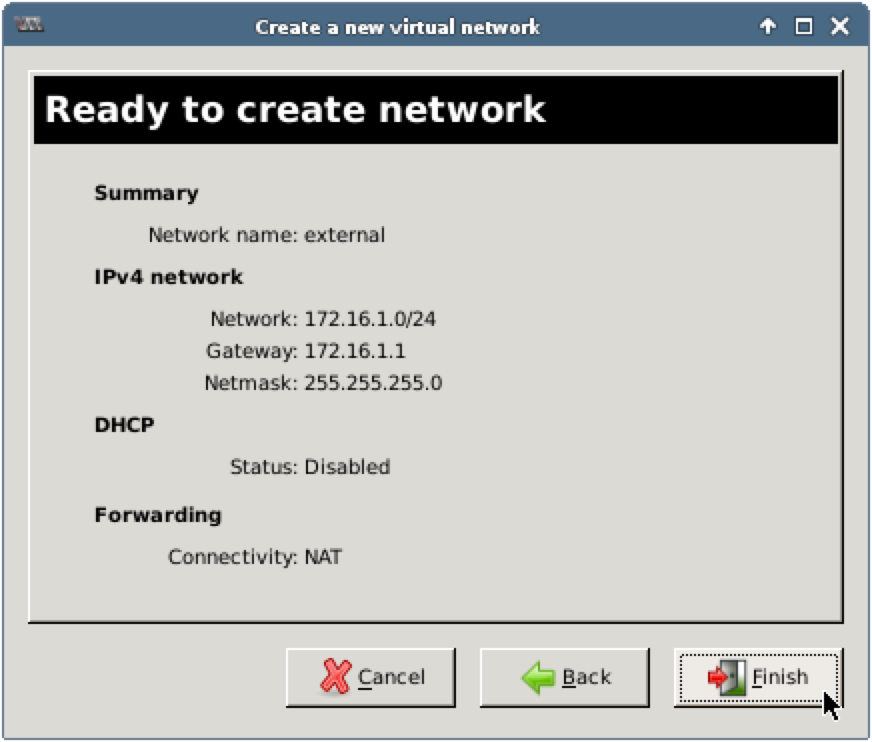
3.2.4. Create Fuel External Network
Name:     external
Network:  172.16.1.0/24
Mode:     forwarding to physical network (NAT)
DHCP:     disabled
Repeat all of the steps from the 3.2.2. Create Admin Network section with the following changes:
Step 3 Enter external in the Network Name field.
Step 4 Enter 172.16.1.0/24 in the Network field.
Step 6 Choose the Forwarding to physical network option.
Step 7 Check network parameters and press Finish.
3.3. Create Fuel VM
Name:       fuel
CPUs:       2
RAM:        4096MB
Disk:       50GB
Network 1:  Virtual network 'admin' : Isolated
Network 2:  Virtual network 'external' : NAT
The simplest way to start using Fuel is to download a bootable Mirantis OpenStack ISO, which contains Fuel, Fuel installer and OpenStack packages. You can build such ISO from the Fuel sources or download from the Mirantis web site. We have downloaded this ISO image for you. You will boot the Fuel Master node from this image.
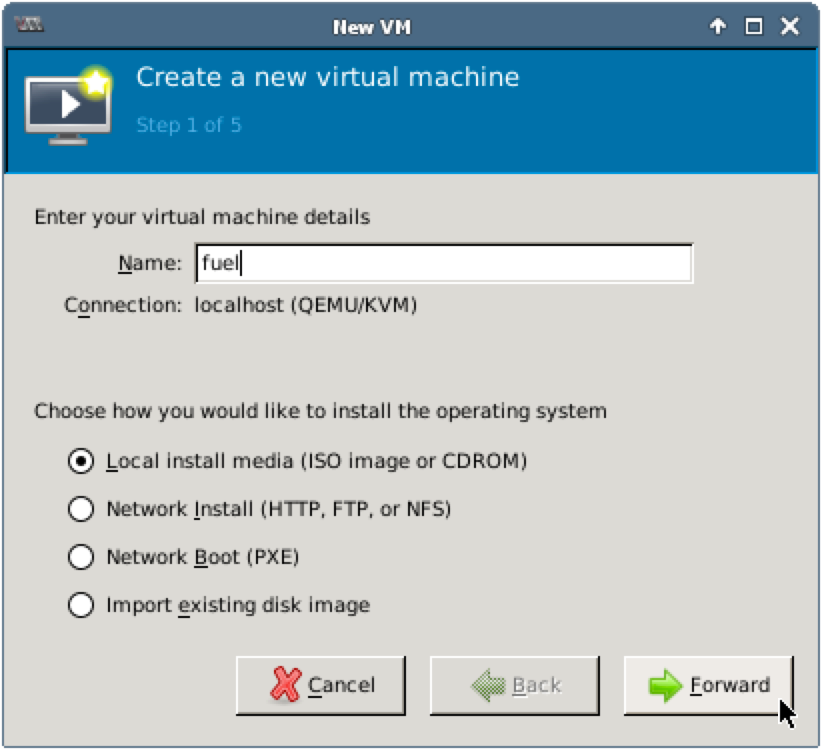
Step 1 Launch Virtual Machine Manager. In the main window, press New to create a new virtual machine.
Step 2 In the New VM window, enter fuel in the Name field, choose Local install media (ISO image or CDROM) and press Forward.
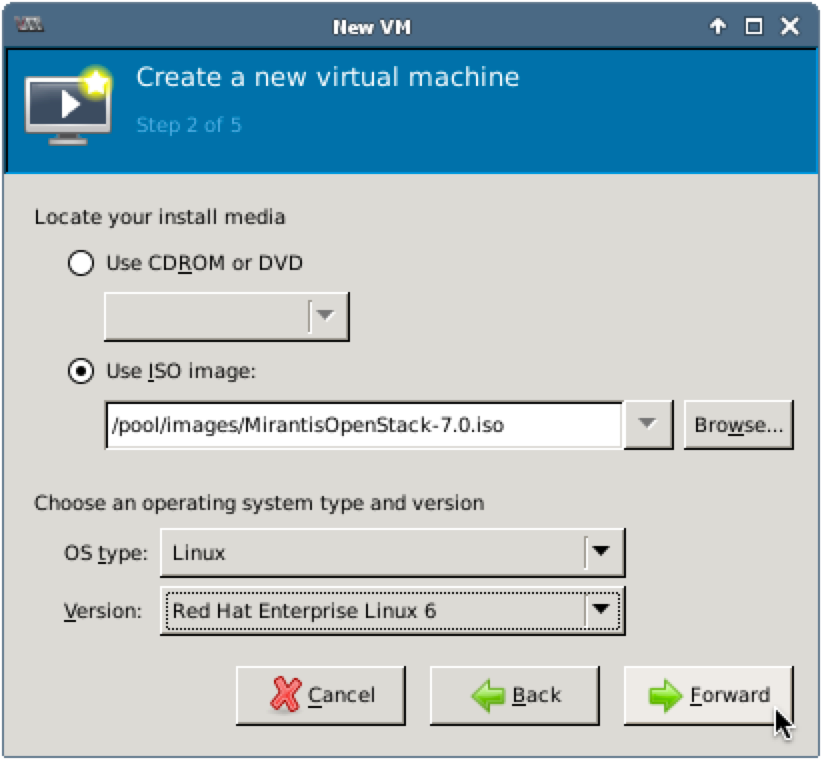
Step 3 Choose the Use ISO image option and press Browse.
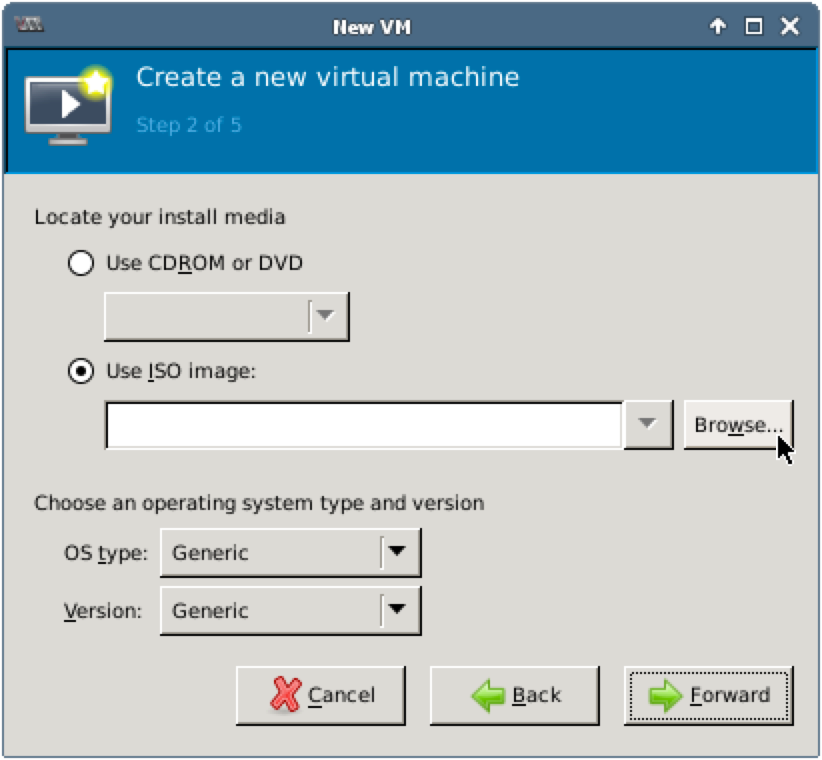
Step 4 In Locate ISO media volume, select MirantisOpenStack-7.0.iso and press Choose Volume.

Step 5 Choose Linux for OS type and Red Hat Enterprise Linux 6 for Version. Press Forward.
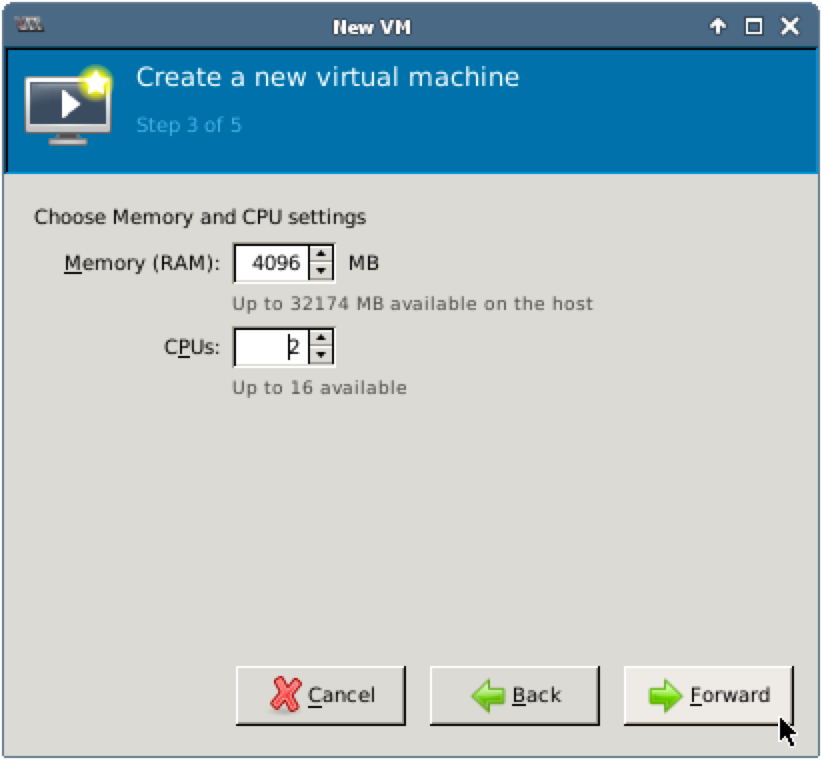
Step 6 Enter 4096 for Memory (RAM) and 2 for CPUs. Press Forward.
Step 7 Choose Create a disk image on the computer's hard drive, enter 50 for disk size, uncheck Allocate entire disk now and press Forward.
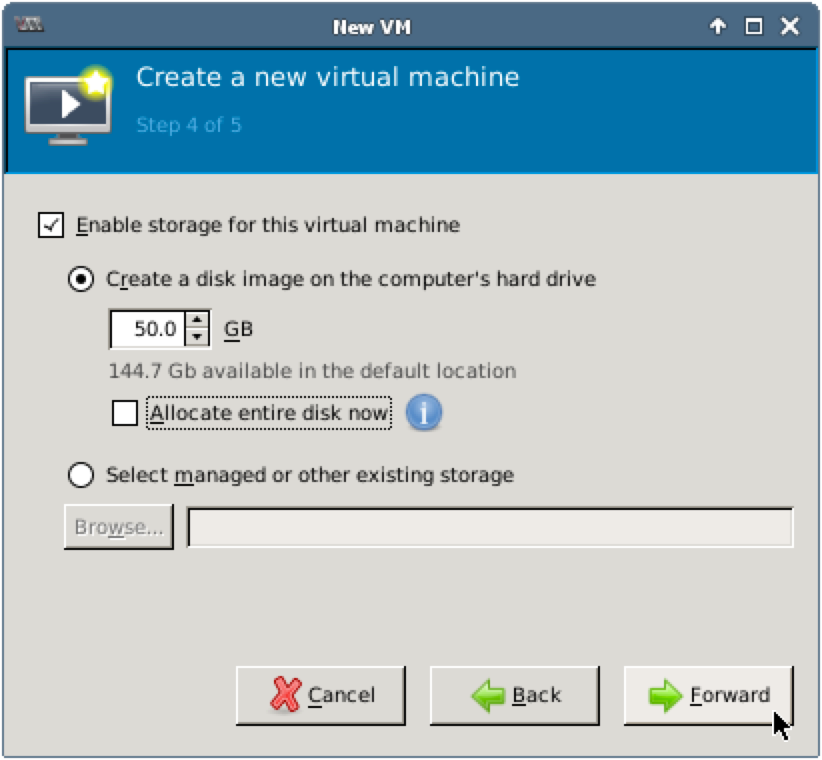
Important
Please check, that you have changed the default disk size to 50GB. Fuel requires at least 50GB for the installation. Also, please check, that you have unchecked the Allocate entire disk now checkbox. Your environment has limited available disk space. If you choose to allocate entire disk now you will run out of disk space while creating additional VMs later.
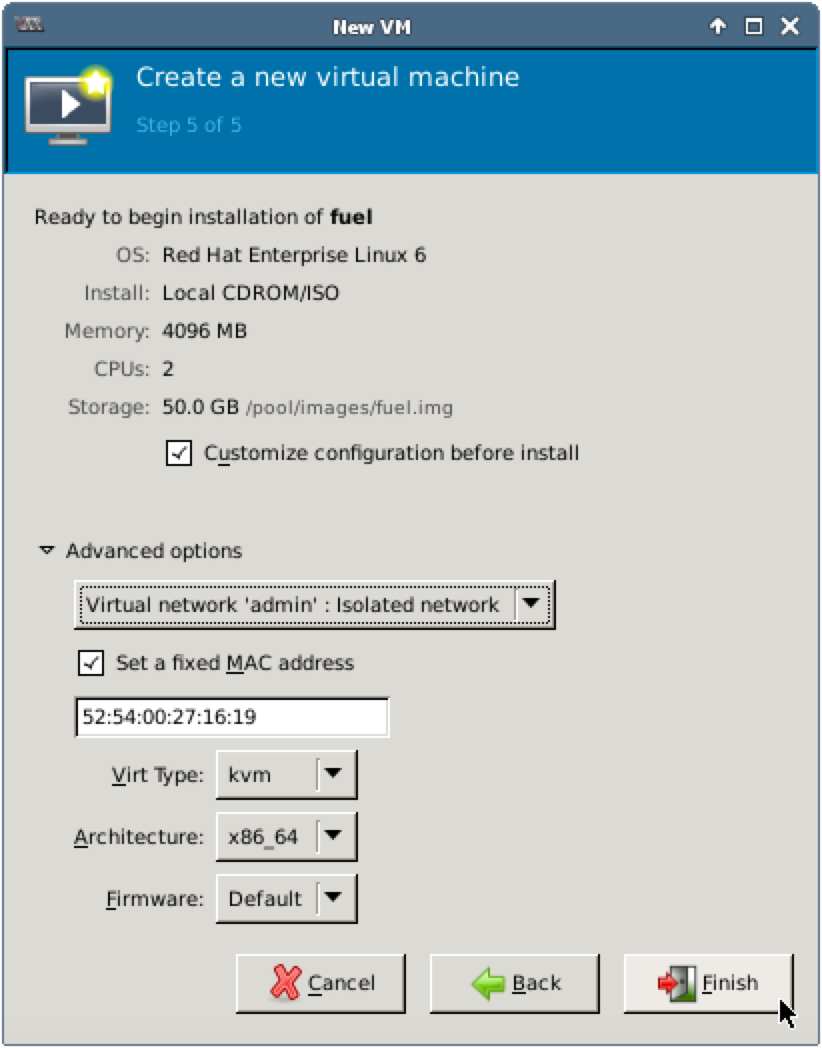
Step 8 Check the Customize configuration before install checkbox. Click on Advanced options to expand it. Choose Virtual network 'admin': Isolated network. The Virtual Machine Manager will generate a MAC address for NIC. Check that Virt Type is kvm, Architecture is x86_64 and Firmware is Default. Press Finish.
Step 9 Choose Input from the list. Press Add Hardware, which is located at the bottom of the window. Choose Network from the list in Add New Virtual Hardware. Choose Virtual network 'external' : NAT for Host device. Keep Hypervisor default for Device model field. Press Finish.
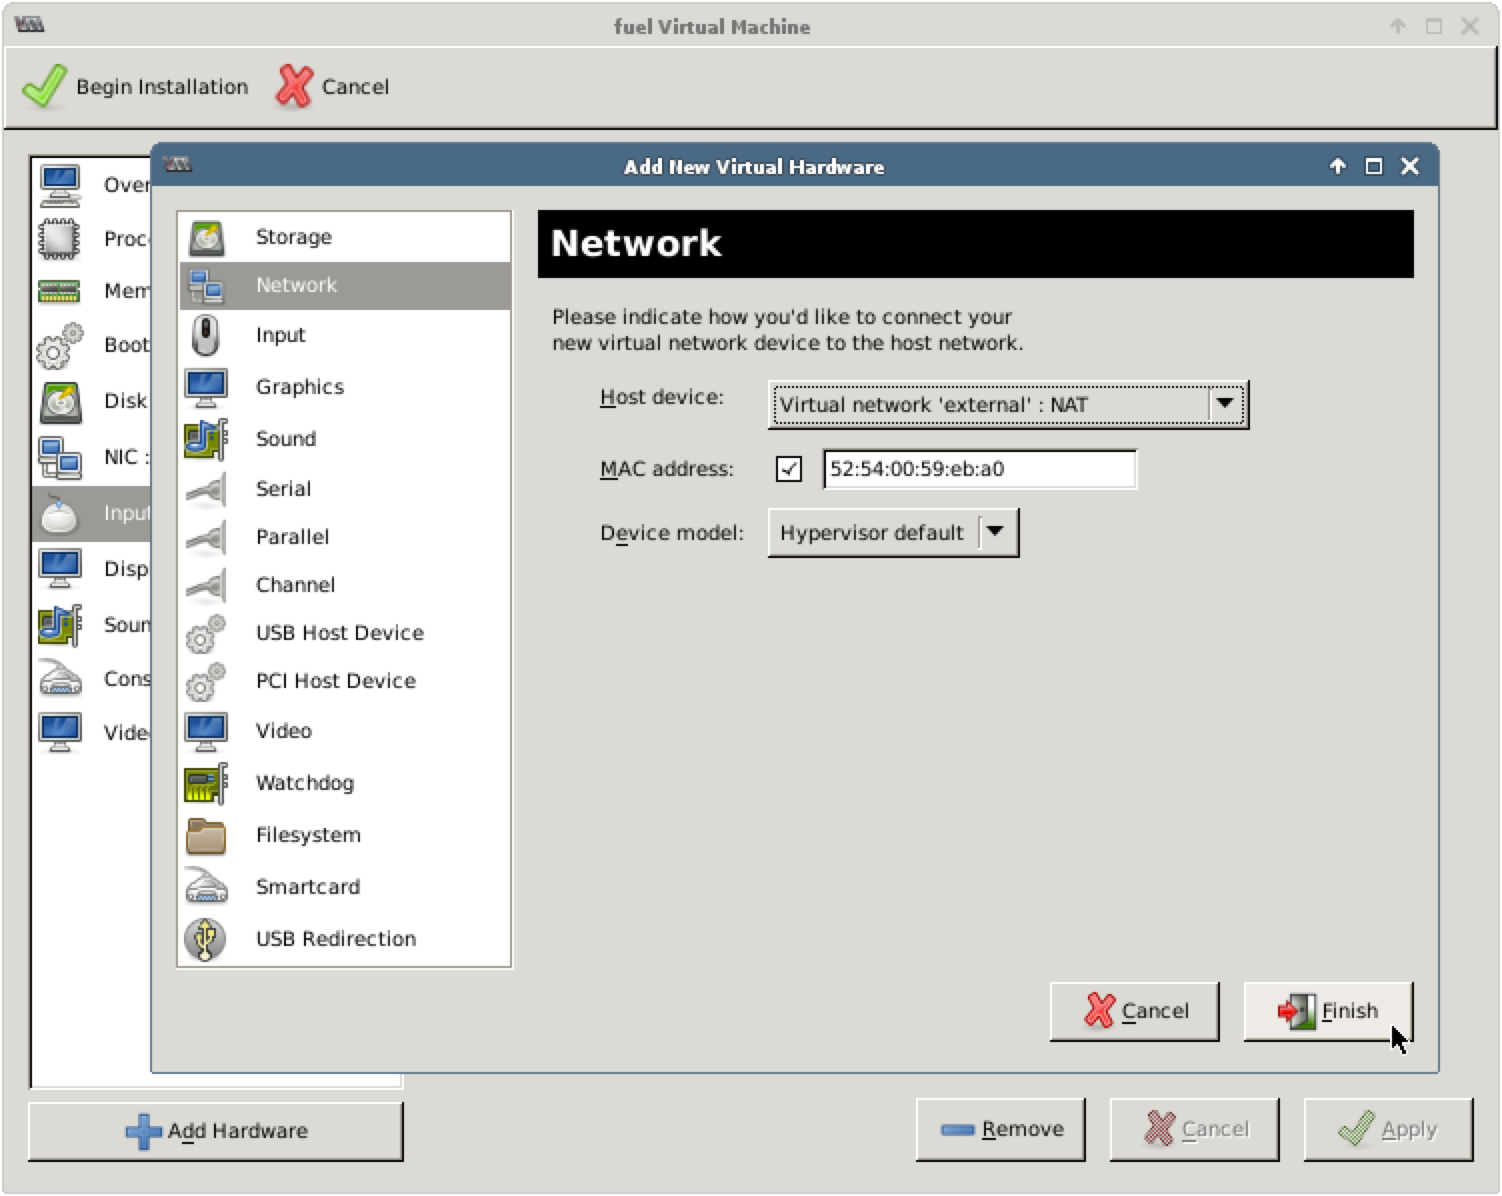
Important
The order of network interfaces is important! You should create a new network interface after the existing one.
The first interface, which is connected to admin network, will receive eth0 name on the Fuel Master node. The second one, which is connected to Fuel external network, will receive eth1 name.
Step 10 Press Begin Installation. The Virtual Machine Manager will create a new VM with the specified settings, launch it and open VM console window.
3.4. Install Fuel
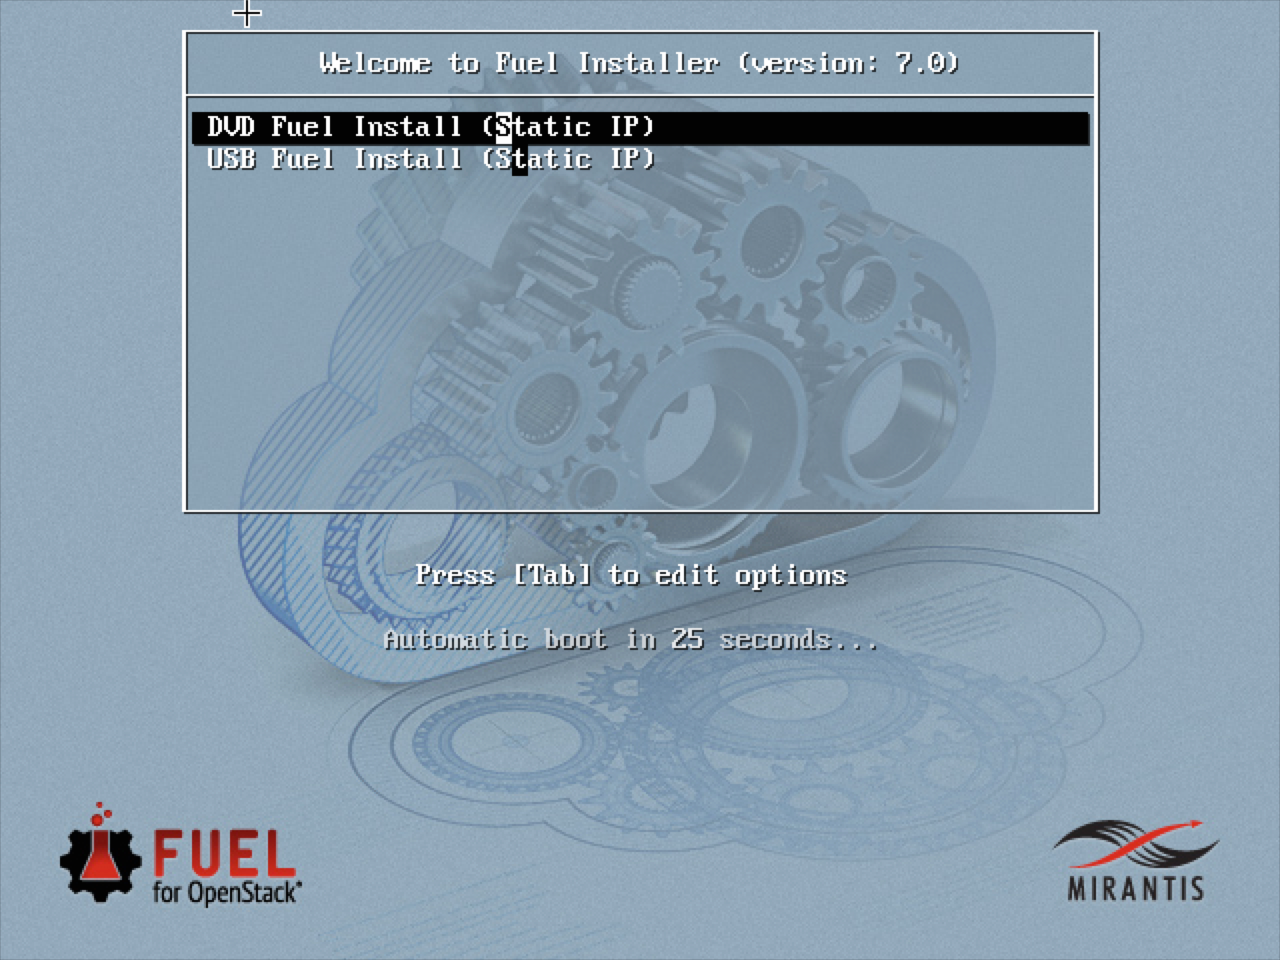
Step 1 Before the installation, Fuel will show the following boot menu. Either wait 30 seconds or press Enter to continue.
Step 2 Wait for Fuel to finish installing. After it has been installed, the server will be automatically rebooted and Fuel will enter into Fuel Setup. The console-based Fuel Setup allows you to configure Fuel for your particular networking environment while helping to detect errors early so you do not need to troubleshoot individual configuration files. Press Enter to continue.

Step 3 Use the Up and Down keys to navigate through the menu, Enter to open the corresponding section. From menu choose Network Setup, press Enter.
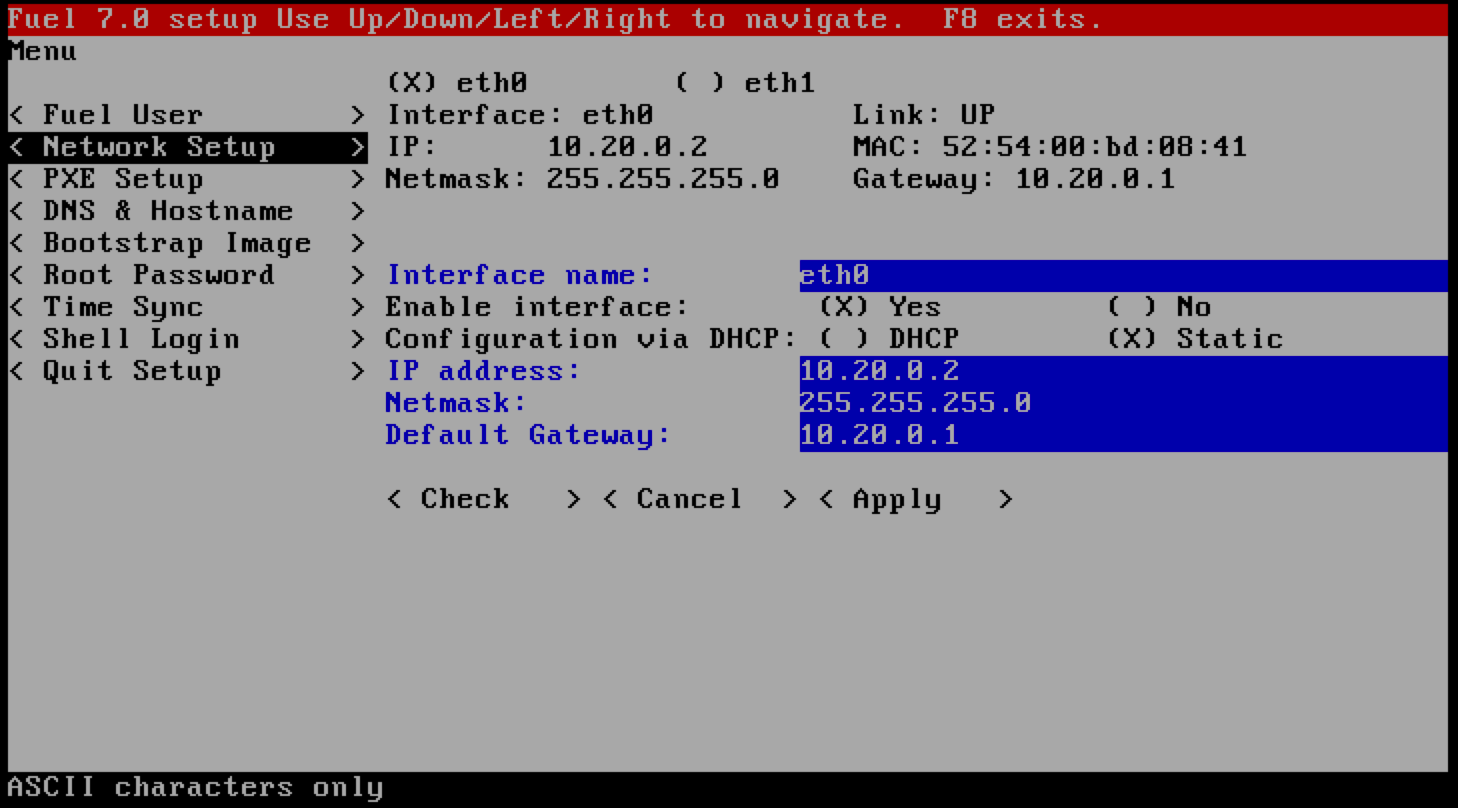
Step 4 Press Right twice to choose eth1, then press Enter.
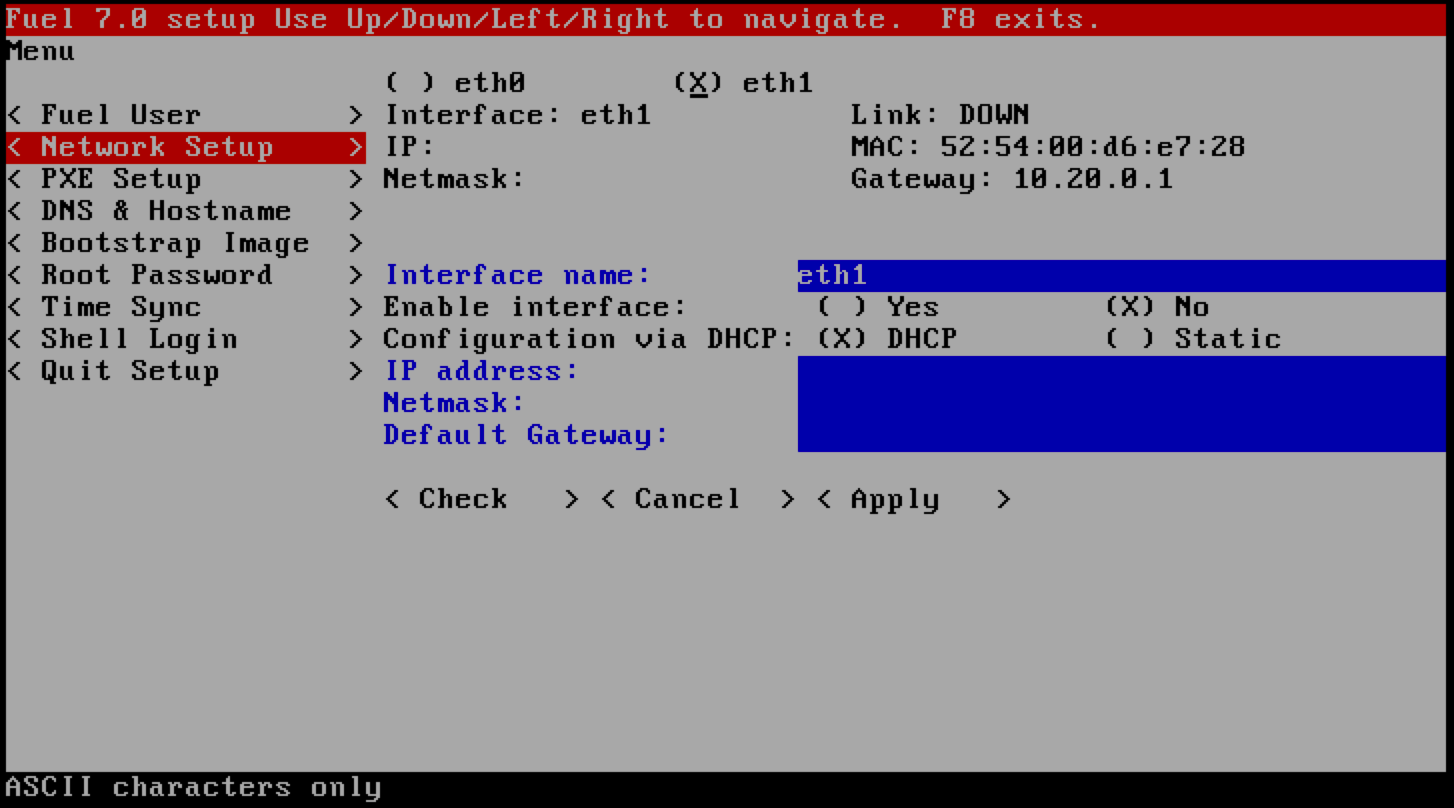
Step 5 we will now configure eth1 for the external network:
- Press Down twice to choose Enable interface and press Enter on Yes to enable the interface.
- Press Down to choose Configuration via DHCP, press Right to choose Static and press Enter.
- Press Down to choose IP address field and enter 172.16.1.2.
- Press Down to choose Netmask field and enter 255.255.255.0.
- Press Down to choose Default Gateway field and enter 172.16.1.1.
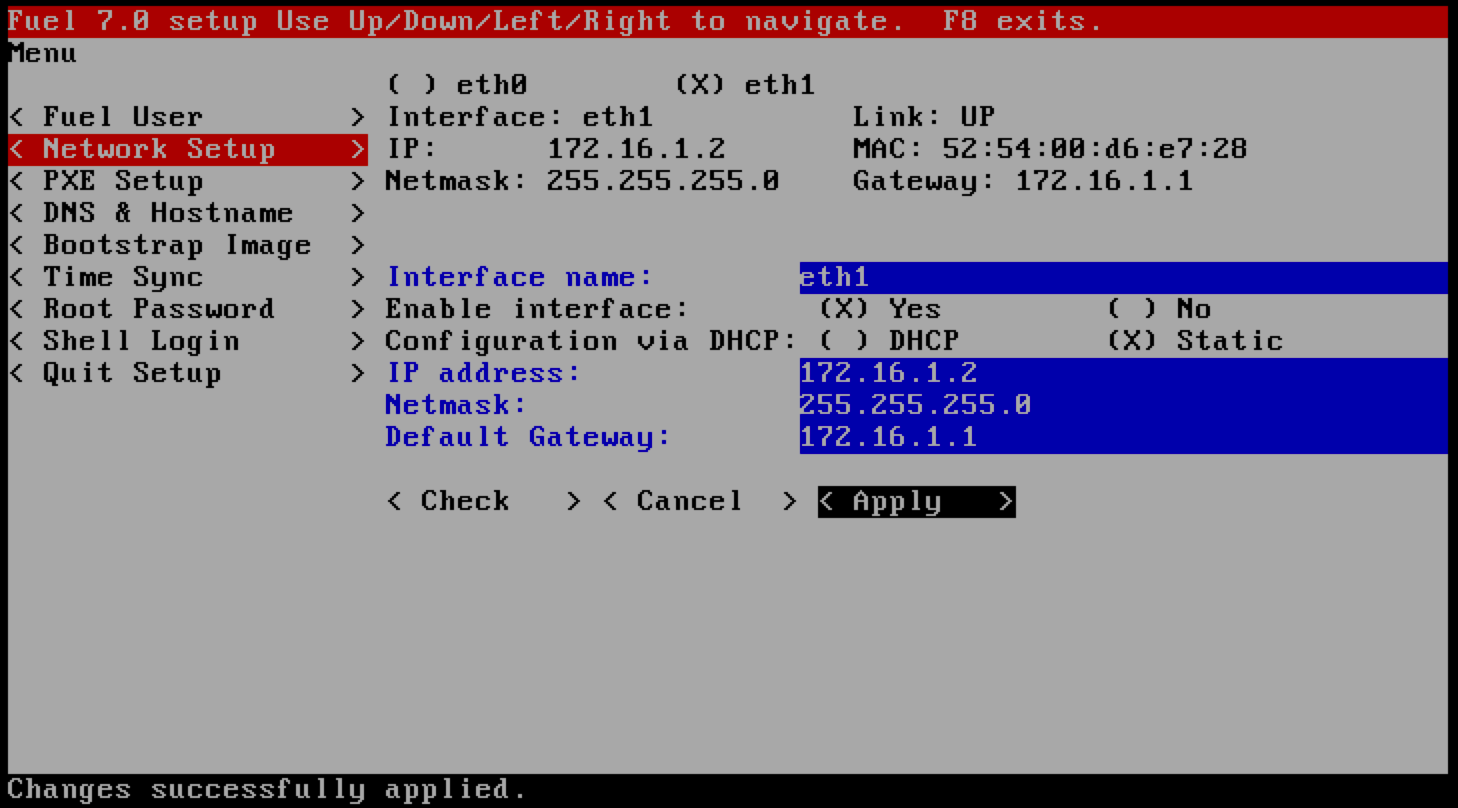
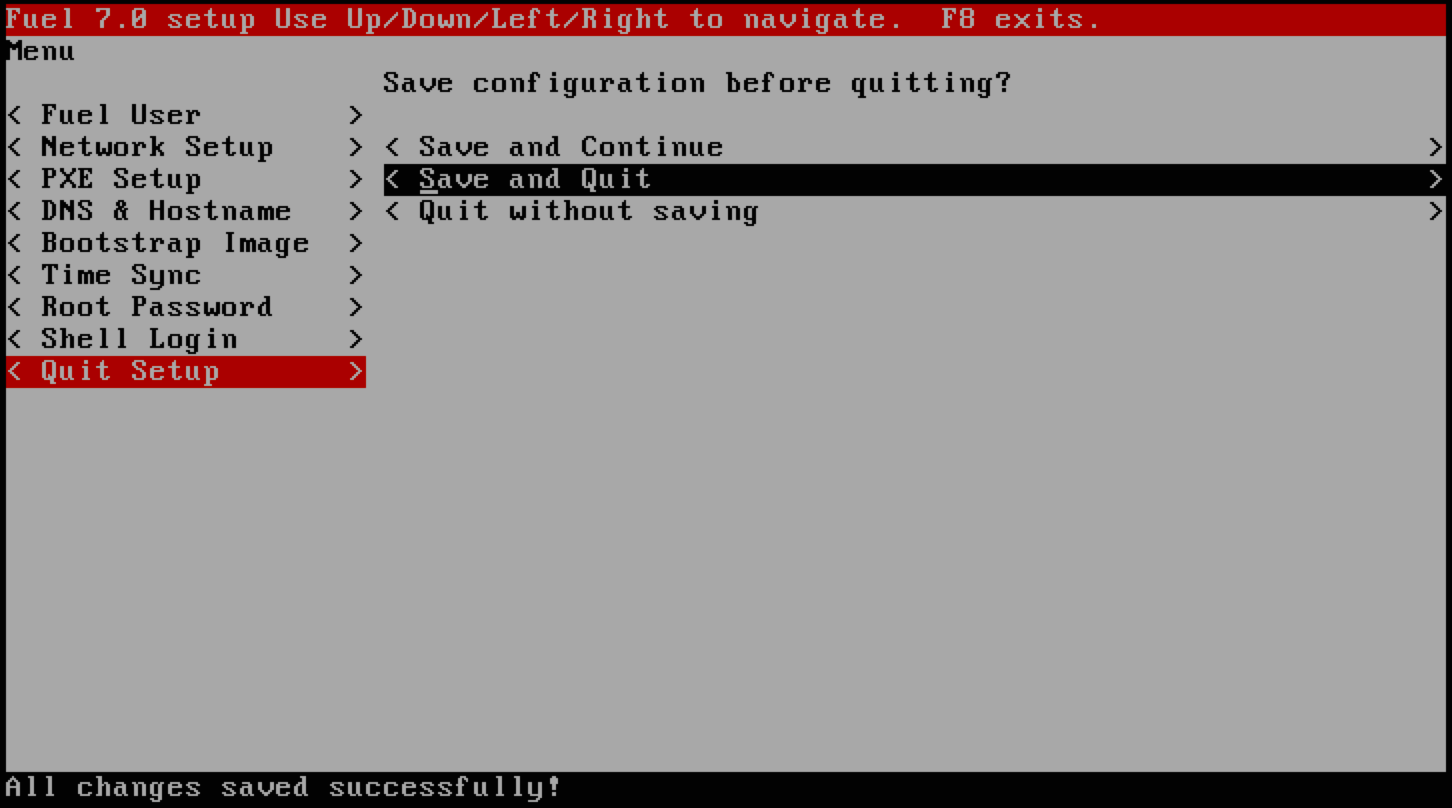
Step 6 Choose Apply and press Enter. From menu choose Quit Setup, press Enter. Choose Save and Quit and press Enter.
Step 7 Wait for Fuel to finish installing. After it has been installed, the following screen will appear:
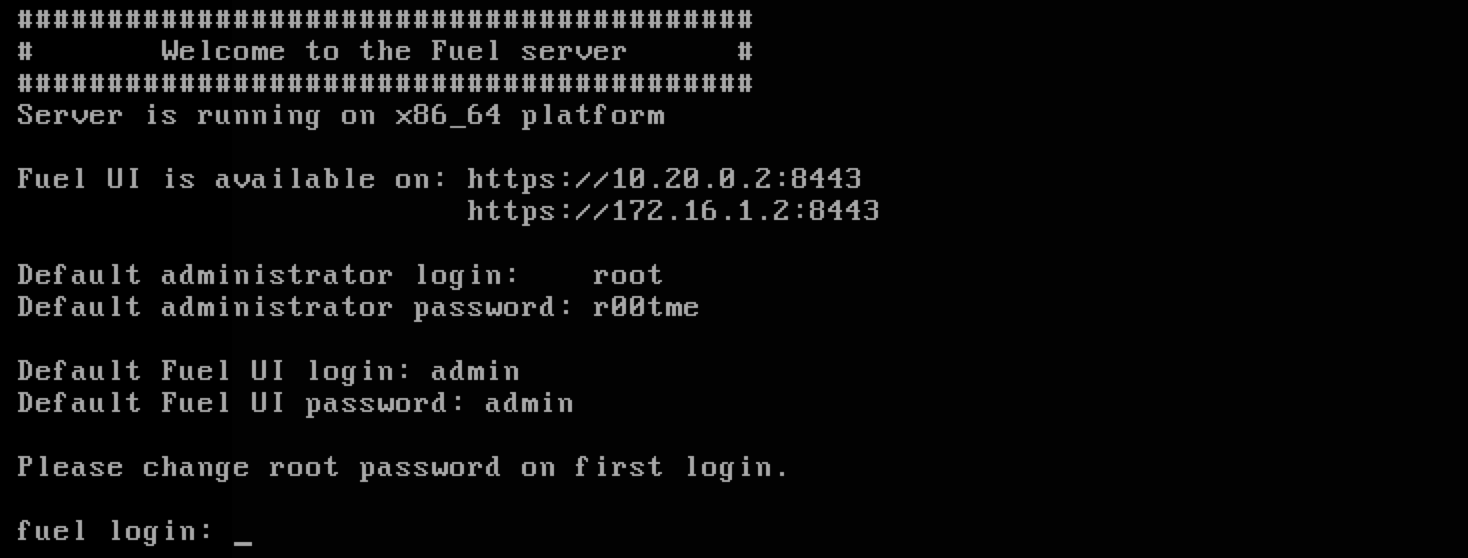
3.5. Check Fuel Installation
3.5.1. Log in to the Fuel Master node
In the Fuel Master node console, enter root for the login name and r00tme for the password. Check that DNS works and that the Fuel Master node has access to the Internet. For example, you can ping an external site:
fuel login: root
Password: ******

...

[root@fuel ~]# ping -c 1 mirantis.com
PING mirantis.com (199.83.128.229) 56(84) bytes of data.
64 bytes from 199.83.128.229.ip.incapdns.net (199.83.128.229): icmp_seq=1 ttl=48 time=78.5 ms

--- mirantis.com ping statistics ---
1 packets transmitted, 1 received, 0% packet loss, time 139ms
rtt min/avg/max/mdev = 78.576/78.576/78.576/0.000 ms
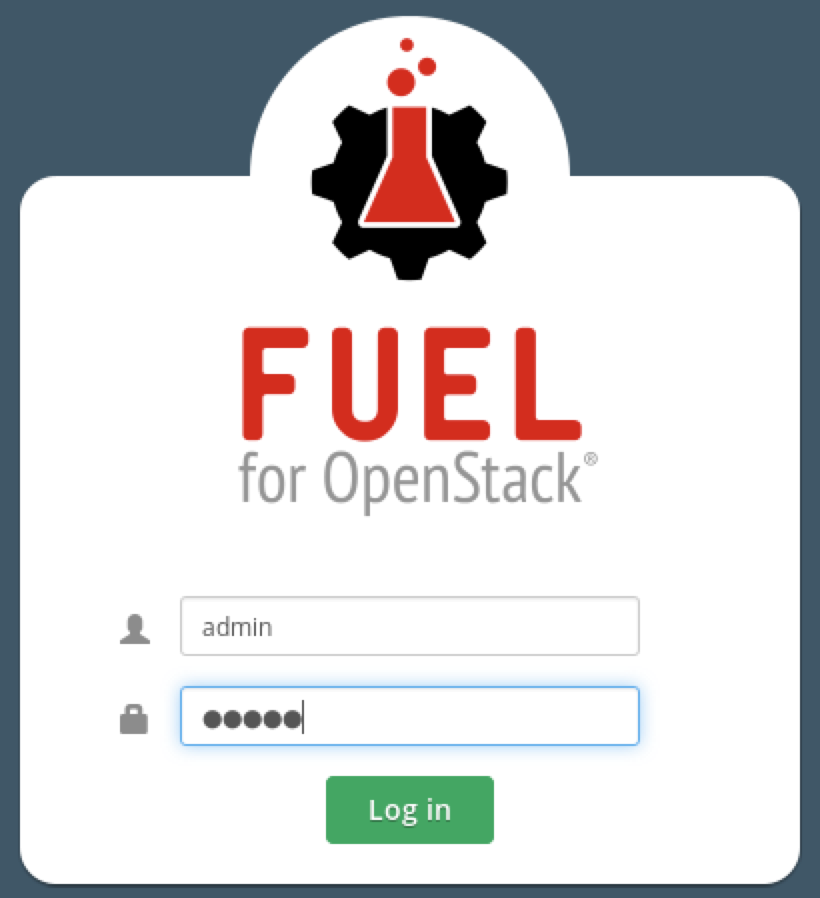
3.5.2. Log in to the Fuel UI
Launch Firefox and open https://10.20.0.2:8443 address. Firefox will complain about using the untrusted connection. See 1.5. Working with Firefox for a workaround. Use admin for the name and admin for the password to log in.
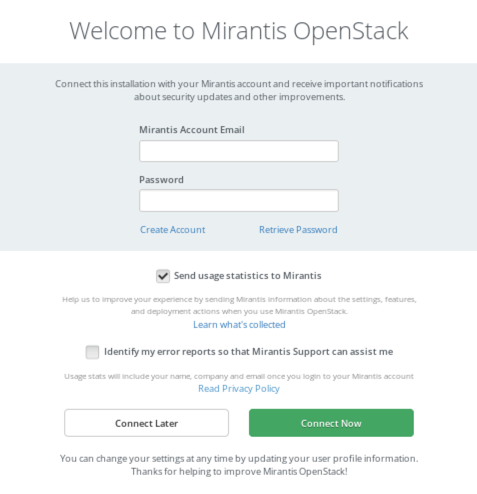
On the first log in, Fuel UI will display the message Welcome to Mirantis OpenStack. If you have a Mirantis account, enter your credentials, or create a new Mirantis account. You can also press Connect Later to continue. You can create a new Mirantis account or connect to an existing one by choosing Support from Fuel UI main menu.
Congratulations! You have successfully installed Fuel.
Checkpoint
- Create virtual networks
- Create a VM for the Fuel Master node
- Install Fuel using the Mirantis OpenStack ISO
- Set up the Fuel Master node on a first boot
- Check that the Fuel Master node is installed and Fuel UI is accessible
![]()
Table Of Contents
- 1. Classroom Environment
- 2. Explore HA OpenStack
- 3. Fuel Installation
- 4. Simple Deployment
- 5. HA Deployment
- 6. OpenStack Networking
- 7. Fuel Troubleshooting
- 8. Fuel Plugins
- 9. OpenStack with Ceph
- 10. Murano
- 11. Sahara