7. Fuel Troubleshooting
In this chapter, you will practice to troubleshoot Fuel and OpenStack environment.
| Chapter Details | |
|---|---|
| Chapter Goal | Fuel troubleshooting |
| Chapter Sections | |
7.1. Prerequisites
Check that the following prerequisite has been met:
- You have access to the lab environment
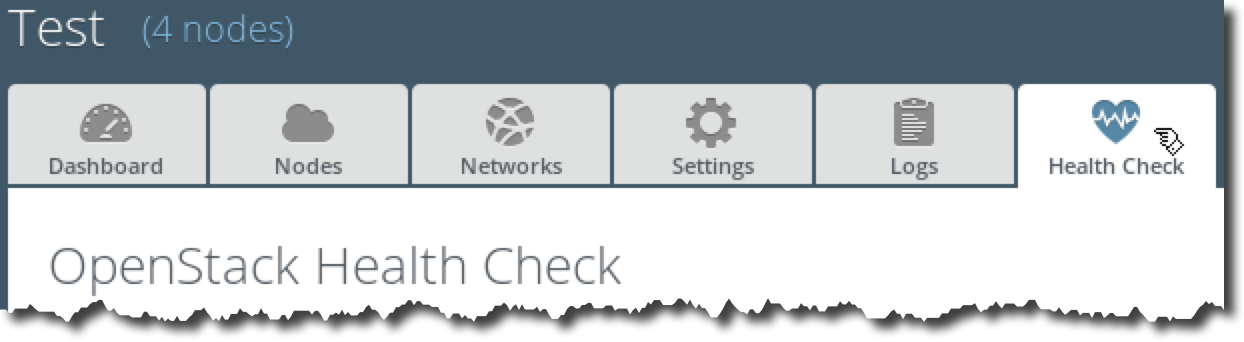
7.2. Fuel Health Check
You can use Fuel Health Check to verify an OpenStack environment after deployment. To run Health Check, log in to the Fuel UI, choose the OpenStack environment that you would like to verify and choose the Health Check tab.
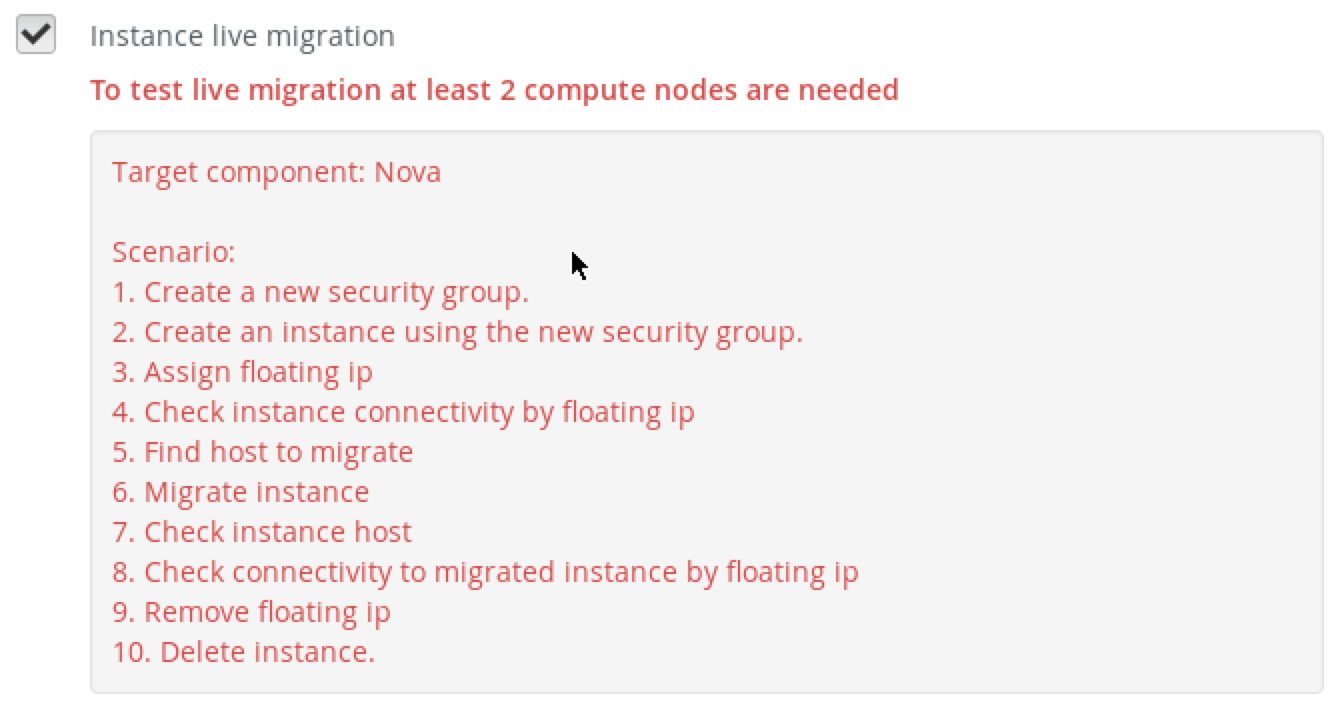
You can choose all the tests by clicking on the Select All checkbox, or specific group of tests, like Sanity tests, or individual tests, by checking their corresponding checkboxes. After selecting the appropriate tests press Run Test.
Depending on the environment, several tests will not be executed. For example, Instance live migration will not be run if you only have one compute node.
The last 3 tests from the Configurtion tests group will fail for our environments because they check if default credentials were changed.
Congratulations! You have successfully practiced to troubleshoot Fuel and OpenStack environment.
7.3. Logs
7.3.1. Accessing logs from Fuel UI
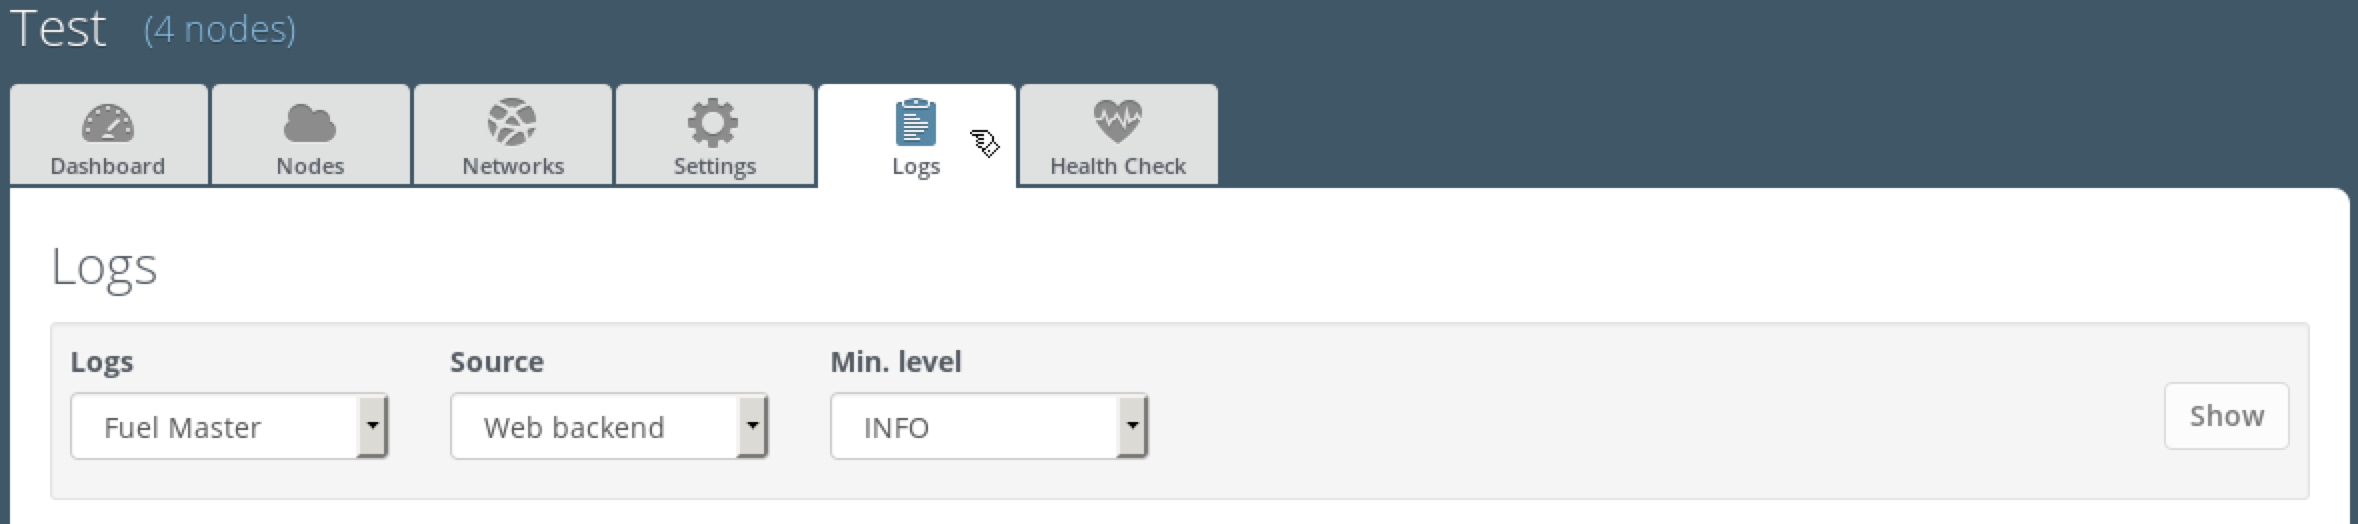
In Firefox, log in to the Fuel UI, choose the OpenStack environment, choose the Logs tab:
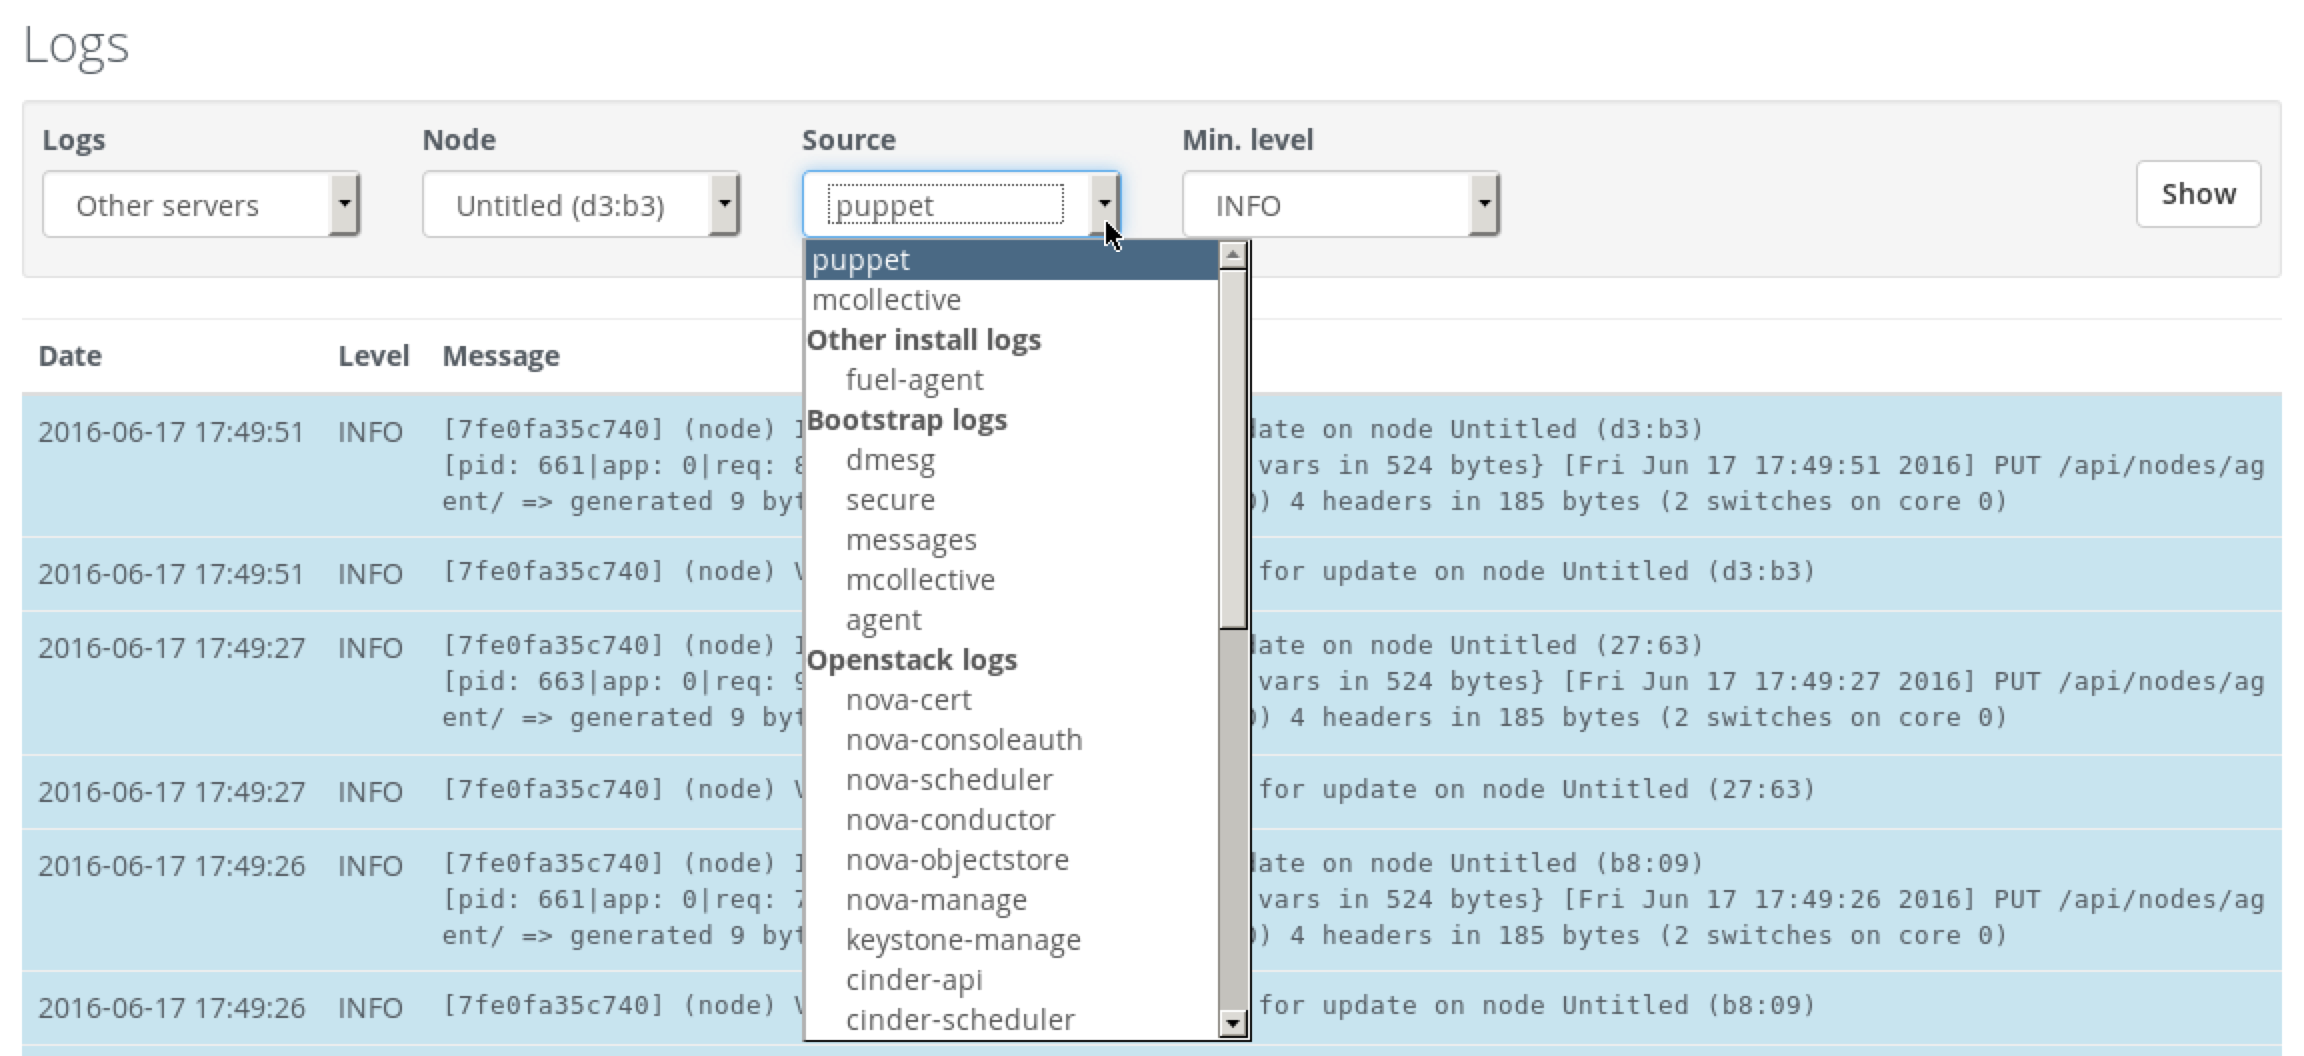
To access OpenStack logs choose Other servers in the Logs field:
7.3.2. Accessing logs on the Fuel node
In Terminal Emulator, log in to the Fuel master node:
stack@lab:~$ ssh root@10.20.0.2
root@10.20.0.2's password:
[root@fuel ~]#
Logs collected from OpenStack nodes are located in the /var/log/remote directory:
[root@fuel ~]# cd /var/log/remote
[root@fuel remote]# ls -l
total 16
lrwxrwxrwx 1 root root   17 Nov  1  2015 10.20.0.3 -> node-2.domain.tld
lrwxrwxrwx 1 root root   17 Nov  1  2015 10.20.0.4 -> node-1.domain.tld
lrwxrwxrwx 1 root root   17 Nov  9  2015 10.20.0.5 -> node-3.domain.tld
lrwxrwxrwx 1 root root   17 Nov  9  2015 10.20.0.6 -> node-4.domain.tld
drwxr-xr-x 3 root root 4096 Nov  9  2015 node-1.domain.tld
drwxr-xr-x 4 root root 4096 Nov  9  2015 node-2.domain.tld
drwxr-xr-x 4 root root 4096 Jun 17 17:35 node-3.domain.tld
drwxr-xr-x 4 root root 4096 Jun 17 17:39 node-4.domain.tld
Use the fuel nodes command to get the IP address for the specific OpenStack node:
[root@fuel remote]# fuel nodes
id | status | name             | cluster | ip        | mac               | roles      | pending_roles | online | group_id
---|--------|------------------|---------|-----------|-------------------|------------|---------------|--------|---------
4  | ready  | Untitled (b8:09) | 1       | 10.20.0.6 | 52:54:00:b0:b8:09 | controller |               | True   | 1
3  | ready  | Untitled (27:63) | 1       | 10.20.0.5 | 52:54:00:a7:27:63 | controller |               | True   | 1
1  | ready  | Untitled (85:61) | 1       | 10.20.0.4 | 3a:3f:25:f0:b2:e6 | compute    |               | True   | 1
2  | ready  | Untitled (d3:b3) | 1       | 10.20.0.3 | 3a:c6:ab:96:60:a7 | controller |               | True   | 1
For example, to access the controller node logs:
[root@fuel remote]# ls -l 10.20.0.3/
...
cinder-api.log
cinder-manage.log
cinder-scheduler.log
...
7.4. OpenStack Services
In Terminal Emulator, log in to the Fuel master node and then log in to any controller node:
stack@lab:~$ ssh root@10.20.0.2
root@10.20.0.2's password:

[root@fuel ~]# fuel nodes
id | status | name             | cluster | ip        | mac               | roles      | pending_roles | online | group_id
---|--------|------------------|---------|-----------|-------------------|------------|---------------|--------|---------
4  | ready  | Untitled (b8:09) | 1       | 10.20.0.6 | 52:54:00:b0:b8:09 | controller |               | True   | 1
3  | ready  | Untitled (27:63) | 1       | 10.20.0.5 | 52:54:00:a7:27:63 | controller |               | True   | 1
1  | ready  | Untitled (85:61) | 1       | 10.20.0.4 | 3a:3f:25:f0:b2:e6 | compute    |               | True   | 1
2  | ready  | Untitled (d3:b3) | 1       | 10.20.0.3 | 3a:c6:ab:96:60:a7 | controller |               | True   | 1

[root@fuel ~]# ssh 10.20.0.3
root@node-2:~#
In the following steps, you will need to know exactly what is the controller node you have logged in. The fuel nodes commands shows node names, so you should now the name of the controller node:
2 | ready | Untitled (d3:b3) | 1 | 10.20.0.3 | 3a:c6:ab:96:60:a7 | controller | | True | 1
The node name contains the last two bytes (d3:b3) of the node’s MAC address. The other way to get the MAC address is to execute the following command on the controller:
root@node-2:~# ip link show eth0 | grep ether
    link/ether 52:54:00:a6:d3:b3 brd ff:ff:ff:ff:ff:ff
Now you can use Virtual Machine Manager to find a VM with the specified MAC address: use Details tabs to see the MAC address of the first NIC. In our case, the controller node is the VM controller:
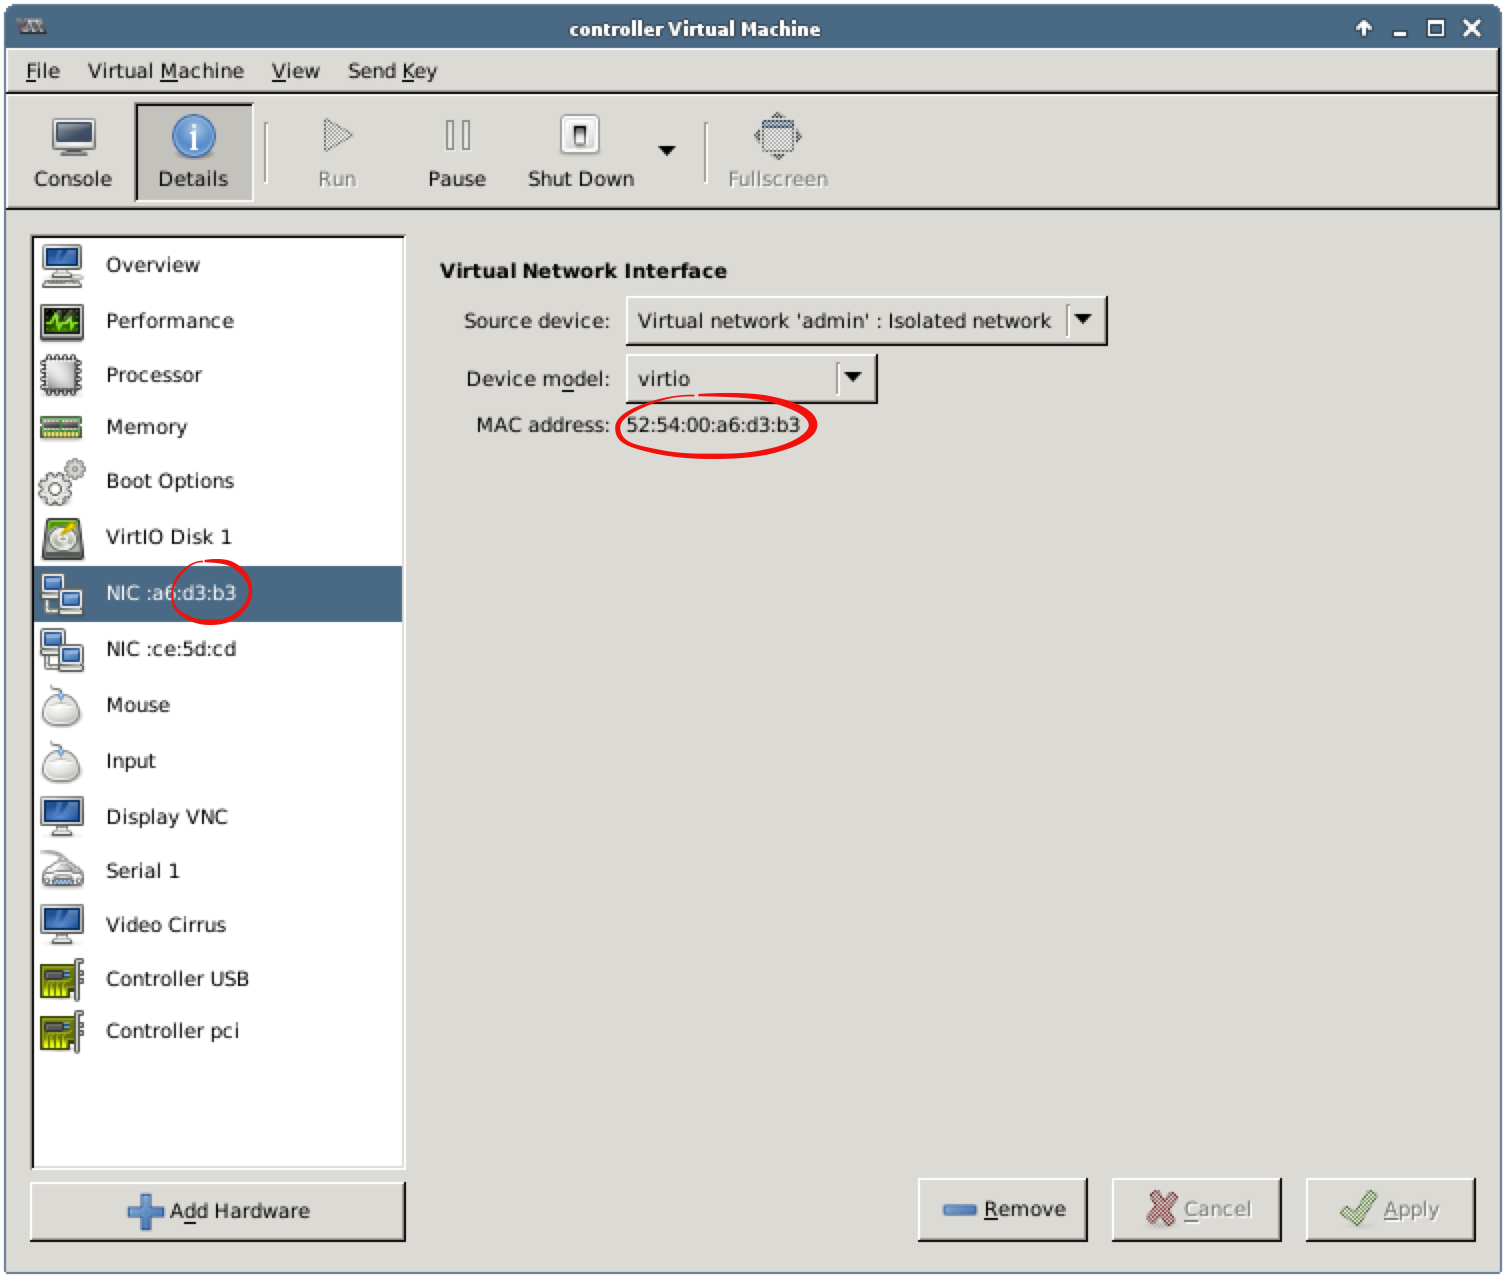
Let’s explore the controller node configuration.
7.4.1. HAProxy
HAProxy configuration files are located in the /etc/haproxy/conf.d/ directory:
root@node-2:~# ls -1 /etc/haproxy/conf.d/
010-stats.cfg
015-horizon.cfg
017-horizon-ssl.cfg
020-keystone-1.cfg
030-keystone-2.cfg
040-nova-api-1.cfg
050-nova-api-2.cfg
060-nova-metadata-api.cfg
070-cinder-api.cfg
080-glance-api.cfg
085-neutron.cfg
090-glance-registry.cfg
110-mysqld.cfg
120-swift.cfg
160-heat-api.cfg
161-heat-api-cfn.cfg
162-heat-api-cloudwatch.cfg
170-nova-novncproxy.cfg
7.4.2. OpenStack Services Health Check
Nova, Cinder, and Heat all have manage utilities that can be used to view the health of some sub-components:
root@node-2:~# source openrc

root@node-2:~# nova-manage service list
Binary           Host                                 Zone             Status     State Updated_At
nova-consoleauth node-2.domain.tld                    internal         enabled    :-)   2016-06-17 20:28:43
nova-scheduler   node-2.domain.tld                    internal         enabled    :-)   2016-06-17 20:29:30
nova-conductor   node-2.domain.tld                    internal         enabled    :-)   2016-06-17 20:29:28
nova-cert        node-2.domain.tld                    internal         enabled    :-)   2016-06-17 20:29:30
nova-compute     node-1.domain.tld                    nova             enabled    :-)   2016-06-17 20:28:50
nova-consoleauth node-3.domain.tld                    internal         enabled    :-)   2016-06-17 20:29:19
nova-scheduler   node-3.domain.tld                    internal         enabled    :-)   2016-06-17 20:29:17
nova-conductor   node-3.domain.tld                    internal         enabled    :-)   2016-06-17 20:29:12
nova-cert        node-3.domain.tld                    internal         enabled    :-)   2016-06-17 20:29:24
nova-consoleauth node-4.domain.tld                    internal         enabled    :-)   2016-06-17 20:29:21
nova-scheduler   node-4.domain.tld                    internal         enabled    :-)   2016-06-17 20:29:21
nova-conductor   node-4.domain.tld                    internal         enabled    :-)   2016-06-17 20:29:18
nova-cert        node-4.domain.tld                    internal         enabled    :-)   2016-06-17 20:29:27

root@node-2:~# cinder-manage service list
Binary           Host                                 Zone             Status     State Updated At
cinder-scheduler node-2                               nova             enabled    :-)   2016-06-17 20:29:59
cinder-scheduler node-3                               nova             enabled    :-)   2016-06-17 20:30:02
cinder-scheduler node-4                               nova             enabled    :-)   2016-06-17 20:29:58

root@node-2:~# heat-manage service list
Hostname         Binary           Engine_Id                            Host       Topic      Status     Updated At
node-4.domain.tld heat-engine      c6d1f288-a608-44c8-9eba-14a561b7c26c node-4.domain.tld engine     down       2015-11-09 03:50:02
node-3.domain.tld heat-engine      e2076eda-4947-48c7-9fd5-7e8fe4a51210 node-3.domain.tld engine     up         2016-06-17 20:30:18
node-3.domain.tld heat-engine      86c50b9e-e0ce-4b2e-9b28-623fa54da818 node-3.domain.tld engine     down       2015-11-09 03:49:37
node-2.domain.tld heat-engine      7e746c11-b164-4c70-b741-aec64a663ef9 node-2.domain.tld engine     up         2016-06-17 20:29:44
node-4.domain.tld heat-engine      64b6ee67-58e2-408a-95b8-1e66c6ed38f4 node-4.domain.tld engine     down       2015-11-09 03:50:02
node-2.domain.tld heat-engine      b4e83994-955a-4a12-8026-fcaf119d7aa1 node-2.domain.tld engine     up         2016-06-17 20:29:44
node-4.domain.tld heat-engine      6b6252ae-c933-4889-8c33-b60148fdaf79 node-4.domain.tld engine     up         2016-06-17 20:30:21
node-3.domain.tld heat-engine      2af598dc-6c02-482c-8d53-e5258b4b1be5 node-3.domain.tld engine     up         2016-06-17 20:30:18
node-2.domain.tld heat-engine      d22c2a70-a1ac-408f-9cd9-f9ec2de76c4c node-2.domain.tld engine     down       2015-11-09 03:23:01
node-4.domain.tld heat-engine      63f7f6bb-a10d-4271-9072-5dc7dce63d91 node-4.domain.tld engine     up         2016-06-17 20:30:21
node-2.domain.tld heat-engine      61967bab-3783-4483-980b-f12dfa708213 node-2.domain.tld engine     down       2015-11-09 03:23:01
node-3.domain.tld heat-engine      27d75497-b66e-46e8-b0cd-95a26d84d019 node-3.domain.tld engine     down       2015-11-09 03:49:37
Neutron client can be used to view the health of neutron agents:
root@node-2:~# neutron agent-list
+--------------------------------------+--------------------+-------------------+-------+----------------+---------------------------+
| id                                   | agent_type         | host              | alive | admin_state_up | binary                    |
+--------------------------------------+--------------------+-------------------+-------+----------------+---------------------------+
| 1c492a99-d11f-4aef-8701-b8635d8396e8 | L3 agent           | node-4.domain.tld | :-)   | True           | neutron-l3-agent          |
| 27161977-a3e2-49f3-83b3-bd65e5fbb085 | Open vSwitch agent | node-1.domain.tld | :-)   | True           | neutron-openvswitch-agent |
| 2858b6d6-dfad-4754-8b7d-fdaab117907b | DHCP agent         | node-2.domain.tld | :-)   | True           | neutron-dhcp-agent        |
| 2b0a91b0-6b63-4b57-ac66-62356e935dbc | Metadata agent     | node-4.domain.tld | :-)   | True           | neutron-metadata-agent    |
| 3cf064f8-5f7a-4482-b8b4-2498d63333ed | L3 agent           | node-2.domain.tld | :-)   | True           | neutron-l3-agent          |
| 4c353781-52c2-4c0c-ba2d-fcc5ec31a711 | Open vSwitch agent | node-4.domain.tld | :-)   | True           | neutron-openvswitch-agent |
| 649b556e-81f4-461a-8359-8c2a83ecec66 | Open vSwitch agent | node-2.domain.tld | :-)   | True           | neutron-openvswitch-agent |
| 68d57513-cb18-4383-99b3-ccb9b774ea9b | Metadata agent     | node-3.domain.tld | :-)   | True           | neutron-metadata-agent    |
| 8ebeba76-6a3a-486d-907c-1e42daaa501d | Metadata agent     | node-2.domain.tld | :-)   | True           | neutron-metadata-agent    |
| a350996c-e22d-4796-b269-032ac31aa5de | DHCP agent         | node-3.domain.tld | :-)   | True           | neutron-dhcp-agent        |
| b8f279af-5cf4-4f3f-83e8-8022bcb0d090 | Open vSwitch agent | node-3.domain.tld | :-)   | True           | neutron-openvswitch-agent |
| c10d8dc7-0877-46f2-a14d-7a29a88a0d43 | DHCP agent         | node-4.domain.tld | :-)   | True           | neutron-dhcp-agent        |
| d73989a5-a84f-42e3-814d-d4cb3a524358 | L3 agent           | node-3.domain.tld | :-)   | True           | neutron-l3-agent          |
+--------------------------------------+--------------------+-------------------+-------+----------------+---------------------------+
Use the nova hypervisor-list to show status of all compute nodes:
root@node-2:~# nova hypervisor-list
+----+---------------------+-------+---------+
| ID | Hypervisor hostname | State | Status  |
+----+---------------------+-------+---------+
| 1  | node-1.domain.tld   | up    | enabled |
+----+---------------------+-------+---------+
7.4.3. Start/Stop Scripts and Logs
Most of the OpenStack services can be restarted via traditional /etc/init.d scripts. For example, let’s restart cinder-api service:
root@node-2:~# service cinder-api restart
cinder-api stop/waiting
cinder-api start/running, process 18463
Services’ logs are also located in a traditional location, for example, /var/log/cinder/cinder-api.log.
7.4.4. RabbitMQ
Execute the following command to check RabbitMQ cluster status:
root@node-2:~# rabbitmqctl cluster_status
Cluster status of node 'rabbit@node-2' ...
[{nodes,[{disc,['rabbit@node-2','rabbit@node-3','rabbit@node-4']}]},
 {running_nodes,['rabbit@node-4','rabbit@node-3','rabbit@node-2']},
 {cluster_name,<<"rabbit@node-2.domain.tld">>},
 {partitions,[]}]
Alternatively, you can use the crm (Pacemaker) tool to check RabbitMQ cluster status:
root@node-2:~# crm resource status master_p_rabbitmq-server
resource master_p_rabbitmq-server is running on: node-2.domain.tld Master
resource master_p_rabbitmq-server is running on: node-4.domain.tld
resource master_p_rabbitmq-server is running on: node-3.domain.tld
The same tool should be used to restart RabbitMQ cluster:
root@node-2:~# crm resource restart master_p_rabbitmq-server
INFO: ordering master_p_rabbitmq-server to stop
waiting for stop to finish ................. done
INFO: ordering master_p_rabbitmq-server to start
7.4.5. MySQL/Galera
Execute the following command to check MySQL/Galera cluster status:
root@node-2:~# crm resource status clone_p_mysql
resource clone_p_mysql is running on: node-2.domain.tld
resource clone_p_mysql is running on: node-4.domain.tld
resource clone_p_mysql is running on: node-3.domain.tld
The same tool should be used to restart MySQL/Galera cluster:
root@node-2:~# crm resource restart clone_p_mysql
INFO: ordering clone_p_mysql to stop
waiting for stop to finish ..... done
INFO: ordering clone_p_mysql to start
7.4.6. Pacemaker
To see the existing Pacemaker configuration execute the following command:
root@node-2:~# cibadmin --query > tmp.xml
The configuration will be saved in XML format to the tmp.xml file. If you want to change the configuration, then edit this file and execute the following command:
root@node-2:~# cibadmin --replace --xml-file tmp.xml
To monitor Pacemaker’s activity use the crm_mon command. Keep this command running:
root@node-2:~# crm_mon

...
Stack: corosync
Current DC: node-2.domain.tld (2) - partition with quorum
Version: 1.1.12-561c4cf
3 Nodes configured
43 Resources configured


Online: [ node-2.domain.tld node-3.domain.tld node-4.domain.tld ]

 Clone Set: clone_p_vrouter [p_vrouter]
     Started: [ node-2.domain.tld node-3.domain.tld node-4.domain.tld ]
vip__management (ocf::fuel:ns_IPaddr2): Started node-2.domain.tld
vip__vrouter_pub        (ocf::fuel:ns_IPaddr2): Started node-2.domain.tld
vip__vrouter    (ocf::fuel:ns_IPaddr2): Started node-2.domain.tld
vip__public     (ocf::fuel:ns_IPaddr2): Started node-2.domain.tld
 Master/Slave Set: master_p_conntrackd [p_conntrackd]
     Masters: [ node-2.domain.tld ]
     Slaves: [ node-3.domain.tld node-4.domain.tld ]
 Clone Set: clone_p_haproxy [p_haproxy]
     Started: [ node-2.domain.tld node-3.domain.tld node-4.domain.tld ]
 Clone Set: clone_p_dns [p_dns]
     Started: [ node-2.domain.tld node-3.domain.tld node-4.domain.tld ]
 Clone Set: clone_p_mysql [p_mysql]
     Started: [ node-2.domain.tld node-3.domain.tld node-4.domain.tld ]
 Master/Slave Set: master_p_rabbitmq-server [p_rabbitmq-server]
     Masters: [ node-2.domain.tld ]
     Slaves: [ node-3.domain.tld node-4.domain.tld ]
 Clone Set: clone_p_heat-engine [p_heat-engine]
     Started: [ node-2.domain.tld node-3.domain.tld node-4.domain.tld ]
 Clone Set: clone_p_neutron-plugin-openvswitch-agent [p_neutron-plugin-openvswitch-agent]
     Started: [ node-2.domain.tld node-3.domain.tld node-4.domain.tld ]
 Clone Set: clone_p_neutron-dhcp-agent [p_neutron-dhcp-agent]
     Started: [ node-2.domain.tld node-3.domain.tld node-4.domain.tld ]
 Clone Set: clone_p_neutron-metadata-agent [p_neutron-metadata-agent]
     Started: [ node-2.domain.tld node-3.domain.tld node-4.domain.tld ]
 Clone Set: clone_p_neutron-l3-agent [p_neutron-l3-agent]
     Started: [ node-2.domain.tld node-3.domain.tld node-4.domain.tld ]
 Clone Set: clone_ping_vip__public [ping_vip__public]
     Started: [ node-2.domain.tld node-3.domain.tld node-4.domain.tld ]
 Clone Set: clone_p_ntp [p_ntp]
     Started: [ node-2.domain.tld node-3.domain.tld node-4.domain.tld ]
Now let’s emulate a controller node failure. Open Virtual Machine Manager. Early you have determined which VM corresponds to the controller node you are currently logged in, for example controller. You should shut down any other controller node, for example controller1 or controller2.
Return to the Terminal Emulator window with crm_mon running. Your output should be similar to this one:
...
Stack: corosync
Current DC: node-2.domain.tld (2) - partition with quorum
Version: 1.1.12-561c4cf
3 Nodes configured
43 Resources configured


Online: [ node-2.domain.tld node-4.domain.tld ]
OFFLINE: [ node-3.domain.tld ]

 Clone Set: clone_p_vrouter [p_vrouter]
     Started: [ node-2.domain.tld node-4.domain.tld ]
vip__management (ocf::fuel:ns_IPaddr2): Started node-2.domain.tld
vip__vrouter_pub        (ocf::fuel:ns_IPaddr2): Started node-2.domain.tld
vip__vrouter    (ocf::fuel:ns_IPaddr2): Started node-2.domain.tld
vip__public     (ocf::fuel:ns_IPaddr2): Started node-2.domain.tld
 Master/Slave Set: master_p_conntrackd [p_conntrackd]
     Masters: [ node-2.domain.tld ]
     Slaves: [ node-4.domain.tld ]
 Clone Set: clone_p_haproxy [p_haproxy]
     Started: [ node-2.domain.tld node-4.domain.tld ]
 Clone Set: clone_p_dns [p_dns]
     Started: [ node-2.domain.tld node-4.domain.tld ]
 Clone Set: clone_p_mysql [p_mysql]
     Started: [ node-2.domain.tld node-4.domain.tld ]
 Master/Slave Set: master_p_rabbitmq-server [p_rabbitmq-server]
     Masters: [ node-2.domain.tld ]
     Slaves: [ node-4.domain.tld ]
 Clone Set: clone_p_heat-engine [p_heat-engine]
     Started: [ node-2.domain.tld node-4.domain.tld ]
 Clone Set: clone_p_neutron-plugin-openvswitch-agent [p_neutron-plugin-openvswitch-agent]
     Started: [ node-2.domain.tld node-4.domain.tld ]
 Clone Set: clone_p_neutron-dhcp-agent [p_neutron-dhcp-agent]
     Started: [ node-2.domain.tld node-4.domain.tld ]
 Clone Set: clone_p_neutron-metadata-agent [p_neutron-metadata-agent]
     Started: [ node-2.domain.tld node-4.domain.tld ]
 Clone Set: clone_p_neutron-l3-agent [p_neutron-l3-agent]
     Started: [ node-2.domain.tld node-4.domain.tld ]
 Clone Set: clone_ping_vip__public [ping_vip__public]
     Started: [ node-2.domain.tld node-4.domain.tld ]
 Clone Set: clone_p_ntp [p_ntp]
     Started: [ node-2.domain.tld node-4.domain.tld ]
Note that Pacemaker has detected the controller node failure and reported that one node is offline. You can press Ctrl-C to terminate the crm_mon process.
Let’s check RabbitMQ and Galera/MySQL clusters:
root@node-2:~# crm resource status master_p_rabbitmq-server
resource master_p_rabbitmq-server is running on: node-2.domain.tld Master
resource master_p_rabbitmq-server is running on: node-4.domain.tld
resource master_p_rabbitmq-server is NOT running

root@node-2:~# crm resource status clone_p_mysql
resource clone_p_mysql is running on: node-2.domain.tld
resource clone_p_mysql is running on: node-4.domain.tld
resource clone_p_mysql is NOT running
Now let’s run the crm_mon tool again and start the VM you have powered off early. Finally, the crm_mon should report that 3 nodes are online:
Online: [ node-2.domain.tld node-3.domain.tld node-4.domain.tld ]
Check RabbitMQ and Galera/MySQL clusters again:
root@node-2:~# crm resource status master_p_rabbitmq-server
resource master_p_rabbitmq-server is running on: node-2.domain.tld Master
resource master_p_rabbitmq-server is running on: node-4.domain.tld
resource master_p_rabbitmq-server is running on: node-3.domain.tld

root@node-2:~# crm resource status clone_p_mysql
resource clone_p_mysql is running on: node-2.domain.tld
resource clone_p_mysql is running on: node-4.domain.tld
resource clone_p_mysql is running on: node-3.domain.tld
7.5. Fuel Containers
Start Terminal Emulator and log in to the Fuel node. Use r00tme for the password:
stack@lab:~$ ssh root@10.20.0.2
root@10.20.0.2's password:
[root@fuel ~]#
Use the following command to show running Docker containers:
[root@fuel ~]# docker ps
CONTAINER ID        IMAGE                         COMMAND                NAMES
d254624f80e6        fuel/mcollective_7.0:latest   "/usr/local/bin/star   fuel-core-7.0-mcollective
e6956771e116        fuel/cobbler_7.0:latest       "/bin/sh -c /usr/loc   fuel-core-7.0-cobbler
a1134b9dd11f        fuel/nginx_7.0:latest         "/usr/local/bin/star   fuel-core-7.0-nginx
227e65f62798        fuel/ostf_7.0:latest          "/bin/sh -c /usr/loc   fuel-core-7.0-ostf
e6e9b59e02fe        fuel/nailgun_7.0:latest       "/bin/sh -c /usr/loc   fuel-core-7.0-nailgun
c6d32caeff2e        fuel/rsyslog_7.0:latest       "/usr/local/bin/star   fuel-core-7.0-rsyslog
34a0175991e3        fuel/astute_7.0:latest        "/bin/sh -c /usr/loc   fuel-core-7.0-astute
023ef63ee1fa        fuel/rsync_7.0:latest         "/bin/sh -c /usr/loc   fuel-core-7.0-rsync
d84cd8e8b156        fuel/keystone_7.0:latest      "/usr/local/bin/star   fuel-core-7.0-keystone
dfaea03c28a4        fuel/rabbitmq_7.0:latest      "/usr/local/bin/star   fuel-core-7.0-rabbitmq
3d6f5ba91ca6        fuel/postgres_7.0:latest      "/usr/local/bin/star   fuel-core-7.0-postgres
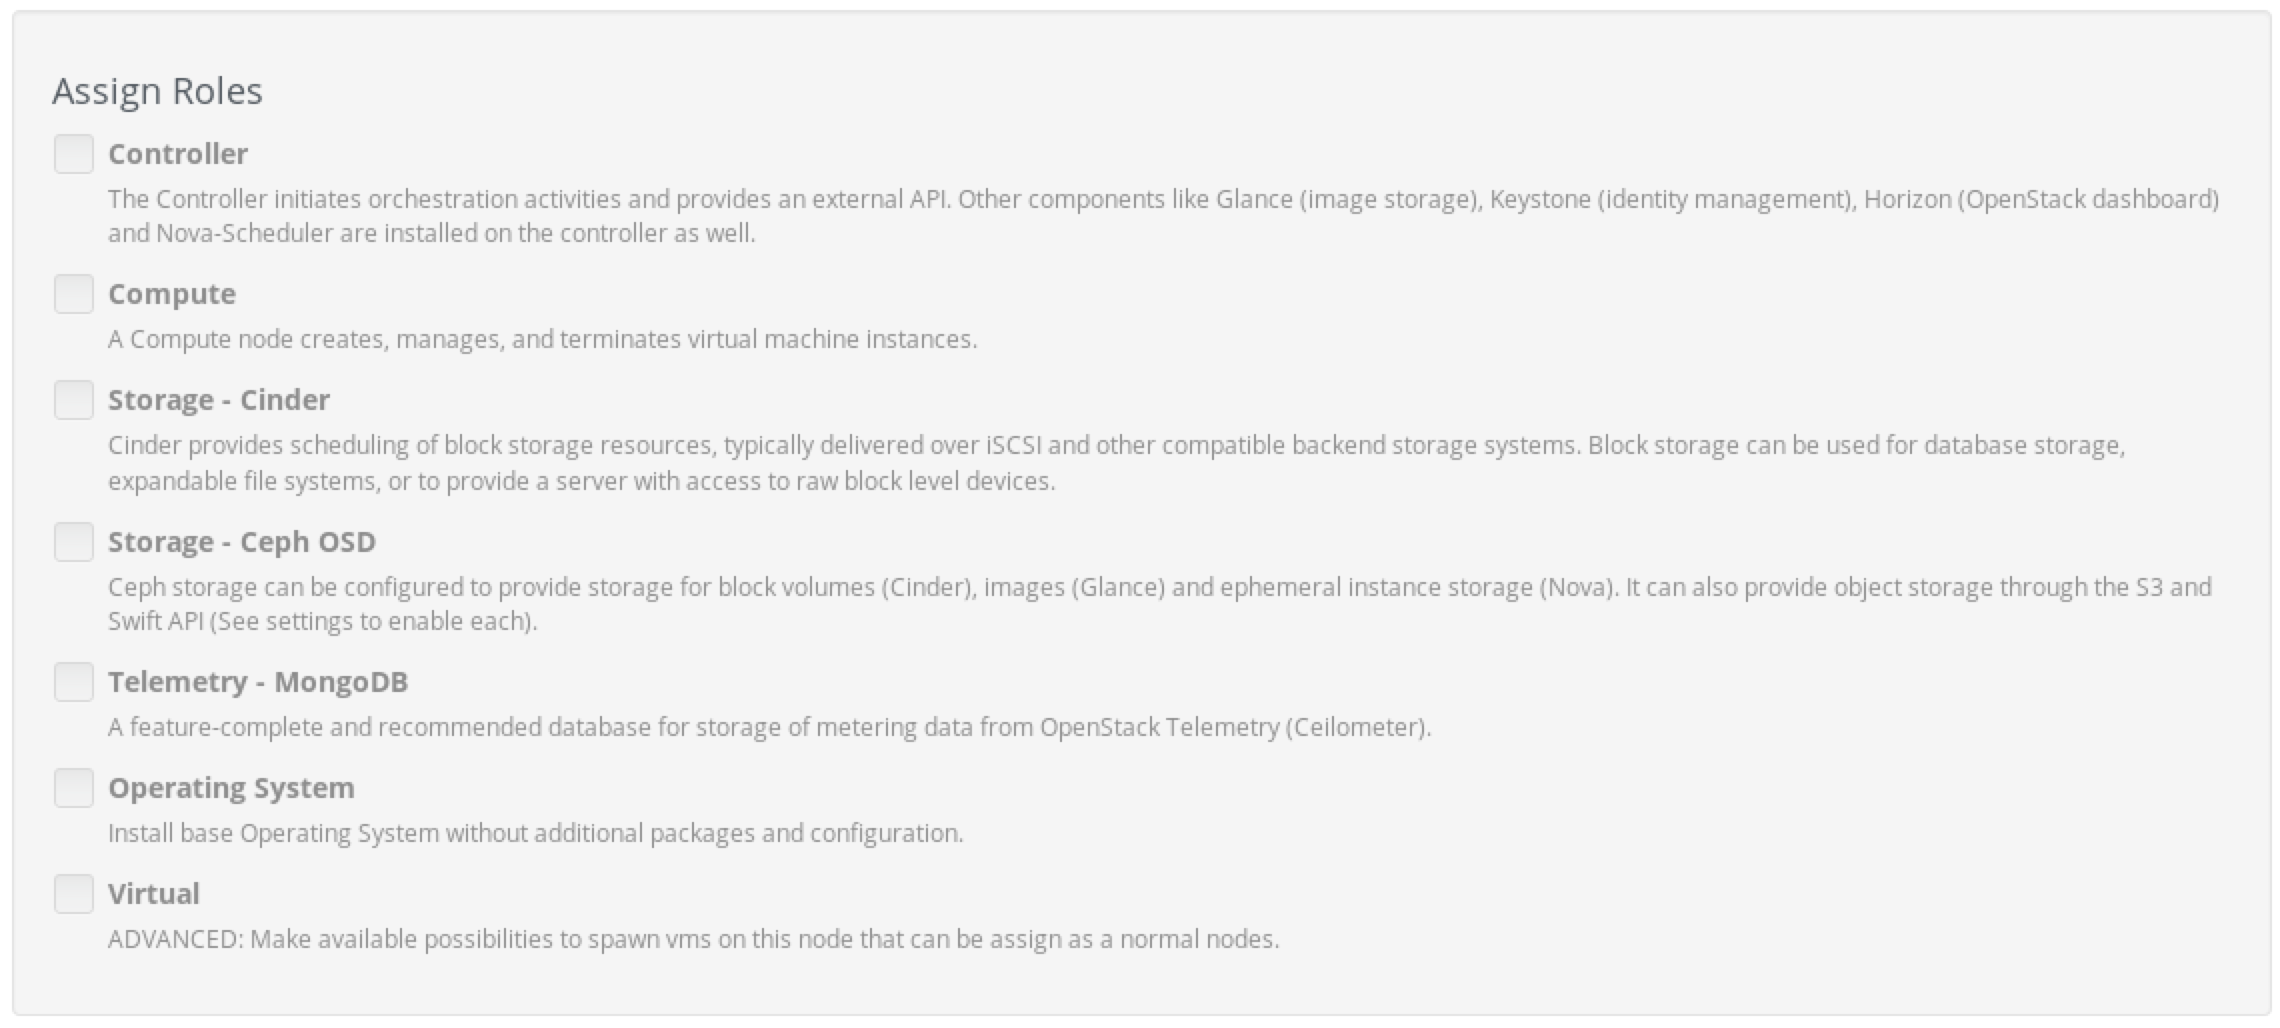
Let’s enable Fuel advanced features. This requires editing Fuel configuration file and restarting nailgun container. Edit the /etc/fuel/version.yaml file, add advanced to feature_groups:
VERSION:
  feature_groups:
    - mirantis
    - advanced
...
Then use the nailgun container ID from the docker ps output to restart nailgun container:
[root@fuel ~]# docker restart e6e9b59e02fe
e6e9b59e02fe
It will take around 2 minutes to restart nailgun container. You can explore nailgun logs while waiting for its restart:
- /var/log/docker-nailgun.log
- /var/log/docker-logs/nailgun/*.logs
Log in to the Fuel UI, choose the OpenStack environment, Nodes, Add Nodes. Check that there are new roles are available:
Checkpoint
- Use Fuel Health Check
- Access to the logs via Fuel UI
- Access to the logs on the Fuel node
- Troubleshoot OpenStack services
- Work with Fuel containers
![]()
Table Of Contents
- 1. Classroom Environment
- 2. Explore HA OpenStack
- 3. Fuel Installation
- 4. Simple Deployment
- 5. HA Deployment
- 6. OpenStack Networking
- 7. Fuel Troubleshooting
- 8. Fuel Plugins
- 9. OpenStack with Ceph
- 10. Murano
- 11. Sahara