4. Simple Deployment
In this chapter you will deploy a simple OpenStack environment using Fuel as a deployment tool. For a simple environment, you will need two additional nodes: one controller and one compute node.
| Chapter Details | |
|---|---|
| Chapter Goal | Deploy a simple OpenStack environment |
| Chapter Sections | |
4.1. Prerequisites
Check that the following prerequisites have been met:
- You have access to the lab environment
- You have created all the required virtual networks (3.2. Create Virtual Networks)
- You have successfully installed the Fuel Master node (3.4. Install Fuel)
- The Fuel Master node is up and running
- The Fuel Master node is connected to the Internet (3.5. Check Fuel Installation)
4.2. Create Controller and Compute Nodes
We will create two additional VMs: one VM for a controller and one VM for a compute node. The required steps are similar to the steps from 3.3. Create Fuel VM section, but there are some changes, specified below. Specifically, the second network interface should be connected to public network.
Note
4.2.1. Create Controller Node
Name:       controller
CPUs:       2
RAM:        4096MB
Disk:       60GB
Network 1:  Virtual network 'admin'  : Isolated
Network 2:  Virtual network 'public' : NAT
Step 1 Launch the Virtual Machine Manager. In the main window, press New button to create a new virtual machine.
Step 2 In New VM window enter controller in the Name field, choose Network Boot (PXE) and press Forward.

Step 3 Choose Linux for OS type and Ubuntu 14.04 LTS (Trusty Tahr) for Version. Press Forward.
Step 4 Enter 4096 for Memory (RAM) and 2 for CPUs. Press Forward.
Step 5 Choose Create a disk image on the computer's hard drive option, enter 60 for disk size, uncheck Allocate entire disk now checkbox and press Forward.
Important
Please check that you have changed the default disk size to 60GB. Controller requires at least 60GB for the installation. Also, please check that you have unchecked the Allocate entire disk now checkbox. Your environment has limited available disk space. If you choose to allocate entire disk now you will run out of disk space while creating additional VMs later.
Step 6 Check Customize configuration before install. Click on Advanced options to expand it. Choose Virtual network 'admin': Isolated network. Virtual Machine Manager will generate MAC address for NIC. Check that Virt Type is kvm, Architecture is x86_64 and Firmware is Default. Press Finish.

Step 7 Choose Input from the list. Press Add Hardware, which is located at the bottom of the window. Choose Netwok from the list in Add New Virtual Hardware. Choose Virtual network 'public' : NAT for Host device. Keep Hypervisor default for Device model field. Press Finish.
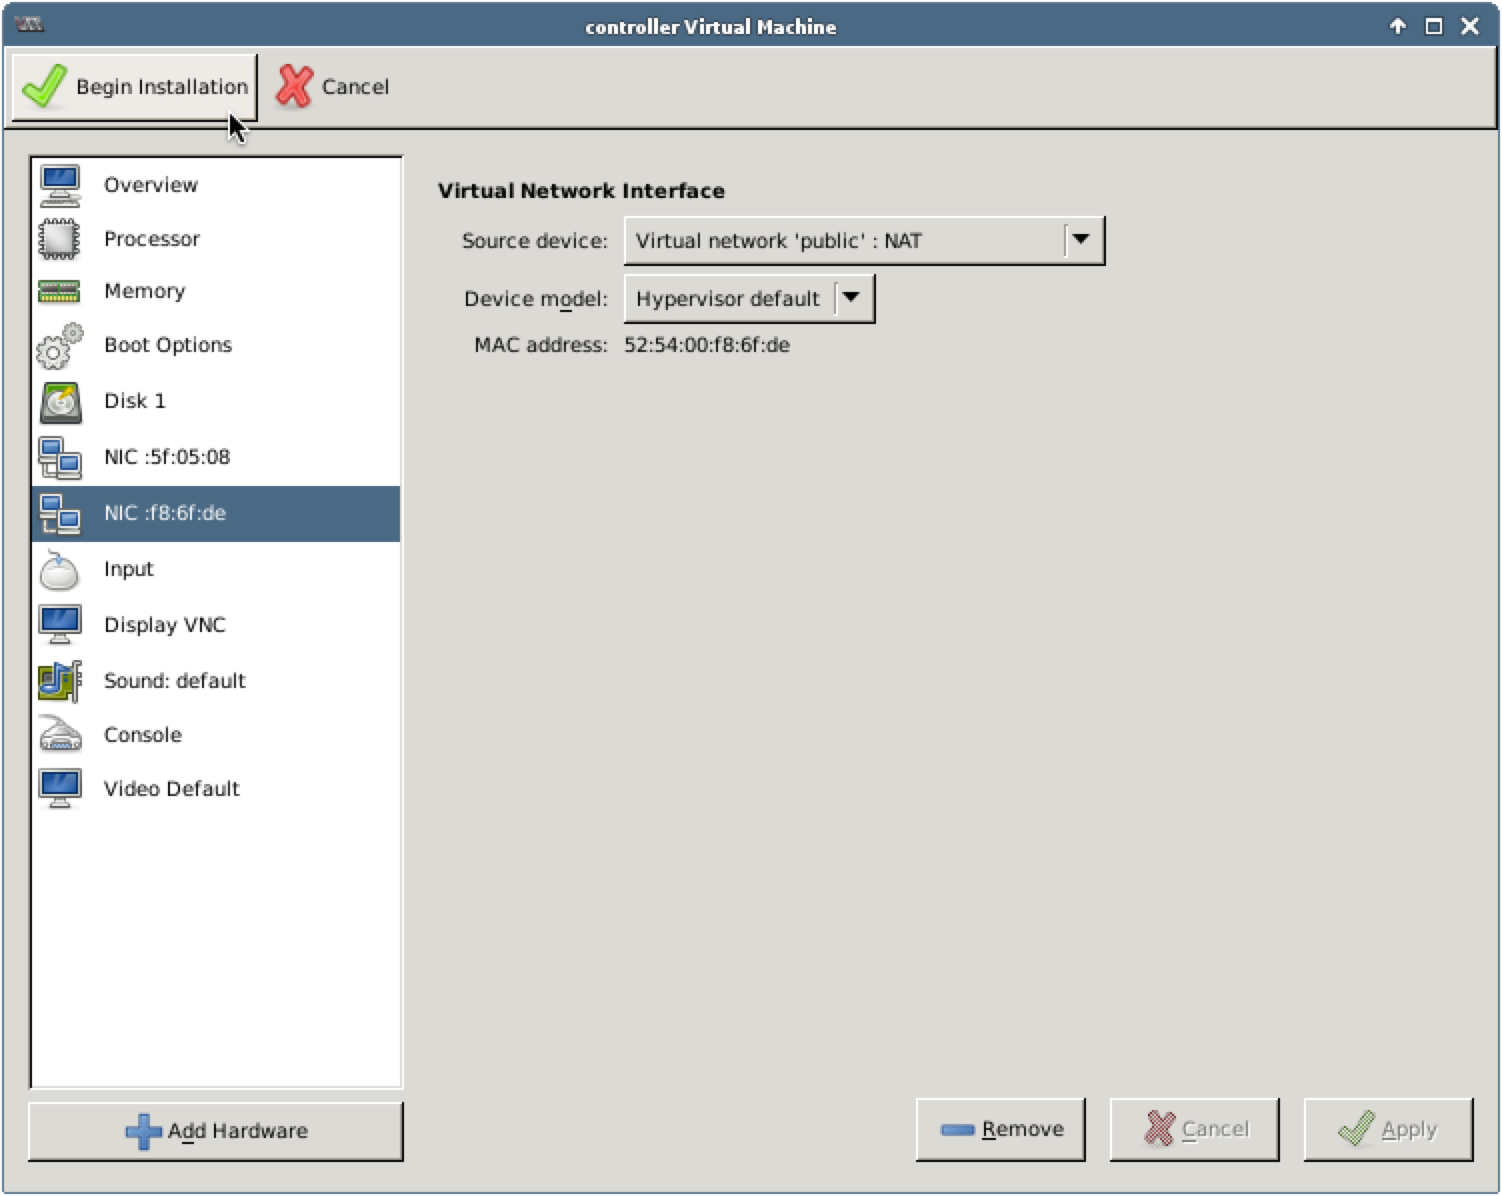
Important
The order of network interfaces is important! You should create a new network interface after the existing one.
Step 8 Press Begin Installation. The Virtual Machine Manager will create a new VM with the specified settings and launch the VM console automatically. Installation progress can be viewed in this console.
4.2.2. Create Compute Node
Name:       compute
CPUs:       2
RAM:        4096MB
Disk:       60GB
Network 1:  Virtual network 'admin'  : Isolated
Network 2:  Virtual network 'public' : NAT
Step 1 Launch the Virtual Machine Manager. In the main window, press New to create a new virtual machine.
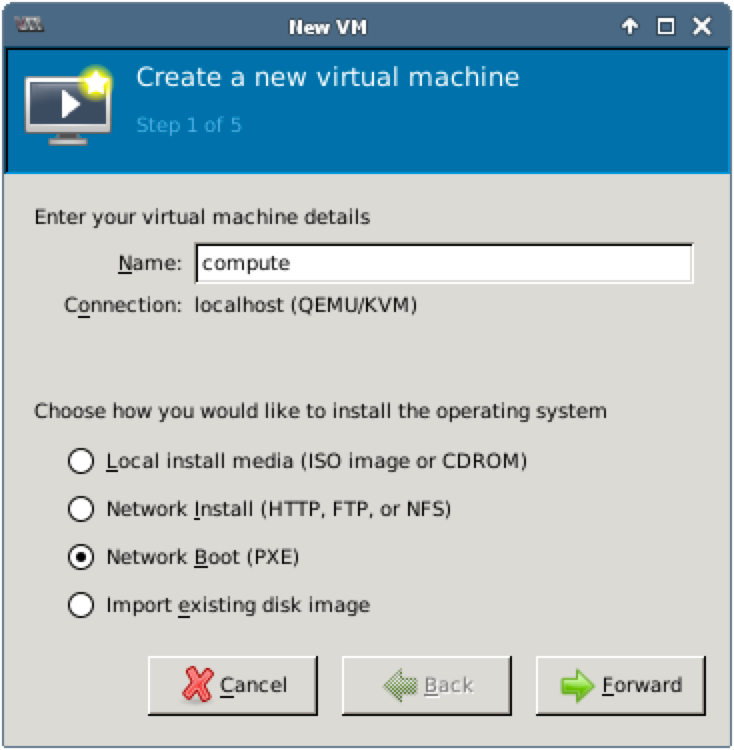
Step 2 In the New VM window, enter compute in the Name field, choose Network Boot (PXE) and press Forward.
Step 3 Choose Linux for OS type and Ubuntu 14.04 LTS (Trusty Tahr) for Version. Press Forward.
Step 4 Enter 4096 for Memory (RAM) and 2 for CPUs. Press Forward.
Step 5 Choose Create a disk image on the computer's hard drive option, enter 60 for disk size, uncheck Allocate entire disk now checkbox and press Forward.
Important
Please check that you have changed the default disk size to 60GB. Also, please check that you have unchecked the Allocate entire disk now checkbox. Your environment has limited available disk space. If you choose to allocate entire disk now you will run out of disk space while creating additional VMs later.
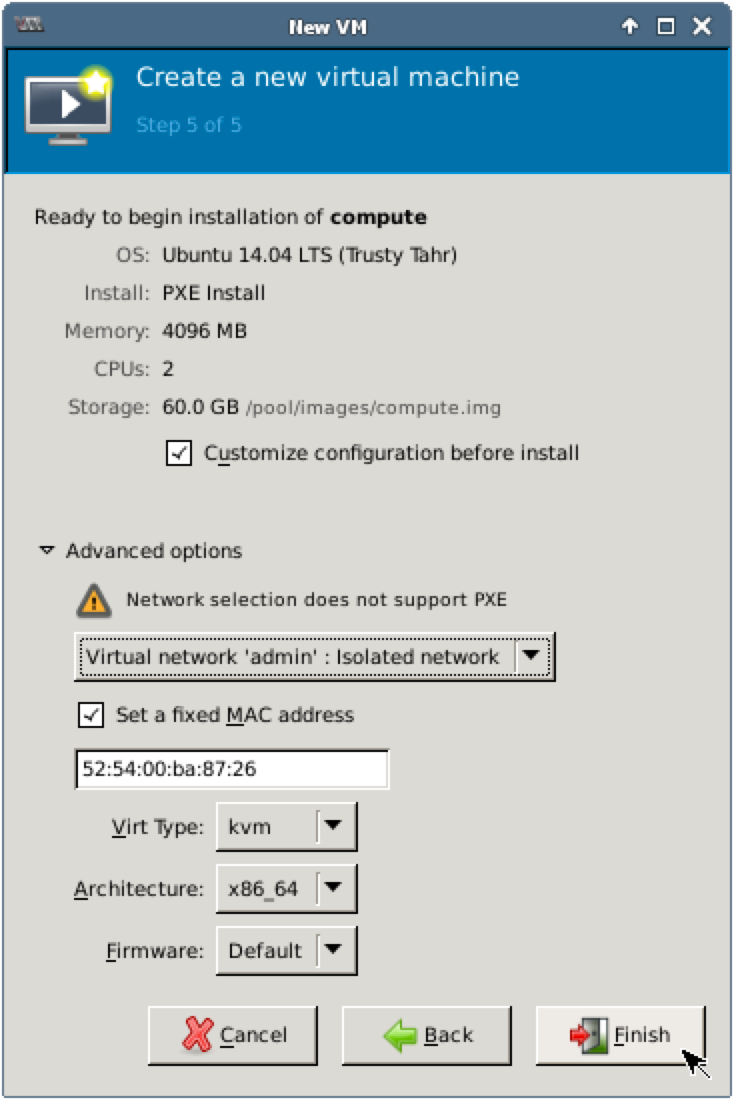
Step 6 Check Customize configuration before install. Click on Advanced options to expand it. Choose Virtual network 'admin': Isolated network. Virtual Machine Manager will generate MAC address for NIC. Check that Virt Type is kvm, Architecture is x86_64 and Firmware is Default. Press Finish.
Step 7 Choose Input from the list. Press Add Hardware, which is located at the bottom of the window. Choose Netwok from the list in Add New Virtual Hardware. Choose Virtual network 'public' : NAT for Host device. Keep Hypervisor default for Device model field. Press Finish.

Important
The order of network interfaces is important! You should create a new network interface after the existing one.
Step 8 Press Begin Installation. The Virtual Machine Manager will create a new VM with the specified settings, launch it and open the VM console window.
4.3. Create a New Environment
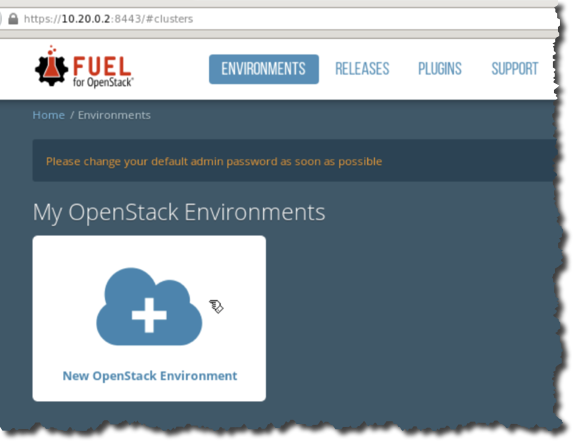
Step 1 Log in to the Fuel UI.
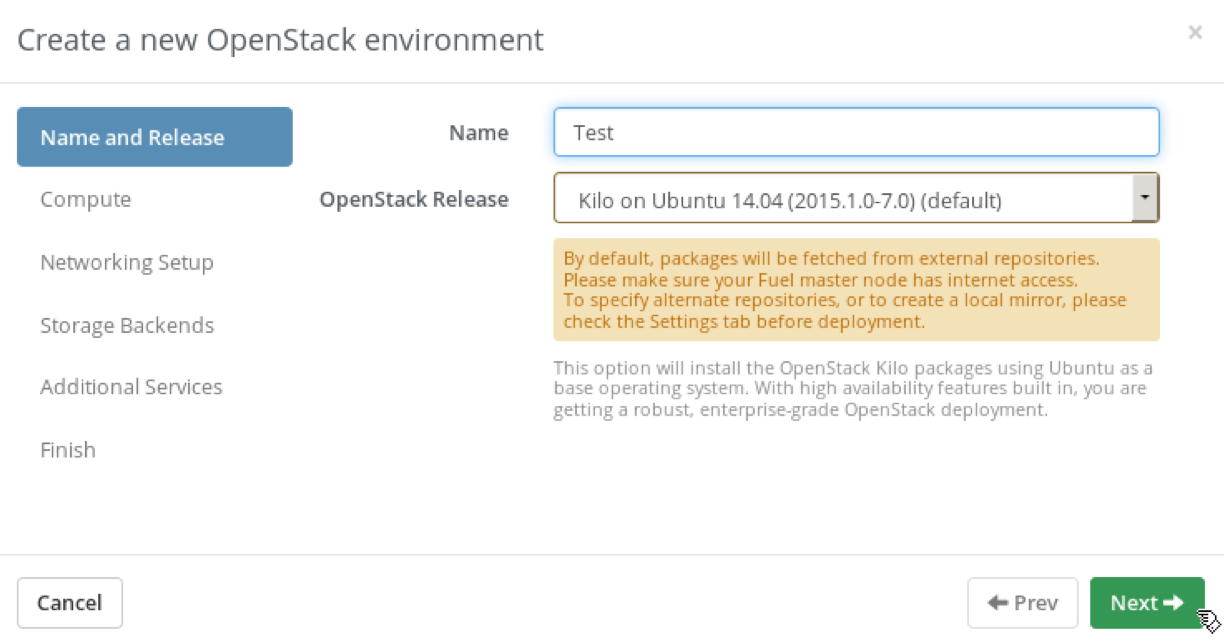
Step 2 From Fuel’s main menu, choose Environments, then select New OpenStack Environment.
Step 3 Enter Test in the Name field and press Next.
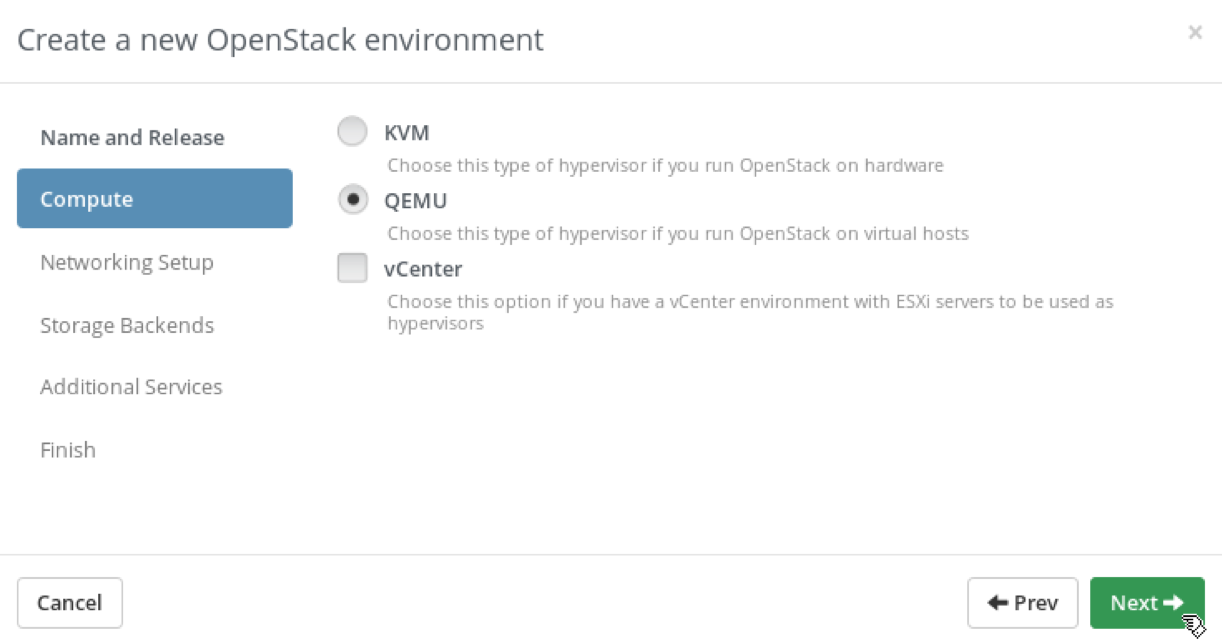
Step 4 Choose QEMU and press Next.
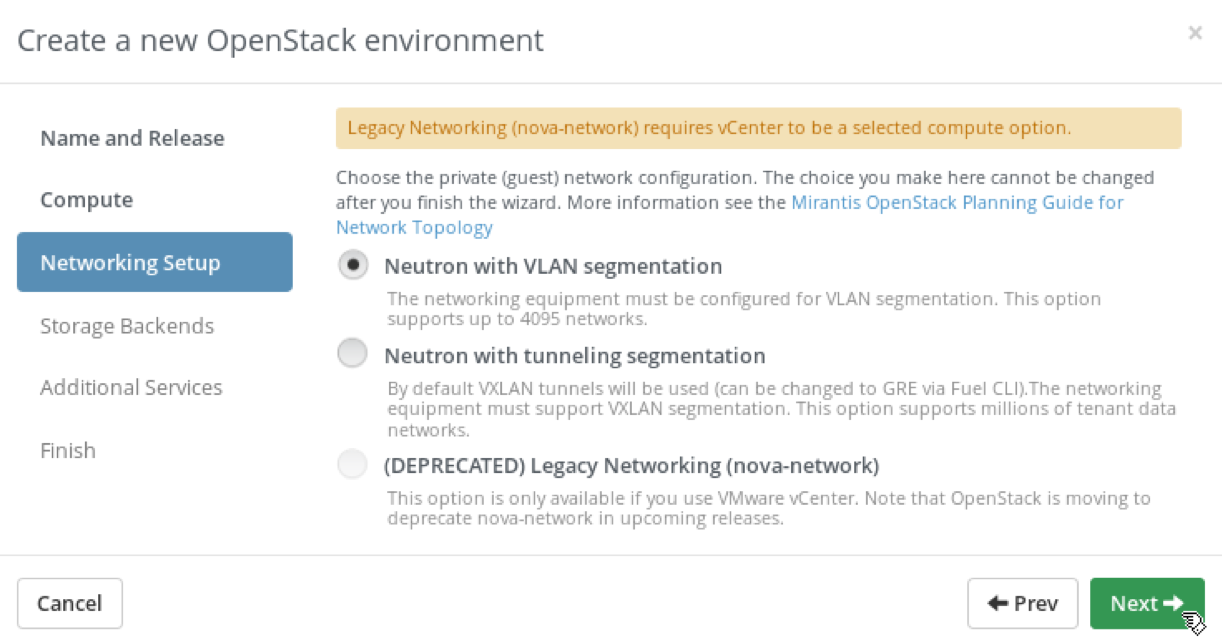
Step 5 Choose Neutron with VLAN segmentation and press Next.
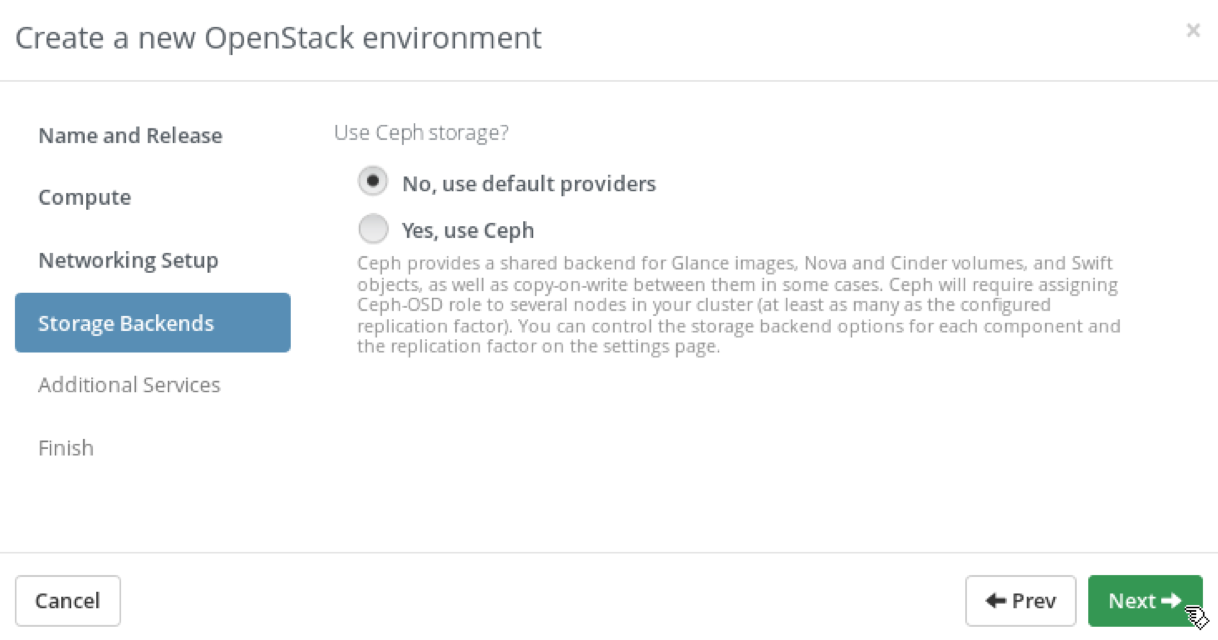
Step 6 Choose No, use default providers and press Next.
Step 7 Do not check any boxes on the Additional Services page and press Next.

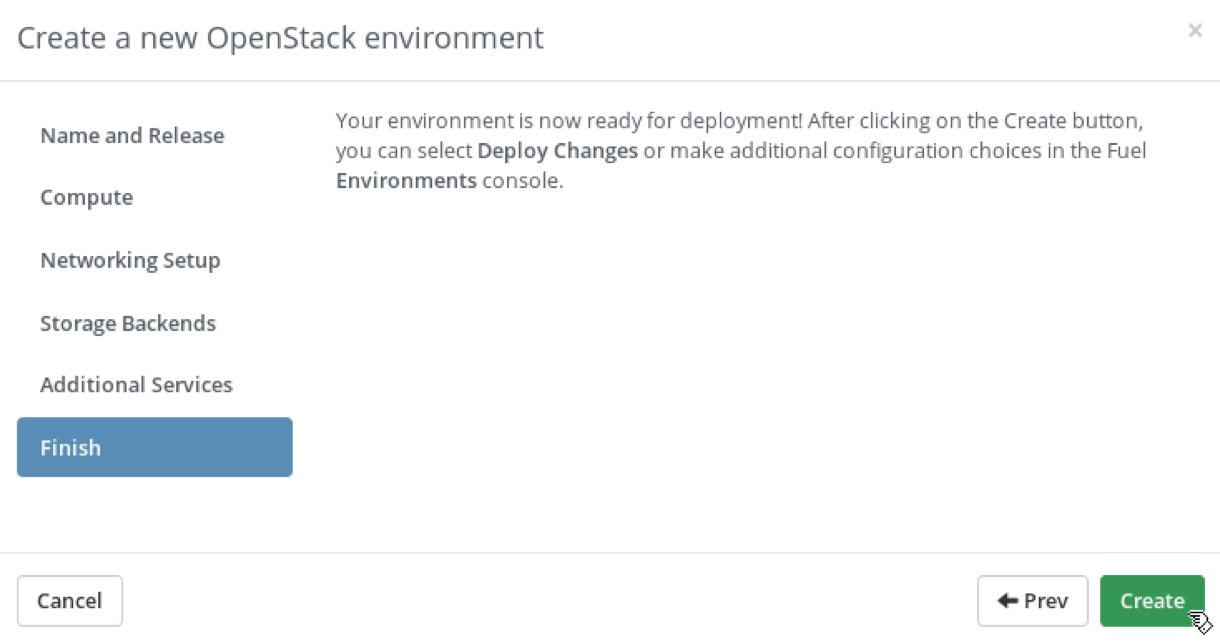
Step 8 Press Create on the last step.
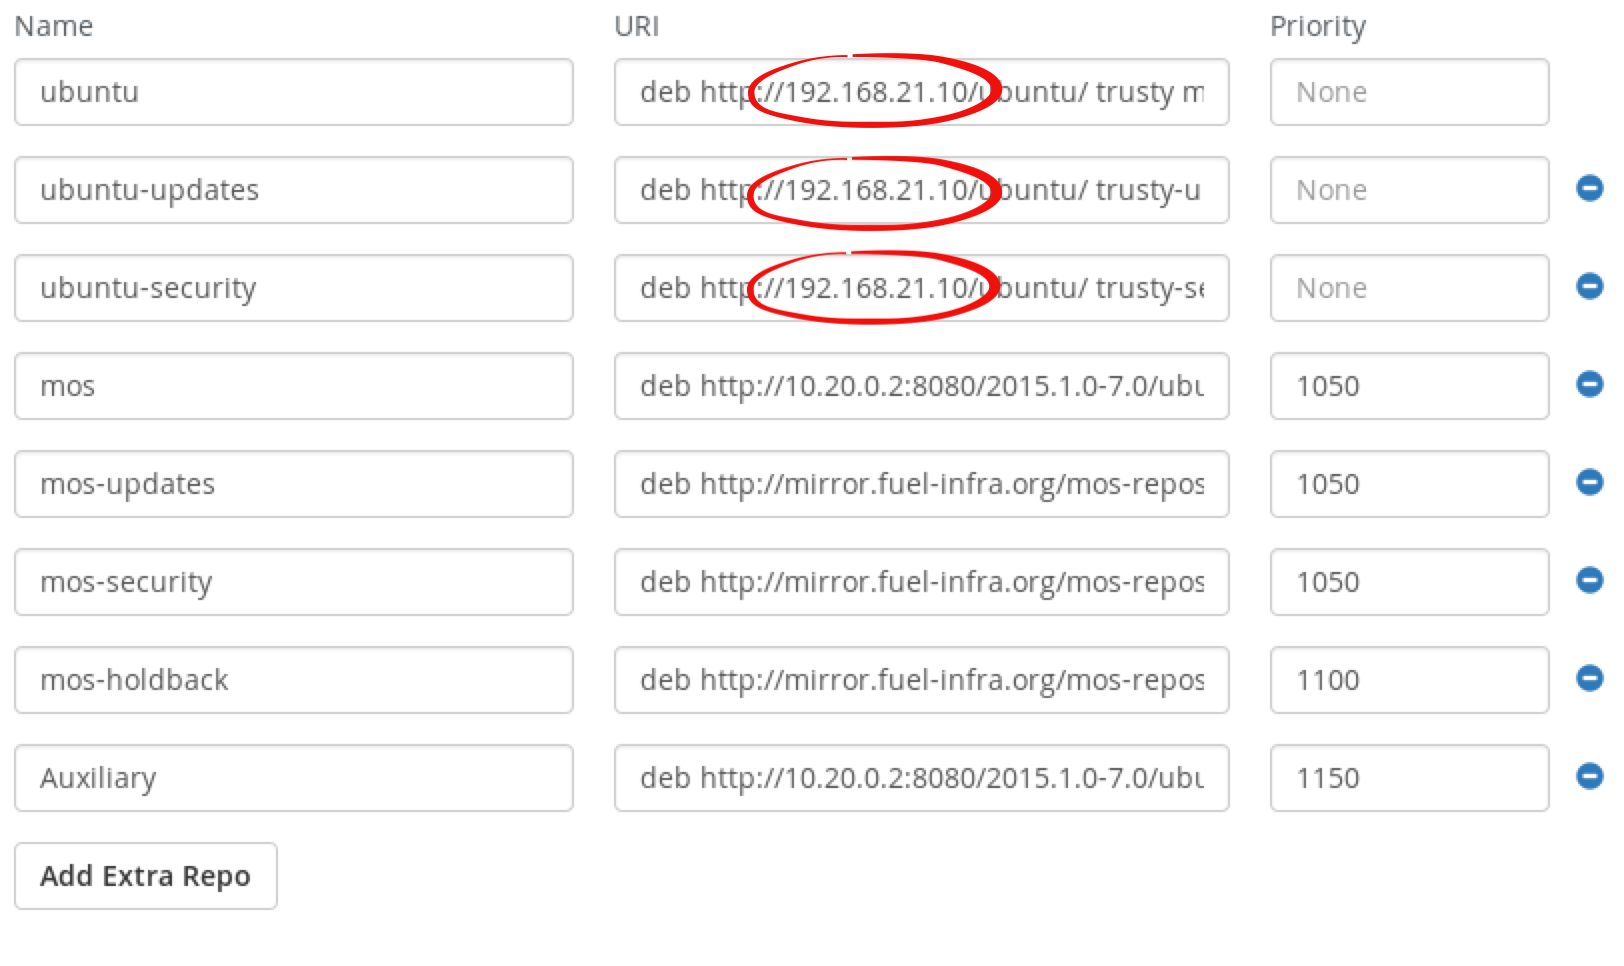
Step 9 Configure repositories. From Fuel’s main menu choose Environments, press on Test environment and choose Settings tab. Choose the menu item Repositories.

Fuel uses these repositories to download Ubuntu packages and updates for the operating system and the product. Replace archive.ubuntu.com in the first three fields to 192.168.21.10.
Note
4.4. Assign Roles to the Nodes
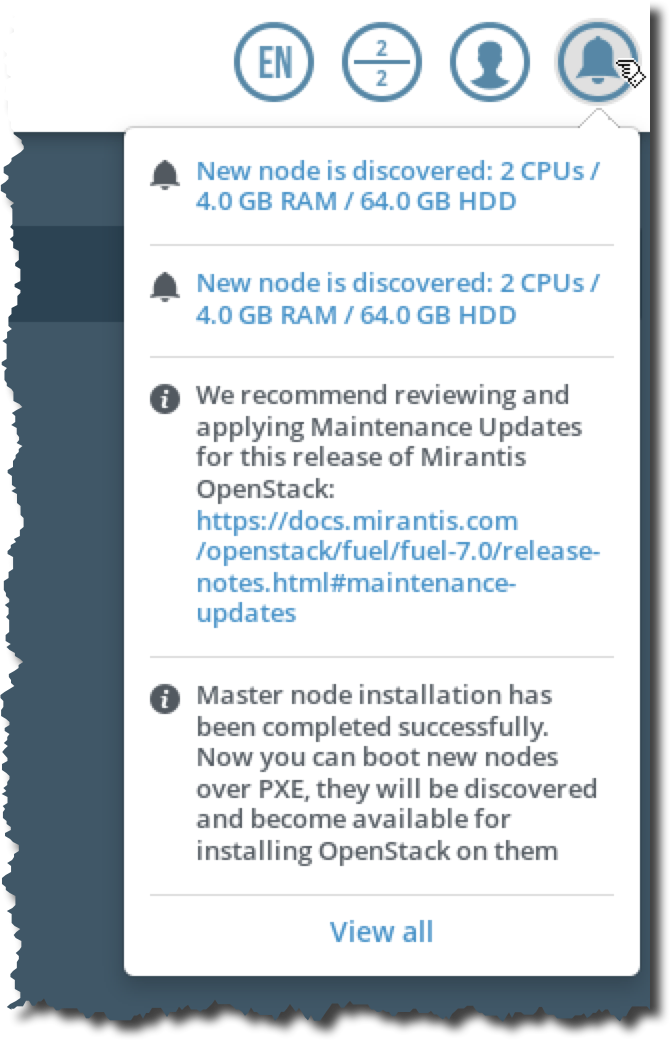
Step 1 Wait while Fuel discovers new nodes. Fuel will boot new nodes, providing a bootstap image via PXE. After the boot, nodes will report their availability to the Fuel Master node. You will get two new notifications in Fuel UI when new nodes are discovered.
Step 2 From Fuel’s main menu, choose Environments, press on Test environment and choose the Nodes tab.
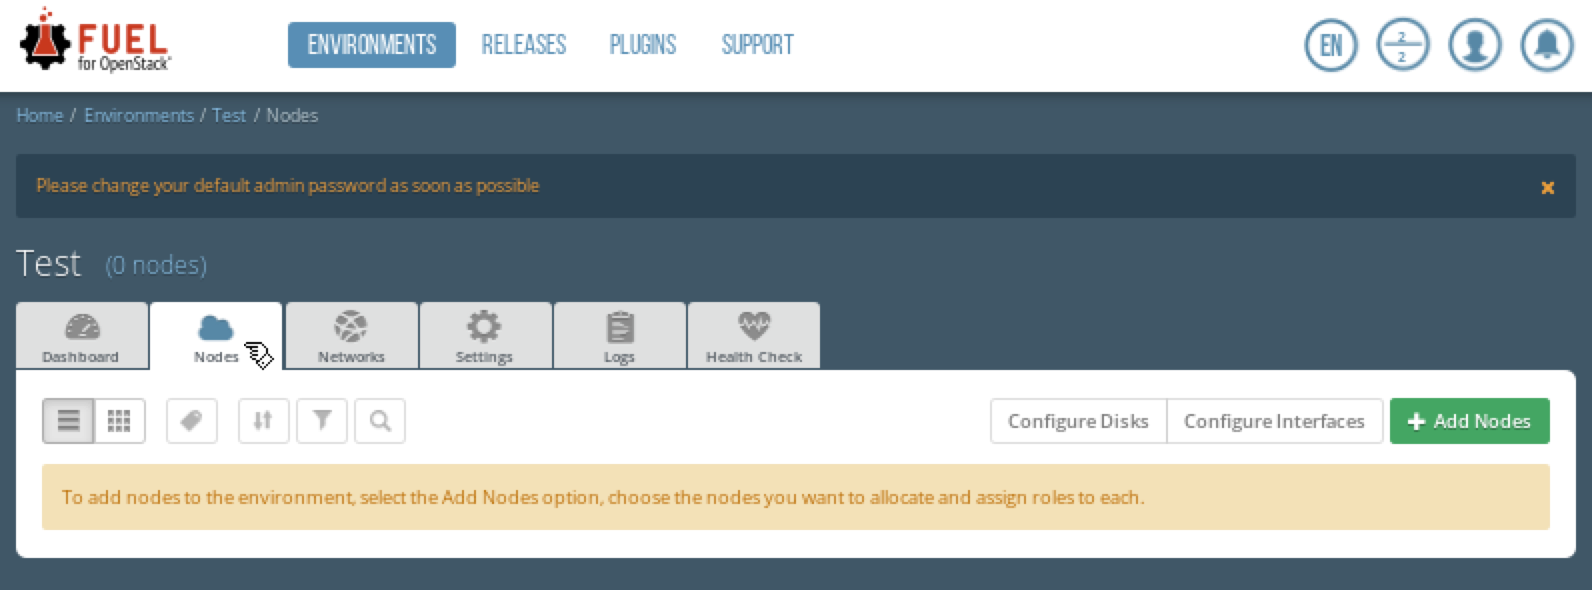
Step 3 Press Add Nodes. Fuel will show the available roles and discovered nodes.
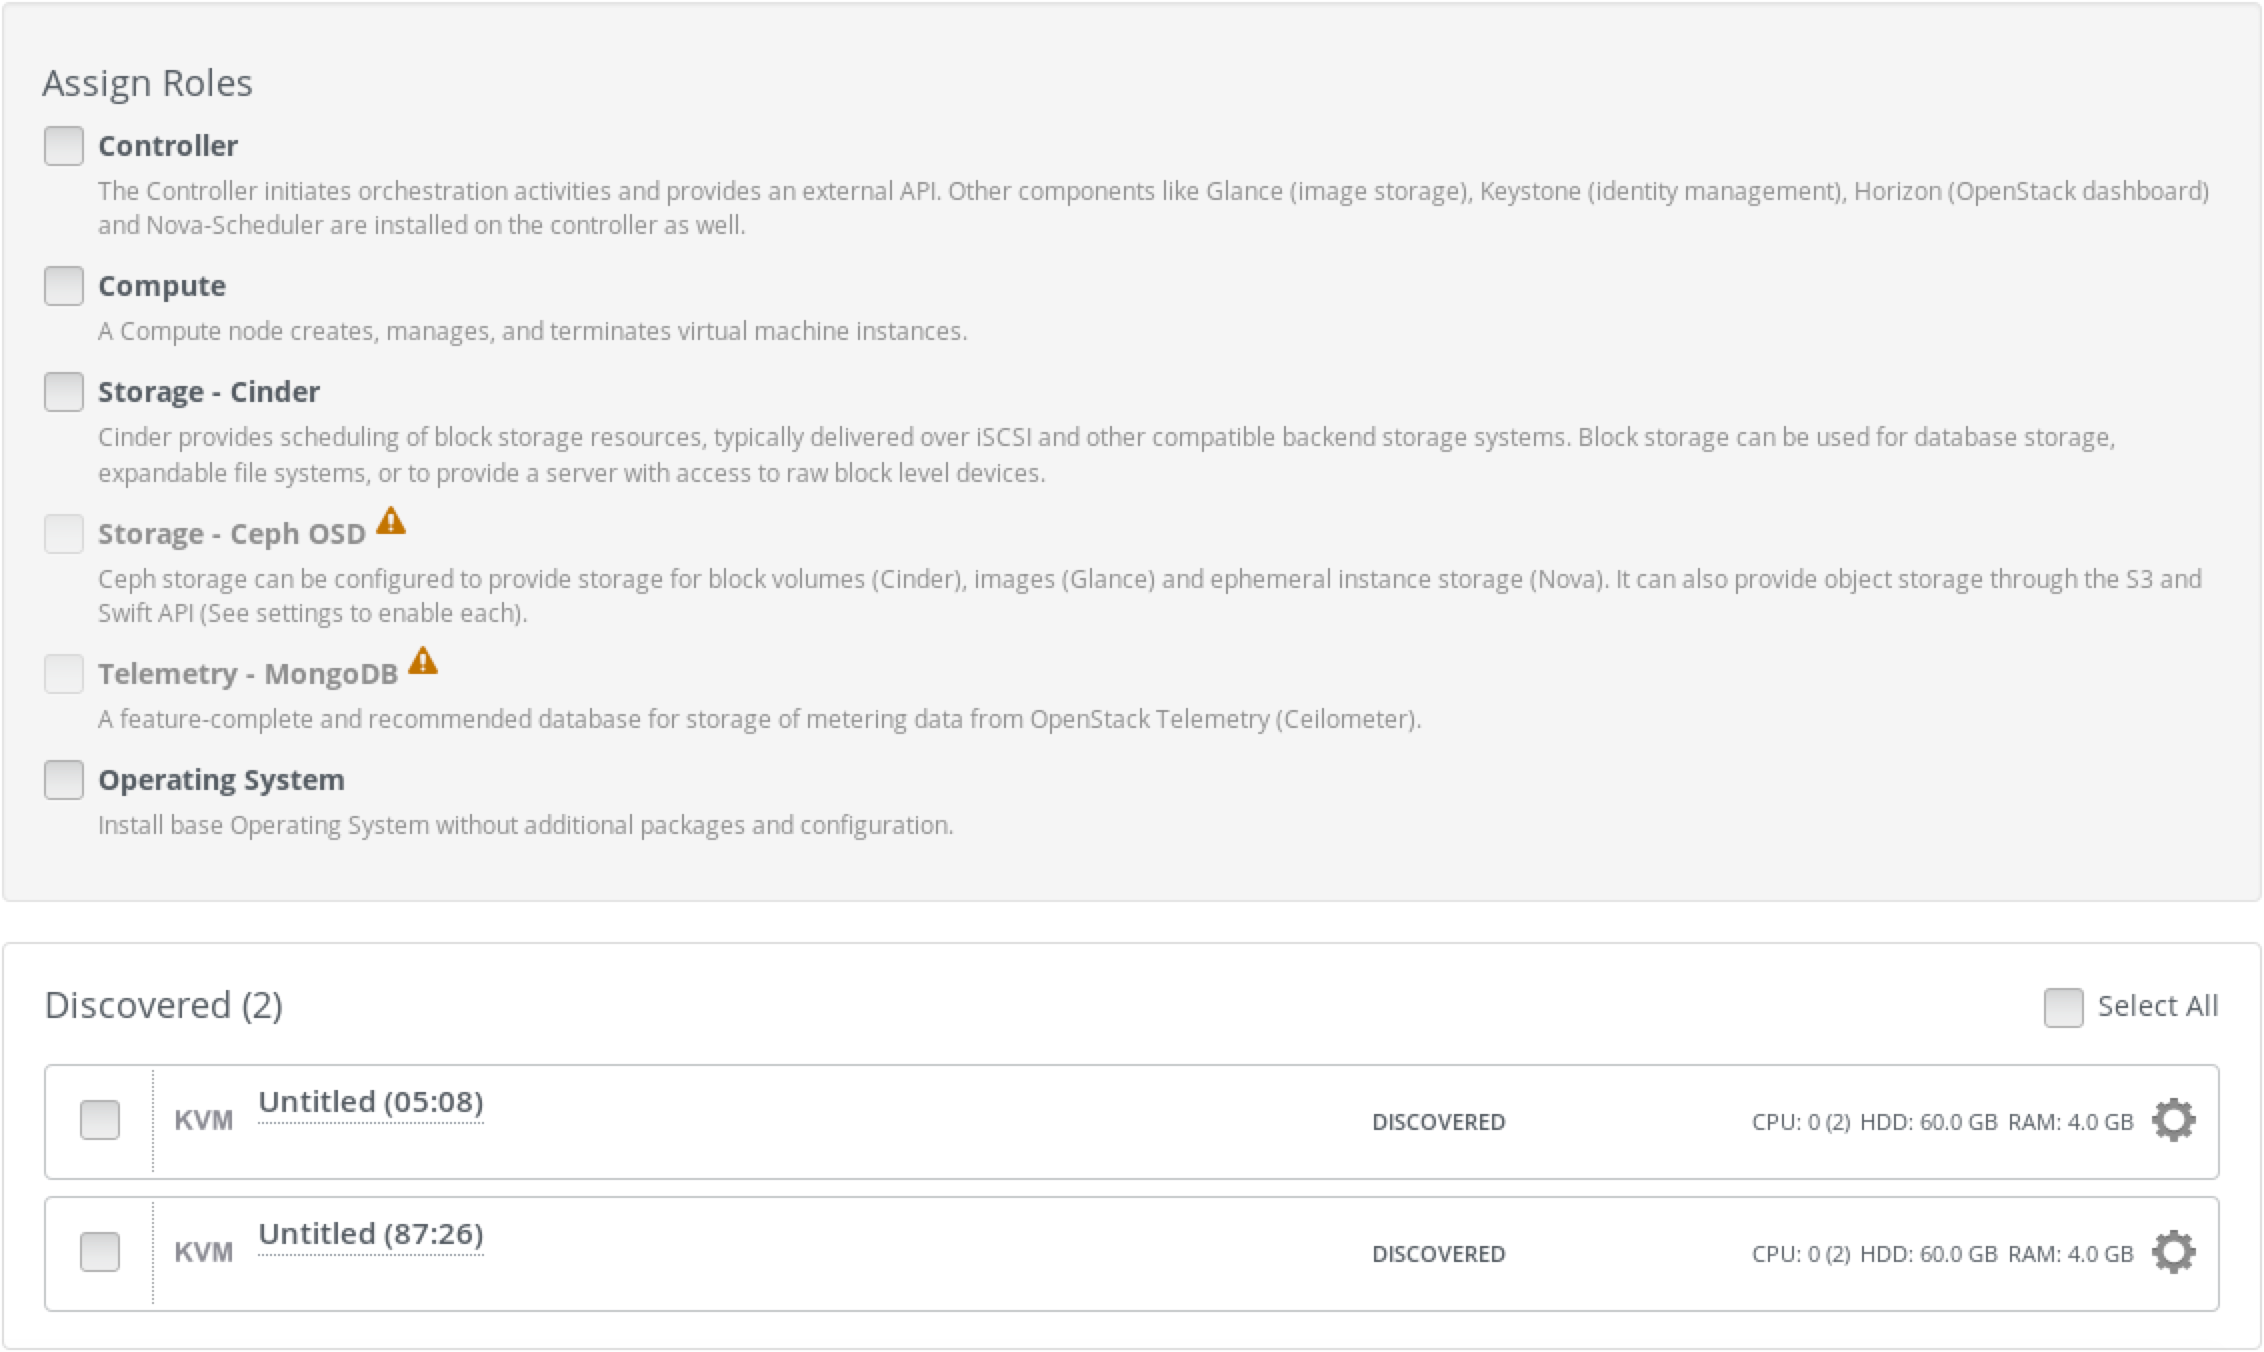
Step 4 Assign Controller role to the controller VM.
You will see, that there are two discovered nodes named Untitled (xx:xx). To find out which discovered node is a controller VM, launch Virtual Machine Manager, open details for controller (double click on controller, then press Details), and choose the first NIC from the list. On the right side there is MAC address for the selected NIC. Copy the MAC address to the clipboard.

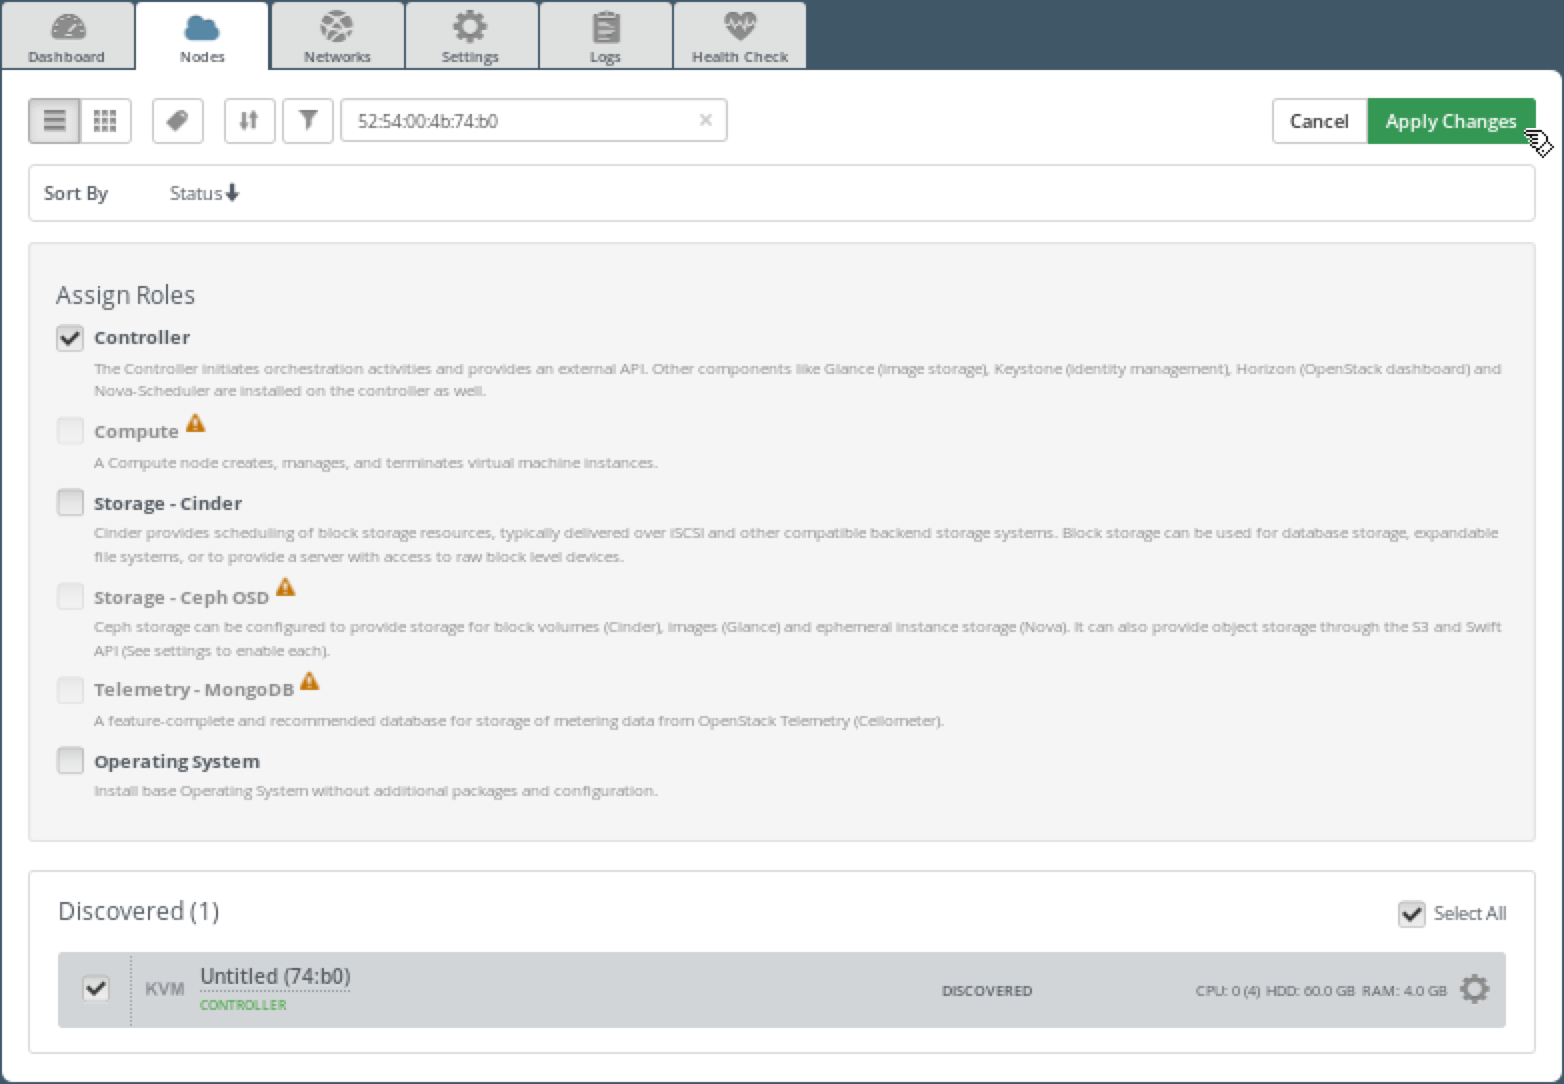
Return to the Add Nodes page in Fuel UI. Choose Controller from the list of roles. Click on the Quick Search icon and enter (or paste from the clipboard) the MAC address of controller VM to the text field.
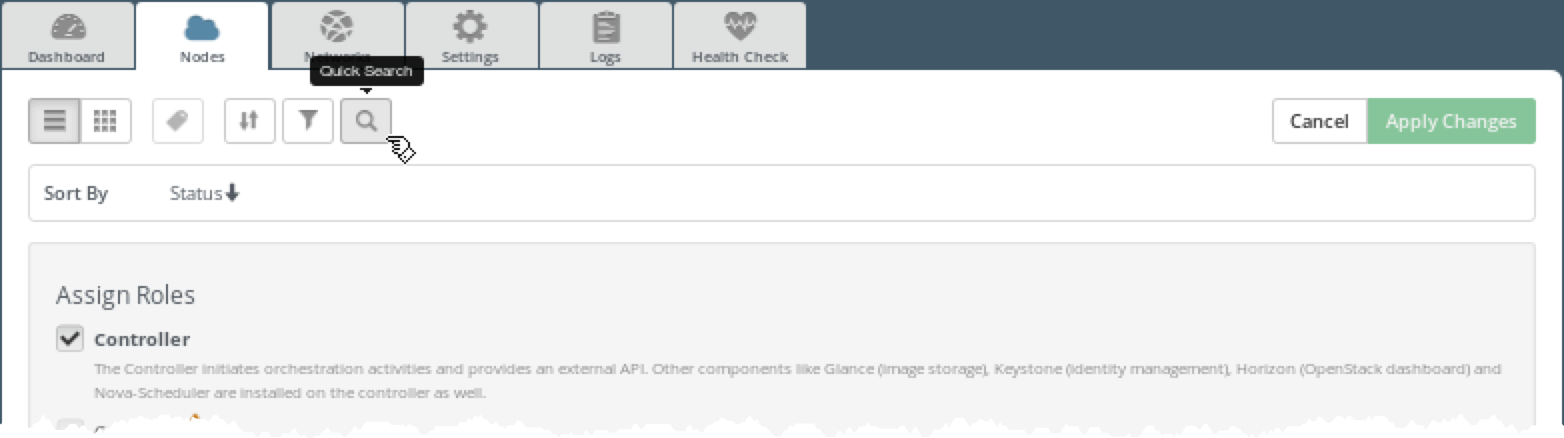
Fuel UI will show the node with the specified MAC address. Click on the node to select it. Press Apply Changes to assign the controller role to the controller VM.
Note
As you can see, the default node name, for example Untitled (74:b0), already contains the last two bytes (74:b0) of the MAC address so you can easily identify where the controller VM is in this specific case. Searching by MAC address works well in situations where there are many discovered nodes at the same time. You can also use Filter Nodes to filter nodes by roles, status, number of CPUs, HDD size, RAM size, etc.
Step 5 Assign the Compute role to the compute VM.
Press Add Nodes. Choose Compute from the list of roles. Choose a second discovered node, if necessary. Press Apply Changes.

4.5. Verify Networks
Step 1 Check network interfaces for target nodes. Choose the Nodes tab, press Select All to select all of the nodes, then press Configure Interfaces.
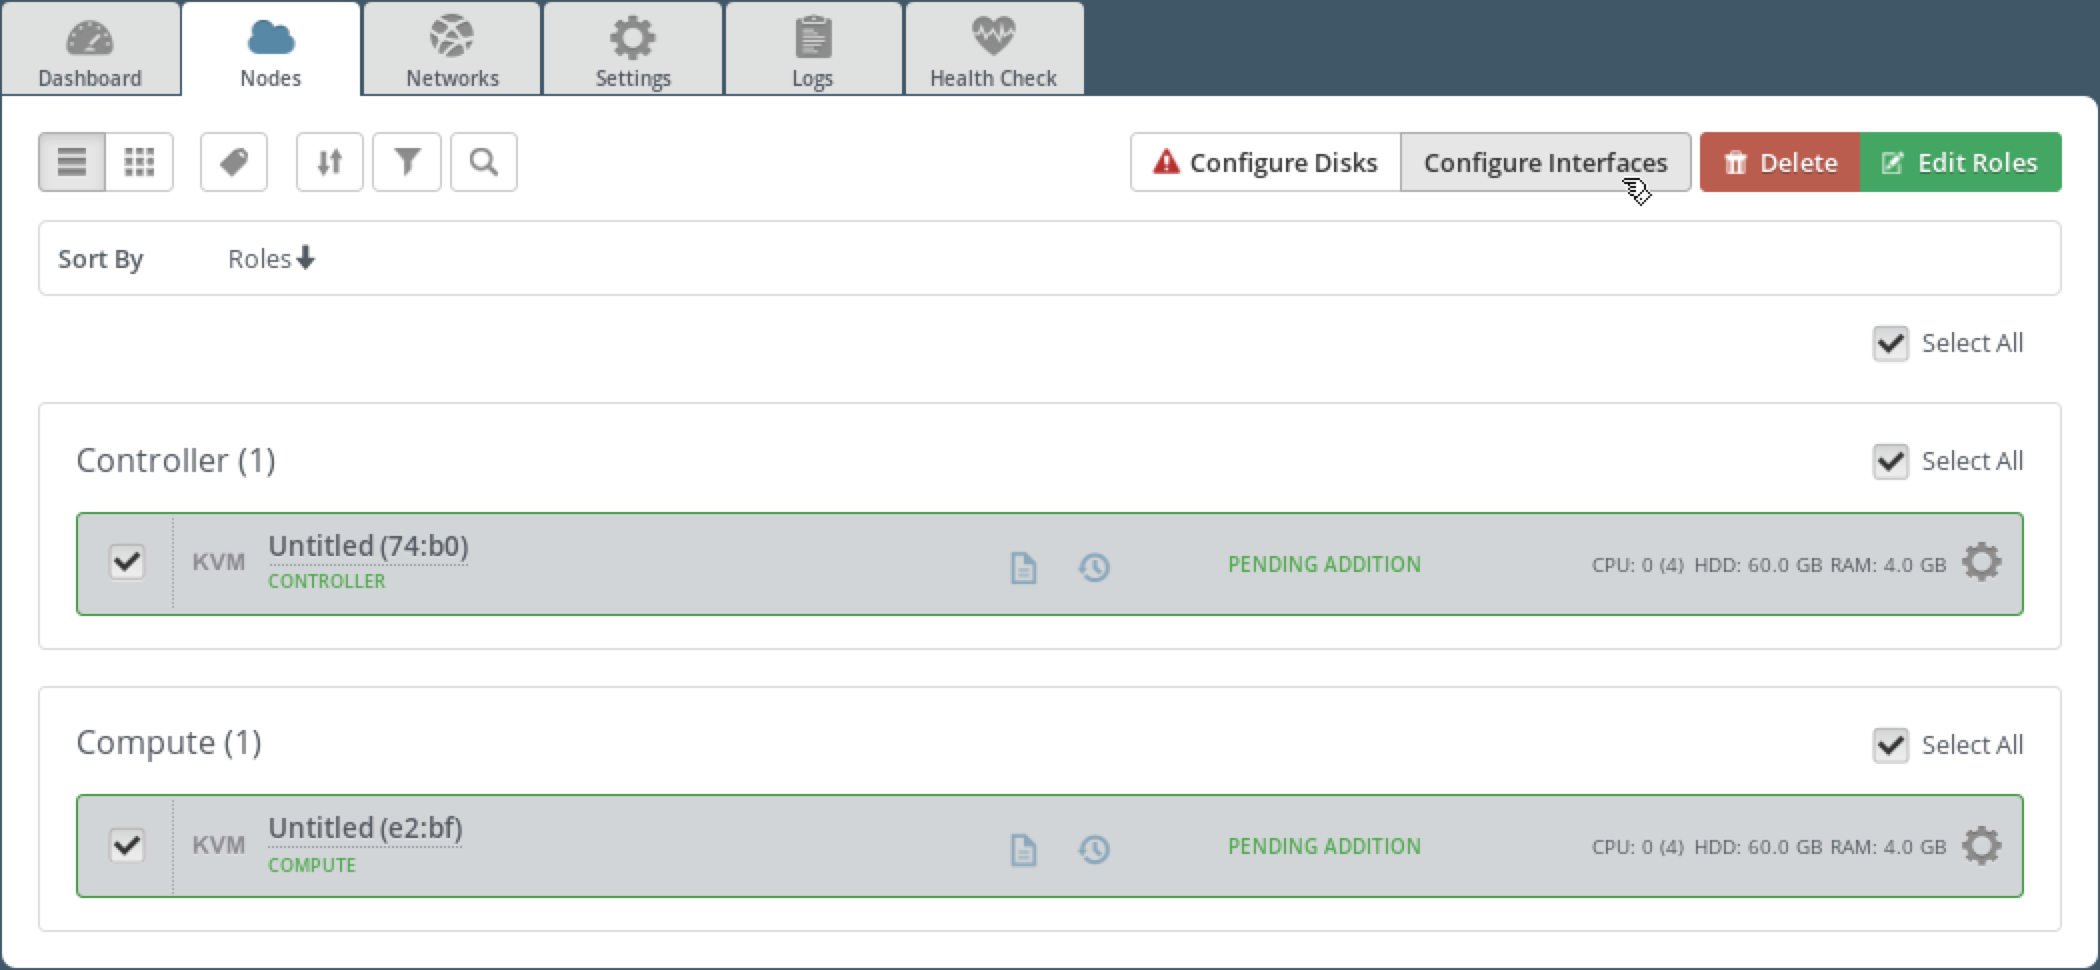
Check that the admin network is untagged and assigned to the first network interface (eth0). Storage, management and private networks share the same interface and use VLAN tags for separation. The public network is untagged and assigned to the second network interface (eth1).

Step 2 Choose the Networks tab. We will use the default network configuration provided by Fuel. Scroll down the page and press Verify Networks.
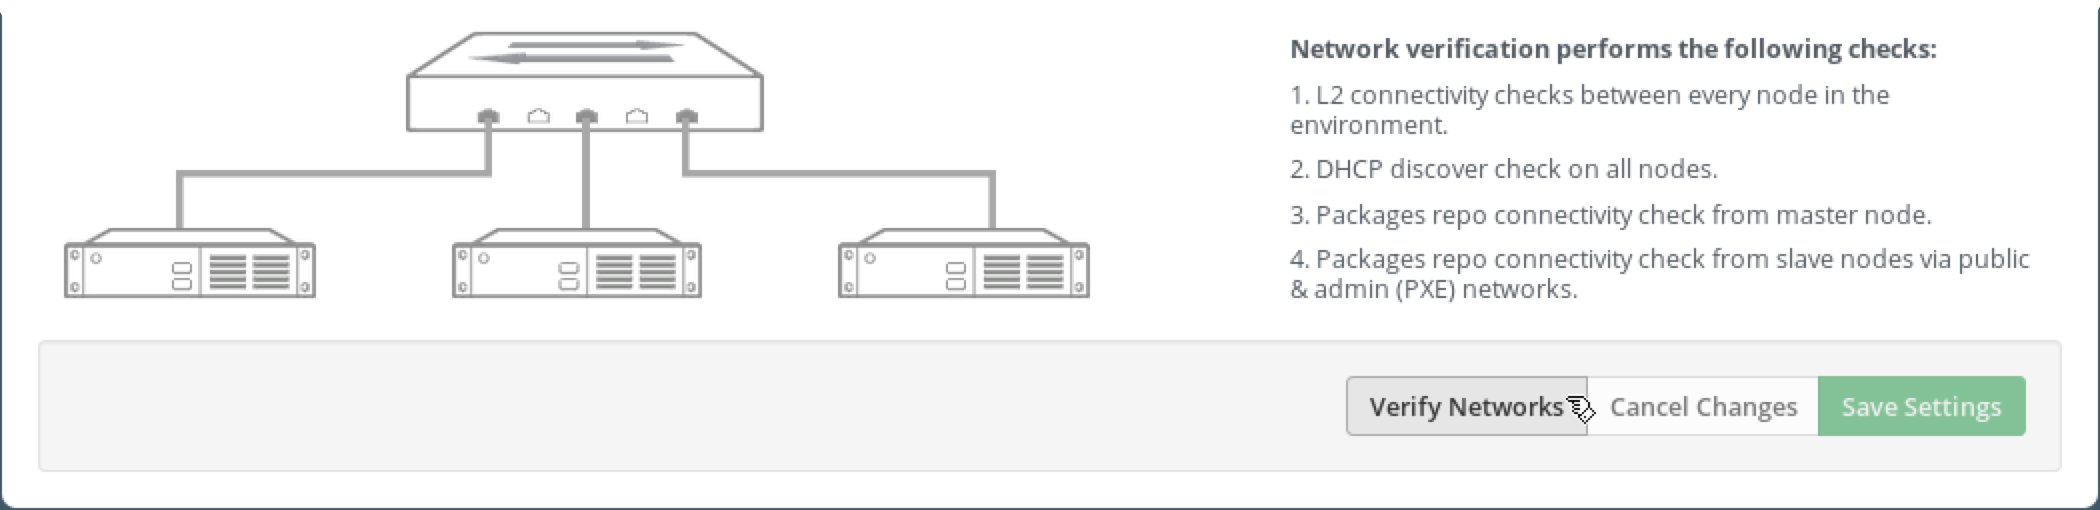
Step 3 It will take several minutes to verify the network. You should get the message “Verification succeeded. Your network is configured correctly” when the verification is complete.

4.6. Deploy Simple Environment
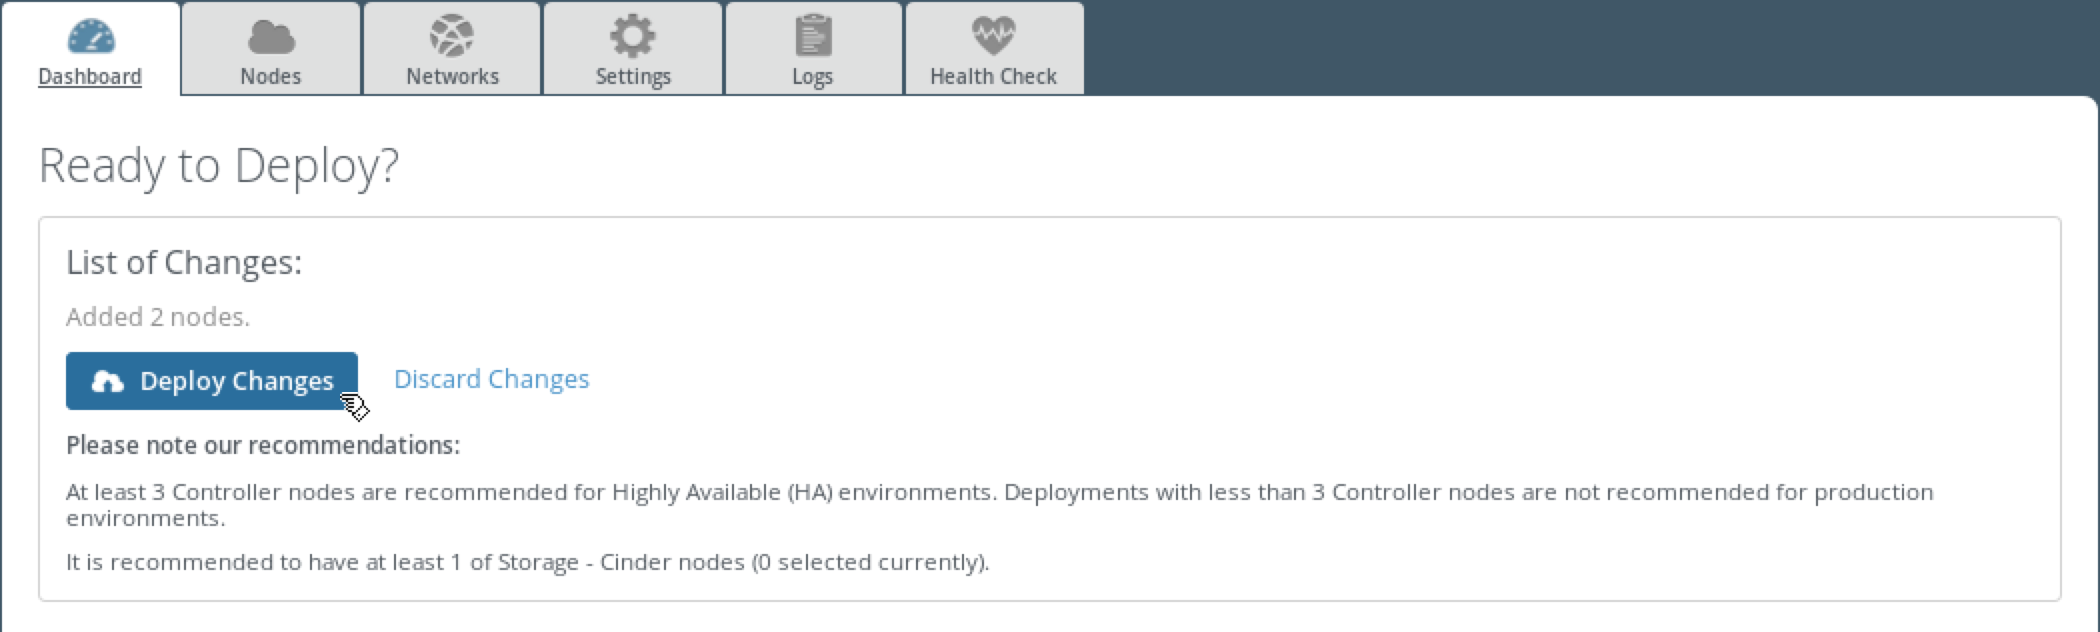
Step 1 Choose the Dashboard tab. Press Deploy Changes.
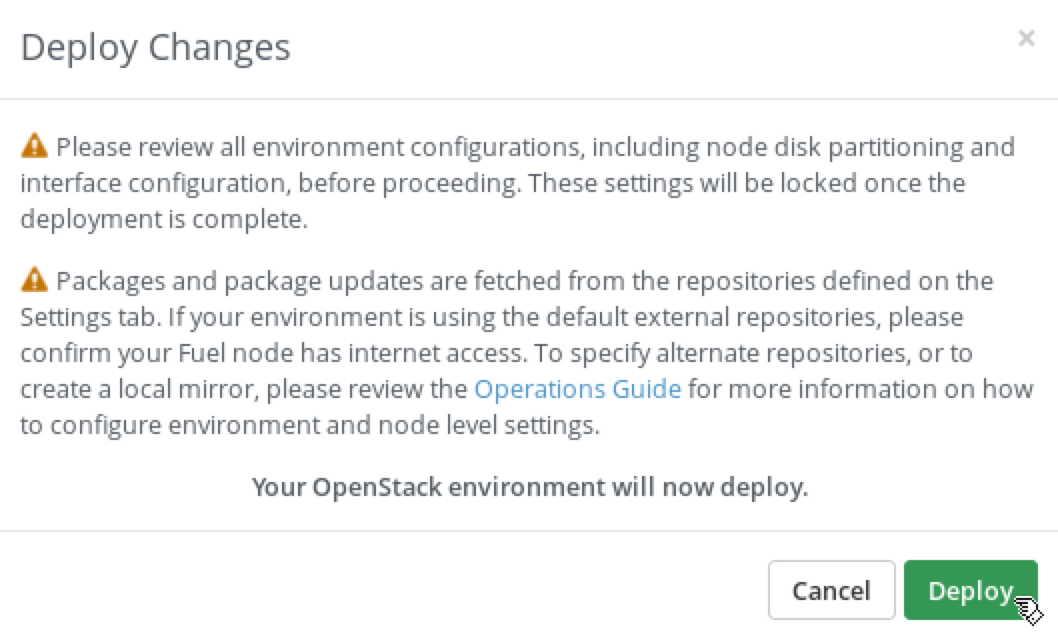
Step 2 Fuel will display a confirmation dialog. Press Deploy.
Step 3 Please wait while Fuel is installing the OpenStack environment. It will take around 1 hour to complete the deployment.
4.7. Verify Simple Environment
4.7.1. Launch an Instance
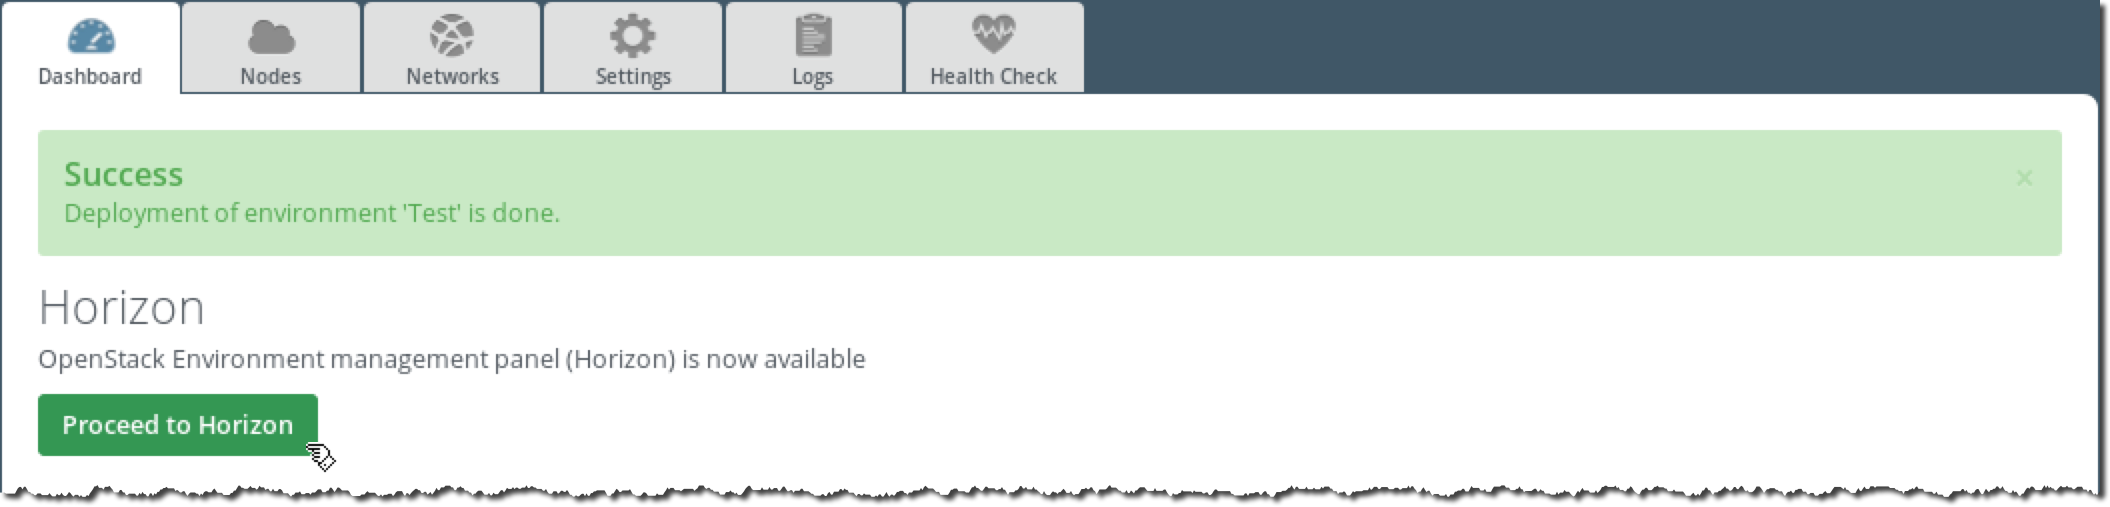
Step 1 Click Proceed to Horizon or open the following link in Firefox: https://172.16.0.3. Use name admin and password admin to log in. Firefox will complain about using the untrusted connection, see 1.5. Working with Firefox for a workaround.
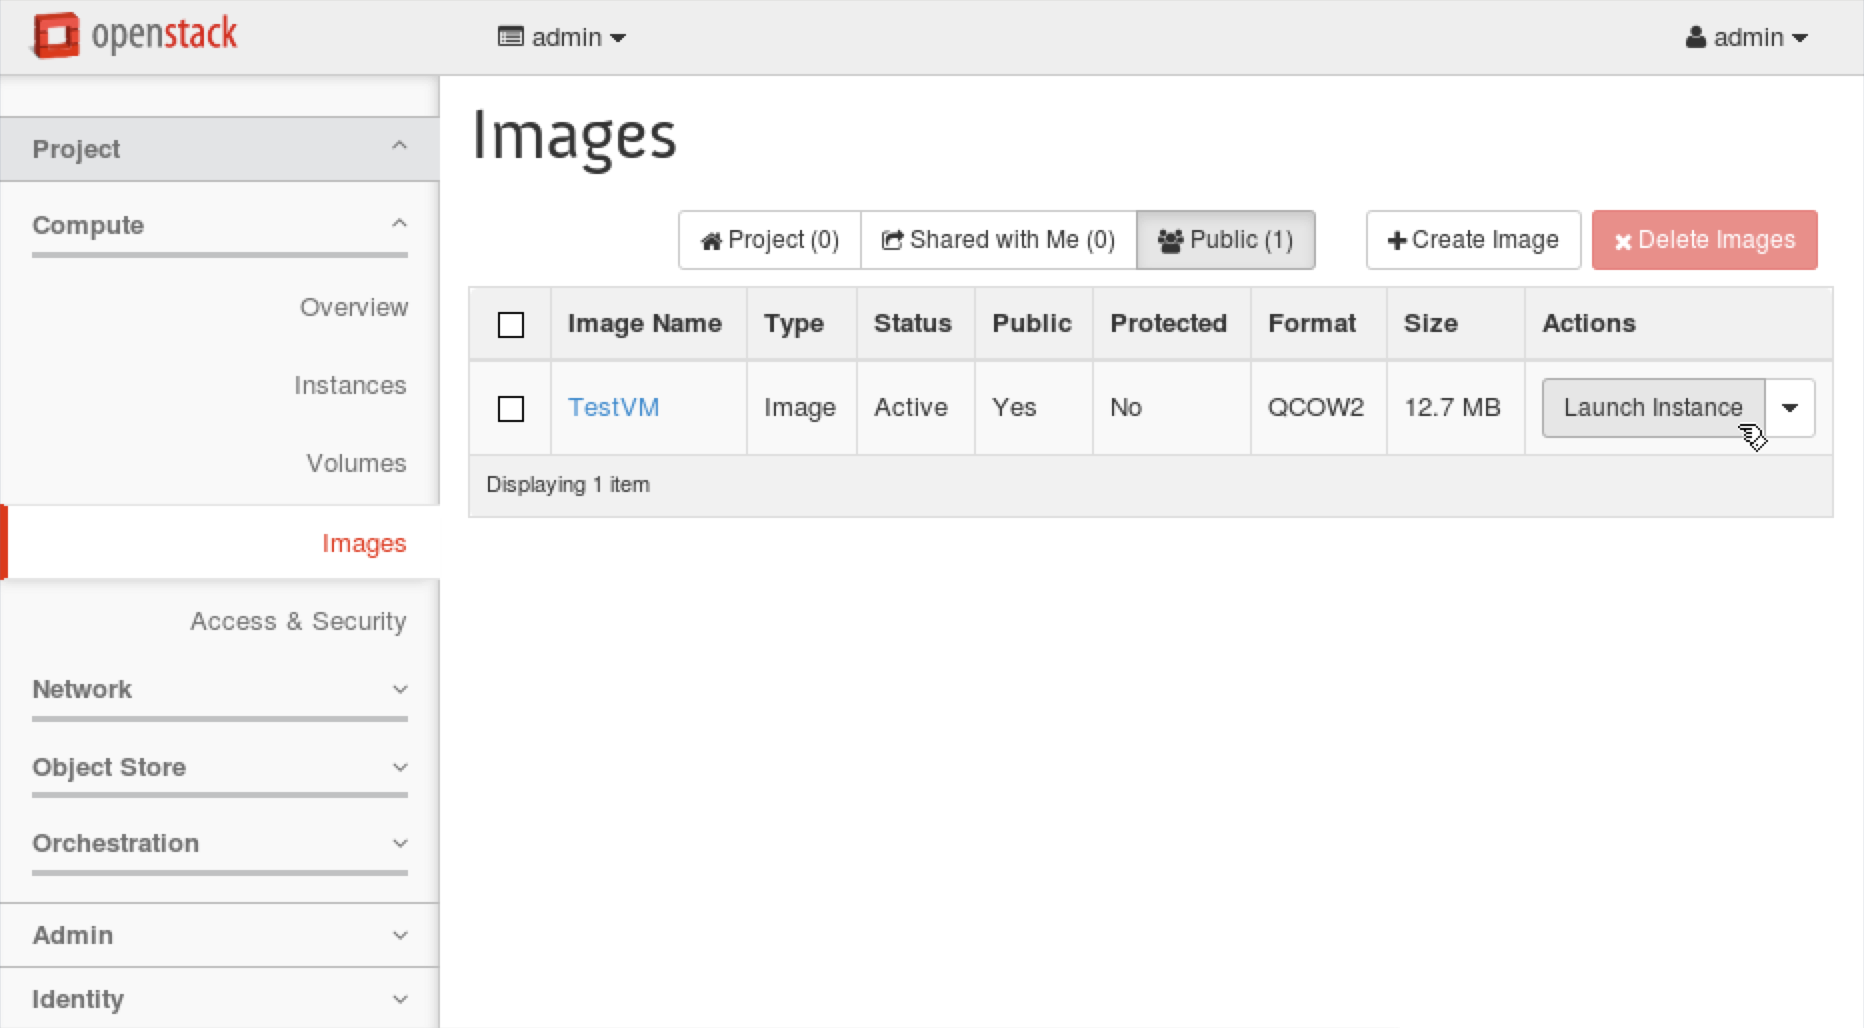
Step 2 From the navigation menu choose Project, Images. Press Launch Instance for the TestVM image.
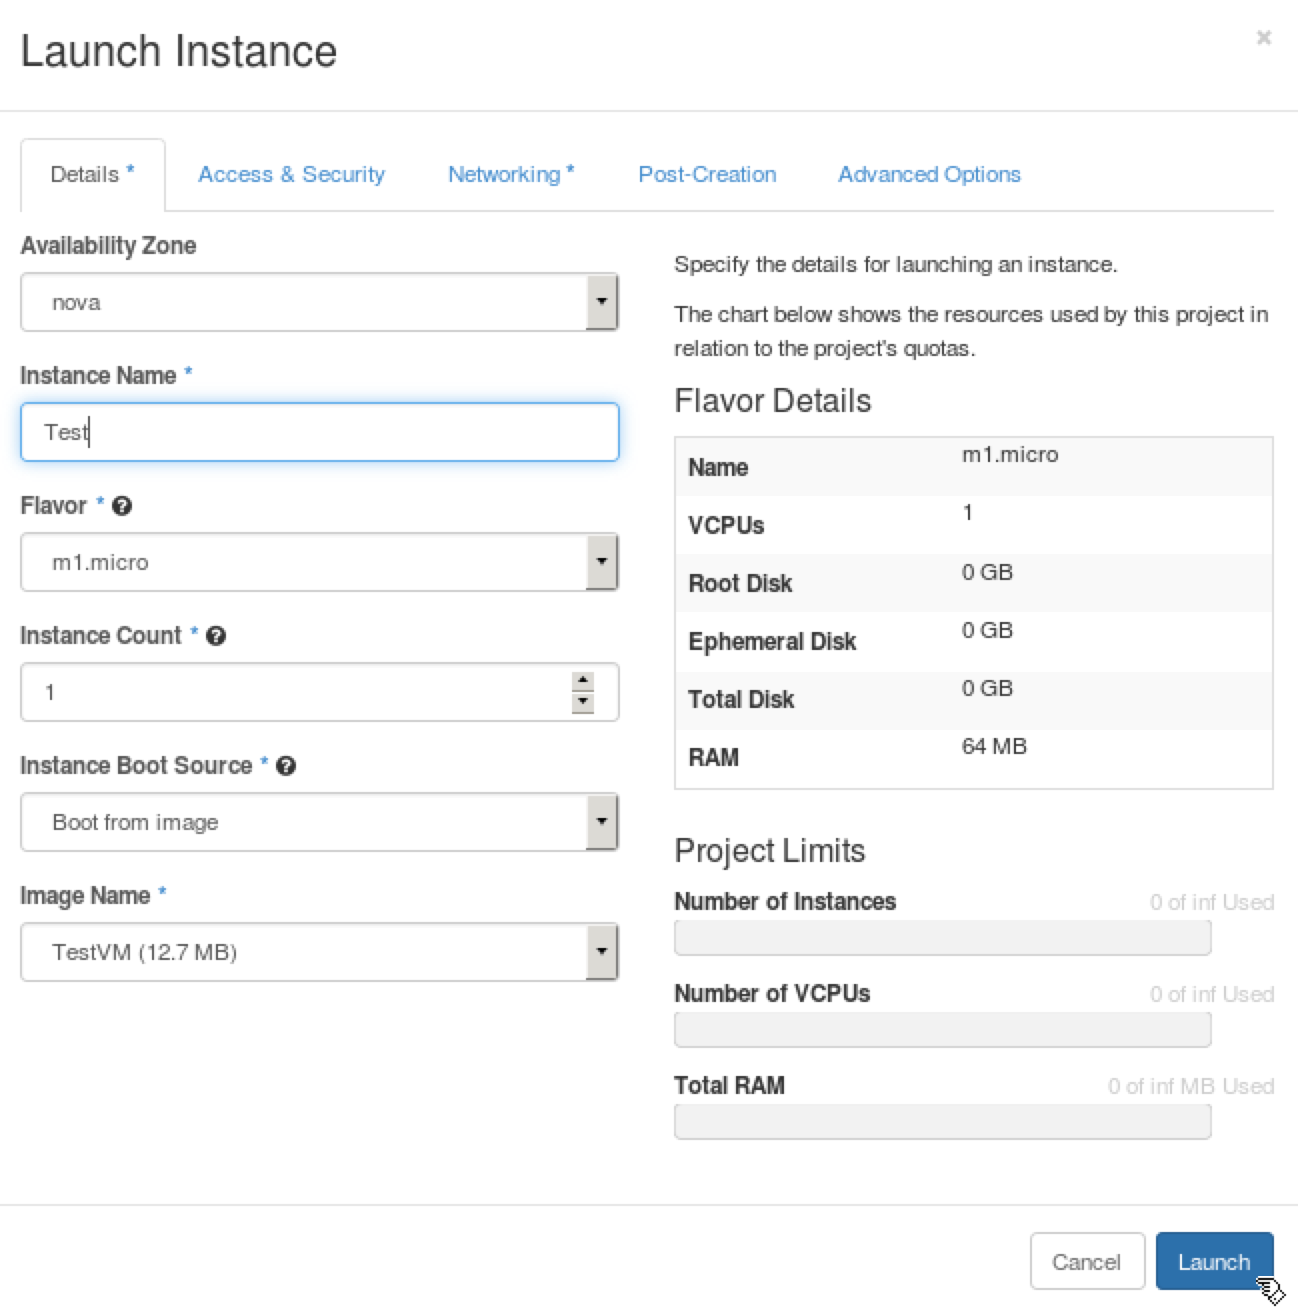
Step 3 Enter, Test to the Instance Name field.
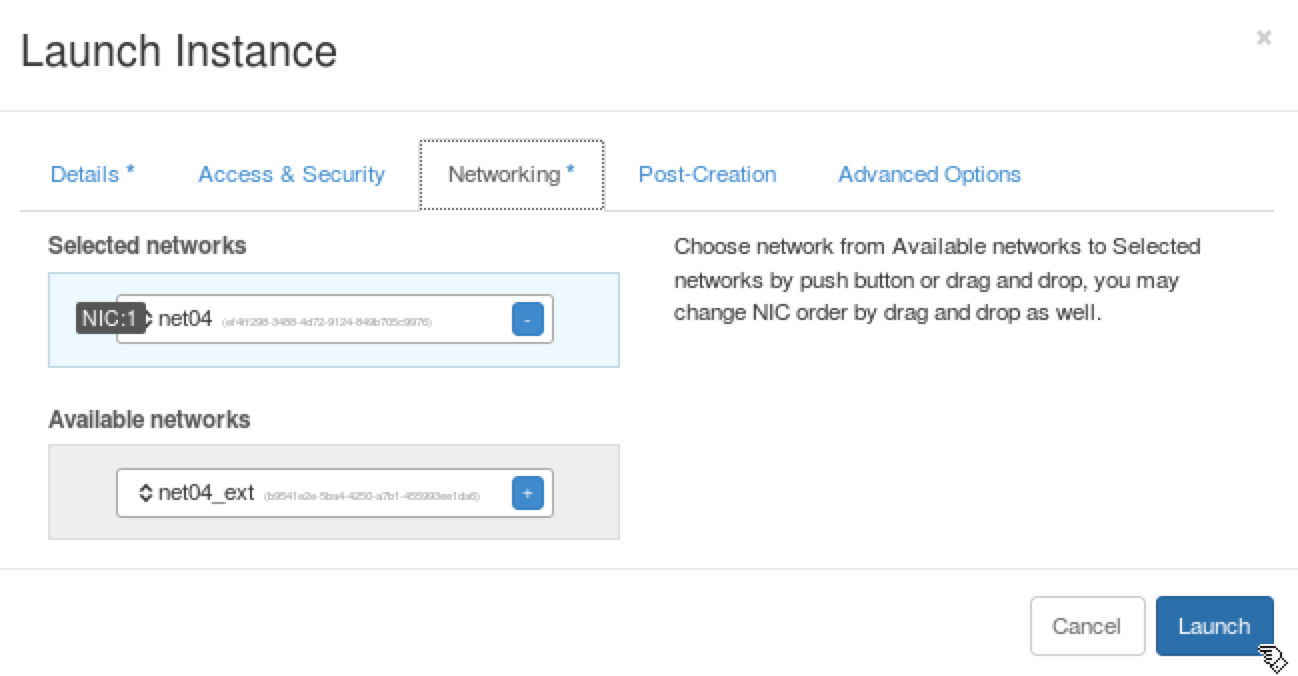
Step 4 Choose the Networking tab, press + near net04 network to select the network. Press Launch to launch a VM.
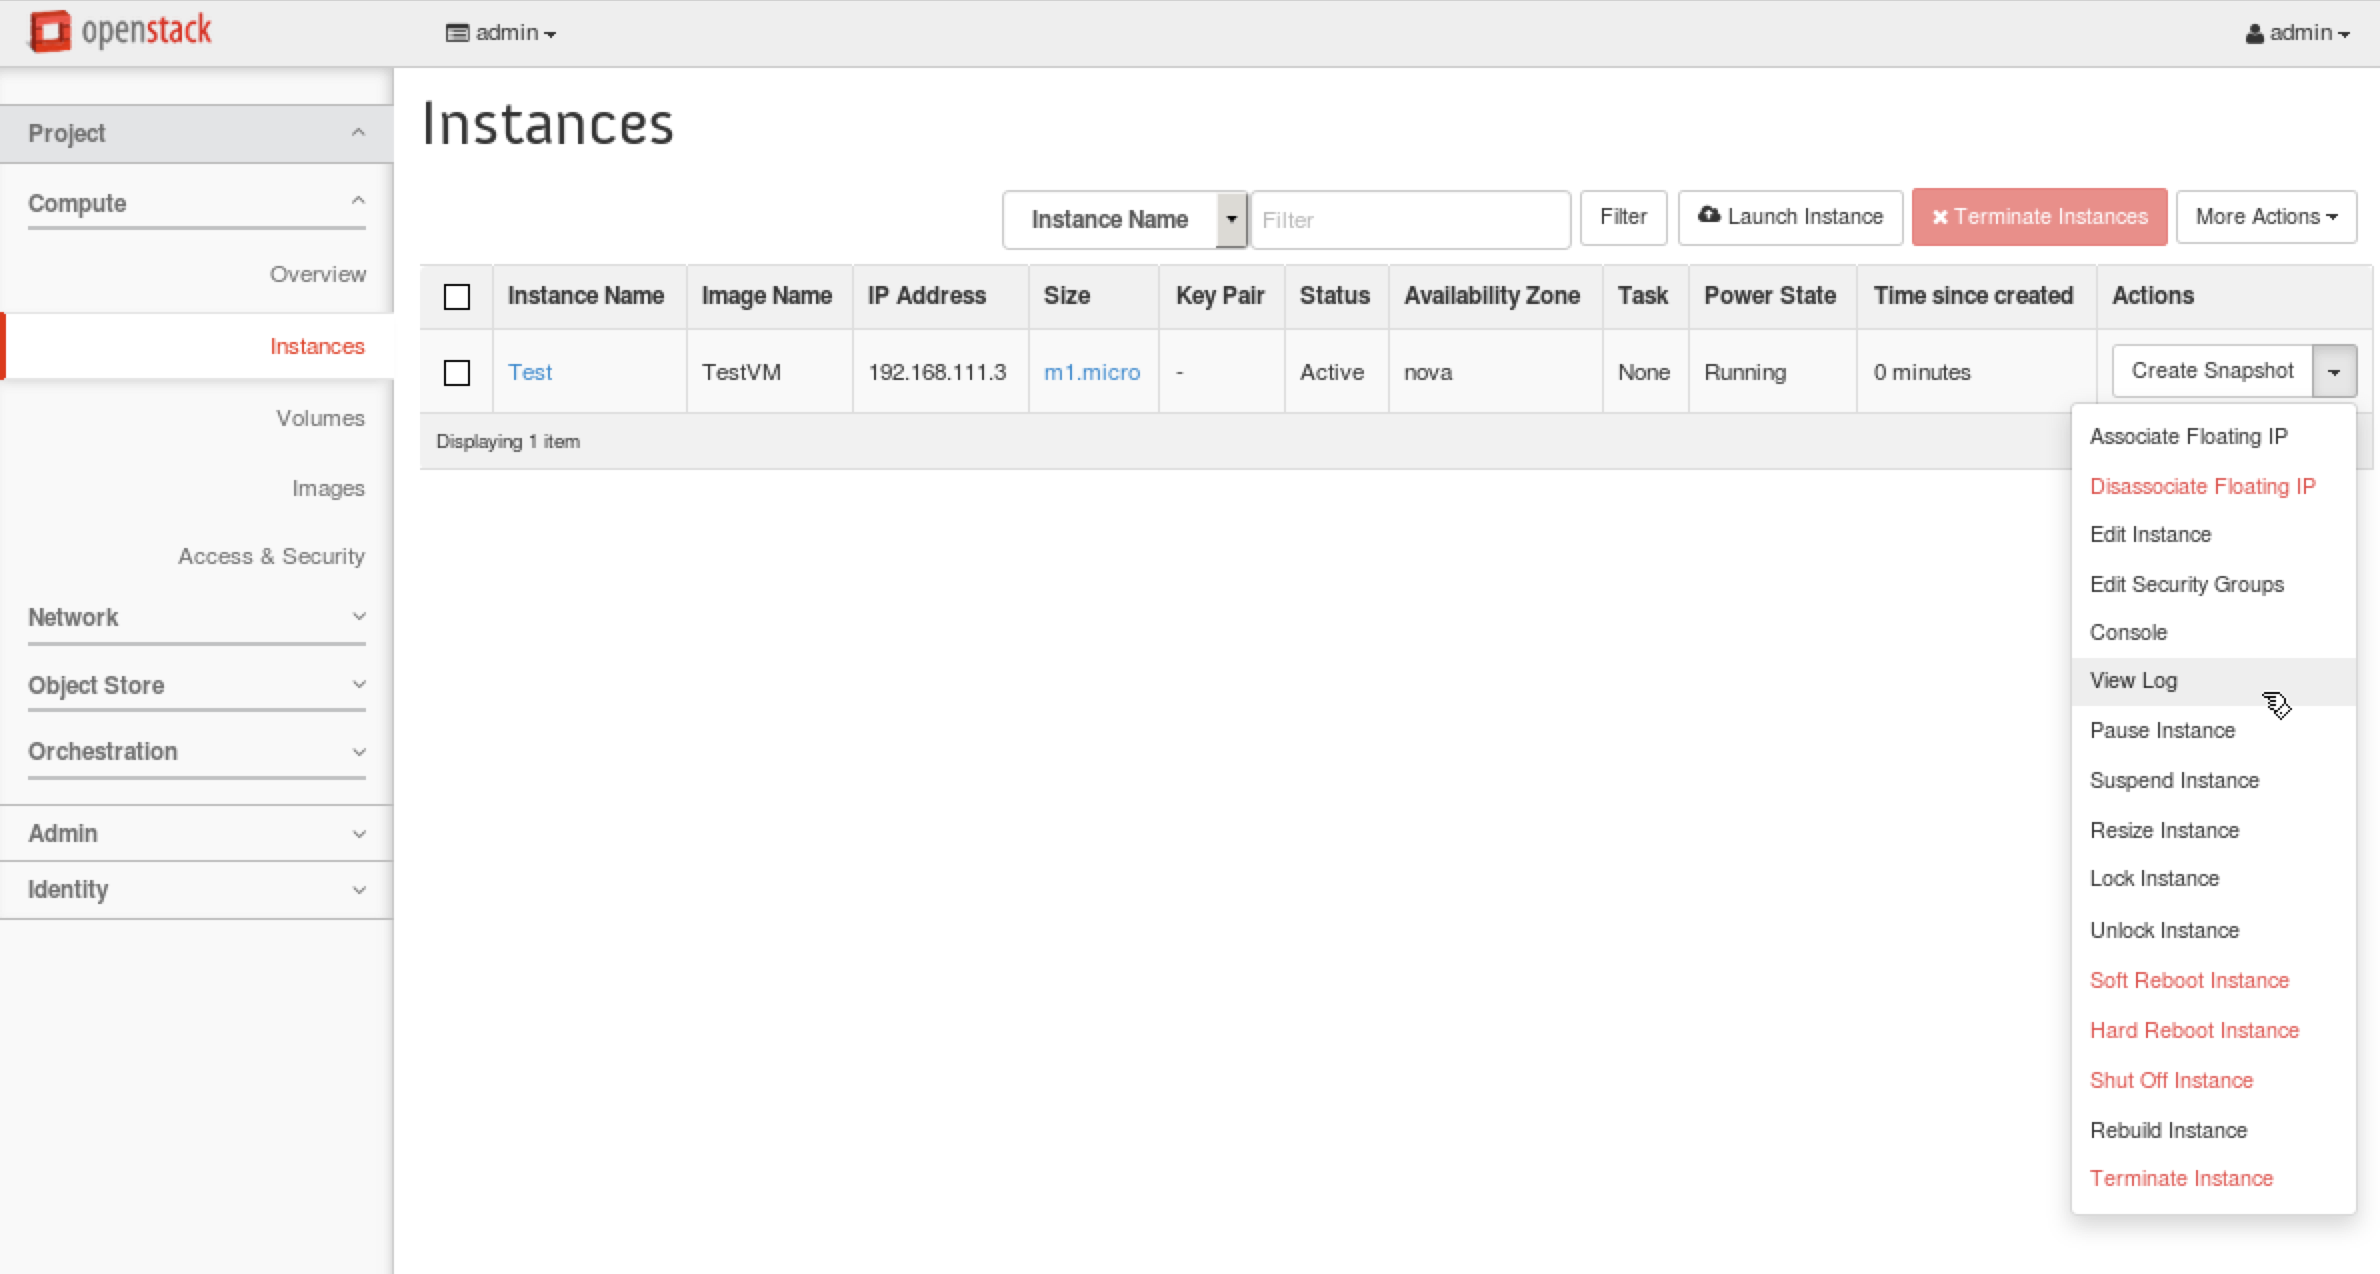
Step 5 Horizon should show the instance as Running. From Actions choose View Log.
Check the log to make sure that VM has booted. The last message in the log should be the login prompt, such as test login:. You may need to refresh the log, if the VM is still booting.
4.7.2. Access VM via Console
From the navigation menu choose Project, Instances. From Actions choose Console to open VM console. Press Click here to show only console. Firefox will complain about using the untrusted connection, see 1.5. Working with Firefox for a workaround. You can log in to the VM using user name cirros and password cubswin:).
4.7.3. Access VM From Lab
We want to make the VM accessible from our environment via the public network. To do this, we need the floating IP to be associated with the VM and allow ICMP and SSH traffic.
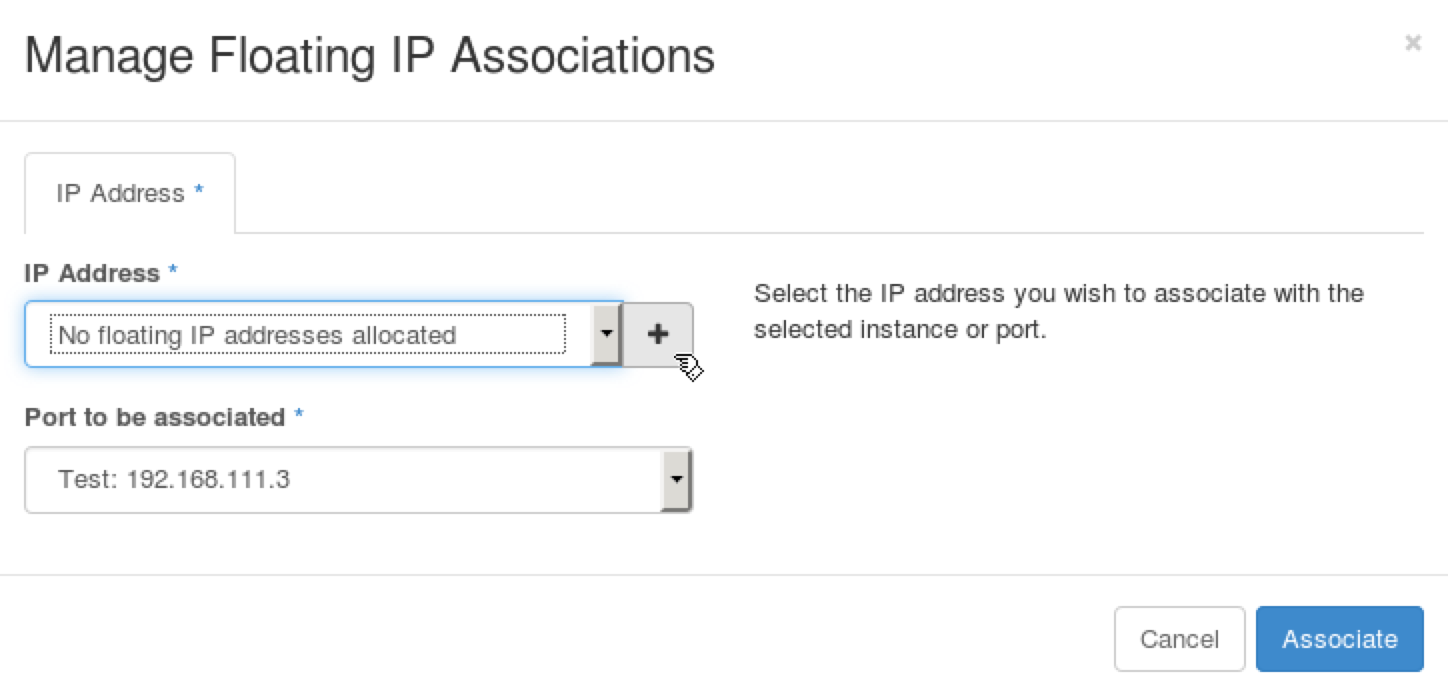
Step 1 From the navigation menu choose Project, Instances. From Actions choose Associate Floating IP. Press + near IP Address field.
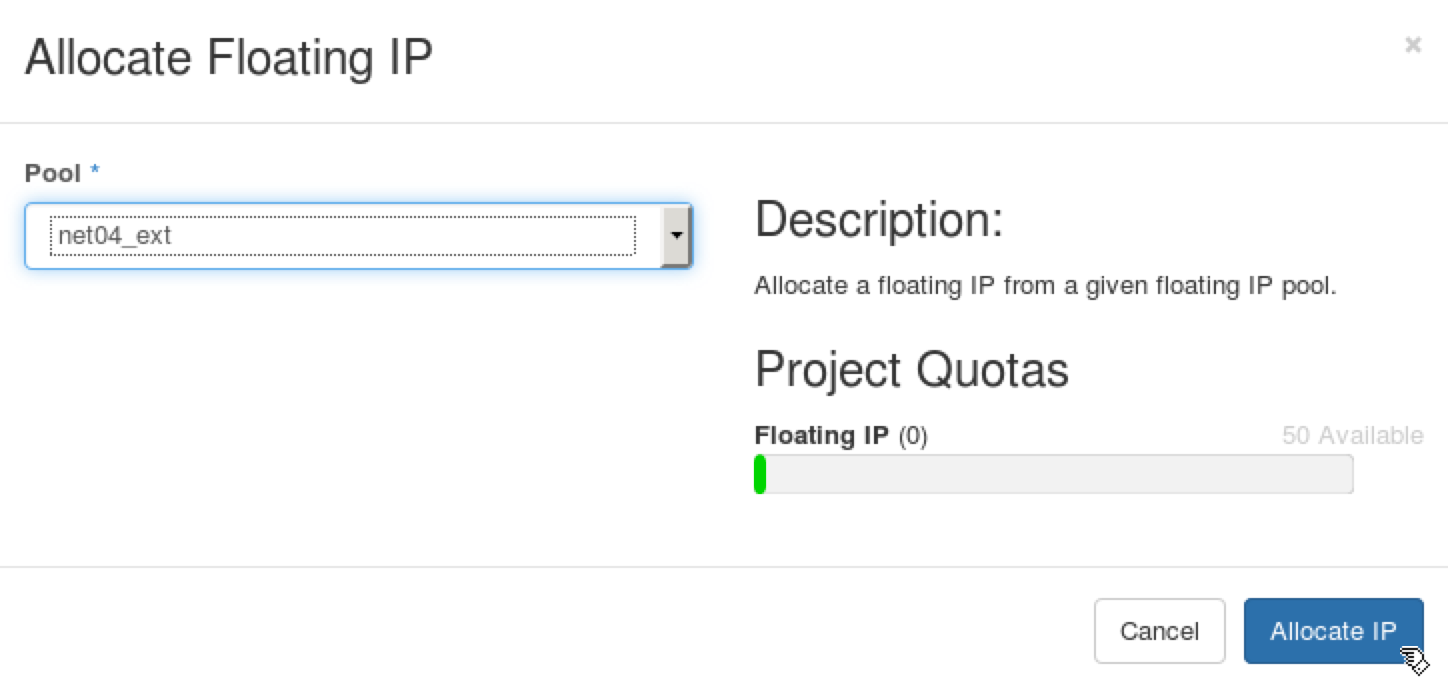
Step 2 Press Allocate IP.
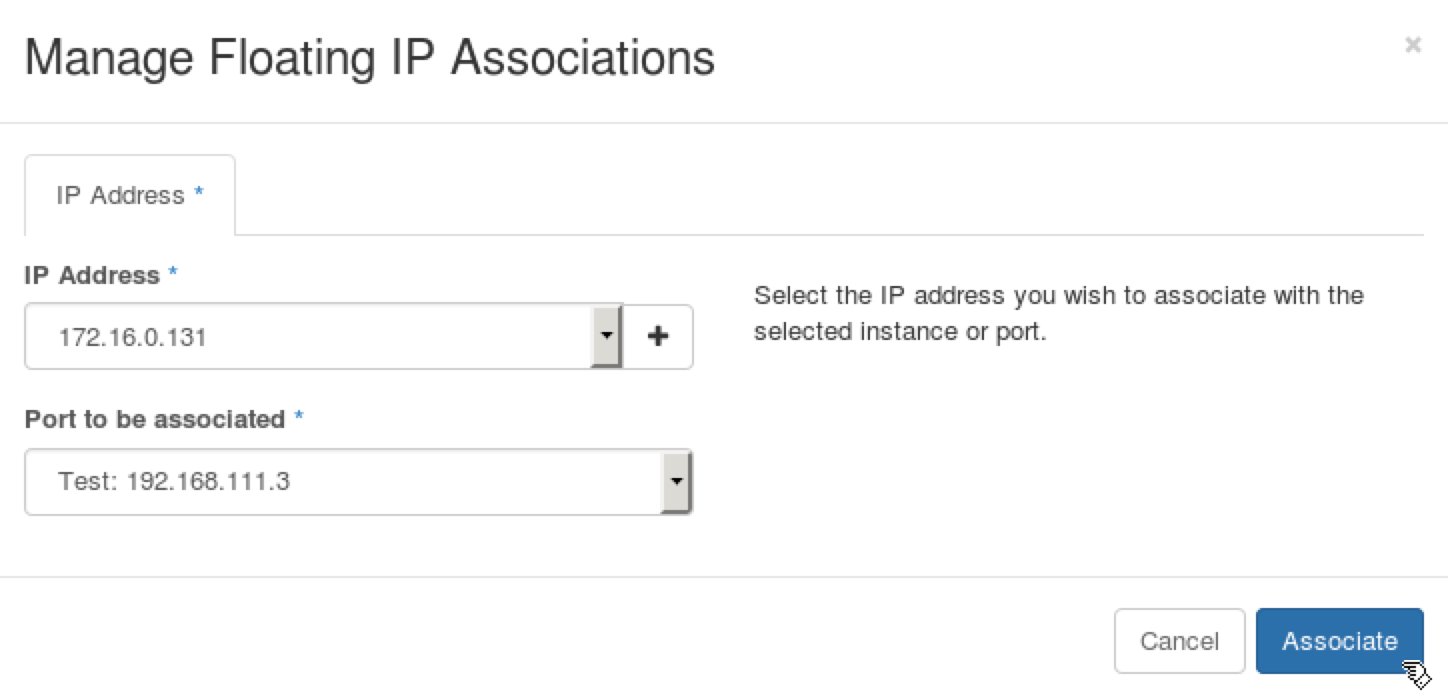
Step 3 Select the recently allocated IP address in the IP Address field and press Associate.
Step 4 From the navigation menu choose Project, Instances. The list should show that the floating IP, for example 172.16.0.131, is associated with the VM.

Step 5 From the navigation menu choose Project, Access & Security. For the default security group press Manage Rules button.
Step 6 Press the Add Rule button. Choose ALL ICMP in the Rule field, Ingress in the Direction field, CIDR in the Remote field, 0.0.0.0/0 in the CIDR field. Press the Add button.
Step 7 Press the Add Rule button. Choose SSH in the Rule field, CIDR in the Remote field, 0.0.0.0/0 in the CIDR field. Press the Add button.
Step 8 Open the Terminal Emulator and check that you can ping the VM through the public network.
stack@lab:~$ ping -c 1 172.16.0.131
PING 172.16.0.131 (172.16.0.131) 56(84) bytes of data.
64 bytes from 172.16.0.131: icmp_seq=1 ttl=63 time=3.77 ms

--- 172.16.0.131 ping statistics ---
1 packets transmitted, 1 received, 0% packet loss, time 0ms
rtt min/avg/max/mdev = 3.771/3.771/3.771/0.000 ms
Step 9 In the Terminal Emulator check that you can log in to the VM using user name cirros and password cubswin:).
stack@lab:~$ ssh cirros@172.16.0.131
The authenticity of host '172.16.0.131 (172.16.0.131)' can't be established.
RSA key fingerprint is 98:5e:f3:67:90:be:33:c8:26:fc:22:3f:0e:c8:ff:e8.
Are you sure you want to continue connecting (yes/no)? yes
Warning: Permanently added '172.16.0.131' (RSA) to the list of known hosts.
cirros@172.16.0.131's password:
$
Congratulations! You have successfully installed an OpenStack environment.
Checkpoint
- Create VMs for controller and compute nodes
- Connect controller and compute node to admin and public networks
- Verify networks in Fuel
- Assign roles to nodes in Fuel
- Deploy an OpenStack environment in Fuel
- Check that the OpenStack environment works and able to launch an instance
- Access the instance through console and public network
![]()
Table Of Contents
- 1. Classroom Environment
- 2. Explore HA OpenStack
- 3. Fuel Installation
- 4. Simple Deployment
- 5. HA Deployment
- 6. OpenStack Networking
- 7. Fuel Troubleshooting
- 8. Fuel Plugins
- 9. OpenStack with Ceph
- 10. Murano
- 11. Sahara