10. Murano
In this chapter you will use a pre-deployed OpenStack environment with Murano to deploy a Murano environment with WordPress application.
| Chapter Details | |
|---|---|
| Chapter Goal | Deploy an OpenStack environment with Murano. Deploy Murano environment. |
| Chapter Sections | |
10.1. Prerequisites
Check that the following prerequisites have been met:
- You have access to the lab environment.
- You have an OpenStack environment deployed with Murano.
10.2. How your OpenStack environment with Murano was deployed
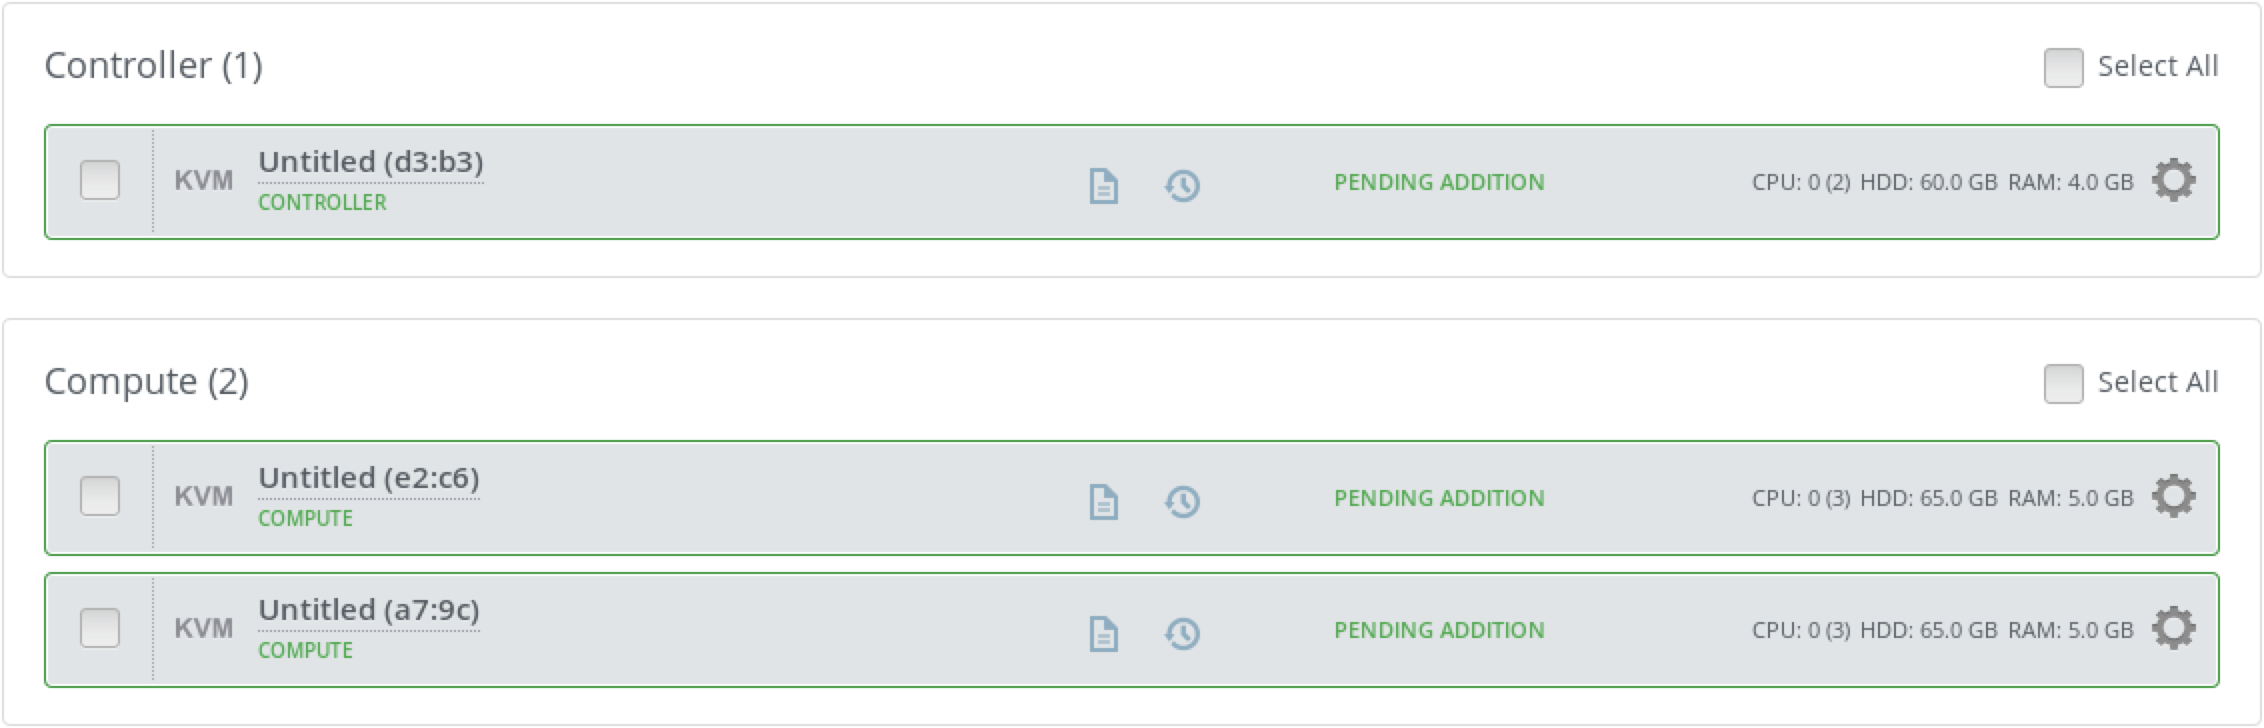
To deploy the OpenStack environment with Murano, we created one controller and 2 compute nodes with the following configuration:
Name:       controller
CPUs:       2
RAM:        4096MB
Disk:       60GB
Network 1:  Virtual network 'admin'  : Isolated
Network 2:  Virtual network 'public' : NAT
Name:       compute1
CPUs:       3
RAM:        5120MB
Disk:       65GB
Network 1:  Virtual network 'admin'  : Isolated
Network 2:  Virtual network 'public' : NAT
Name:       compute2
CPUs:       3
RAM:        5120MB
Disk:       65GB
Network 1:  Virtual network 'admin'  : Isolated
Network 2:  Virtual network 'public' : NAT
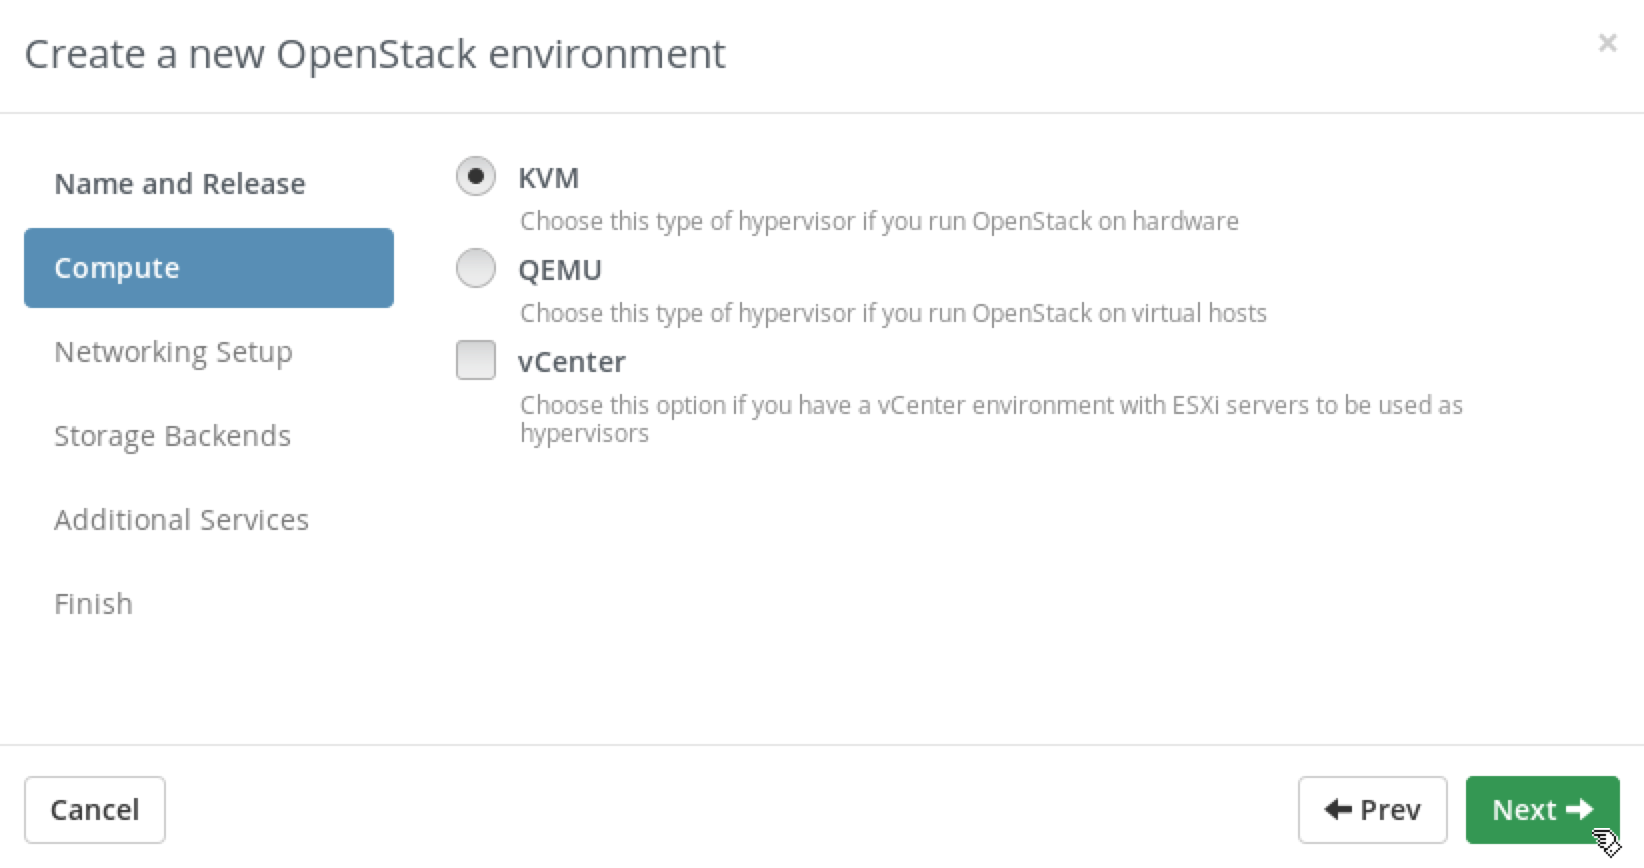
For the next step, we created a new OpenStack environment, following the steps from section 4.3. Create a New Environment to create a new environment, with the exception of steps 4 and 7.
In Step 4 we choose the KVM option on the Compute page:
In Step 7 we checked the Install Murano checkbox:

Then we assigned the Controller role to the controller node and the Compute role to both compute1 and compute2 nodes (see section 4.4. Assign Roles to the Nodes).
After that, we deployed an OpenStack environment, following the steps from section 4.6. Deploy Simple Environment.
10.3. How to check that Murano has been installed
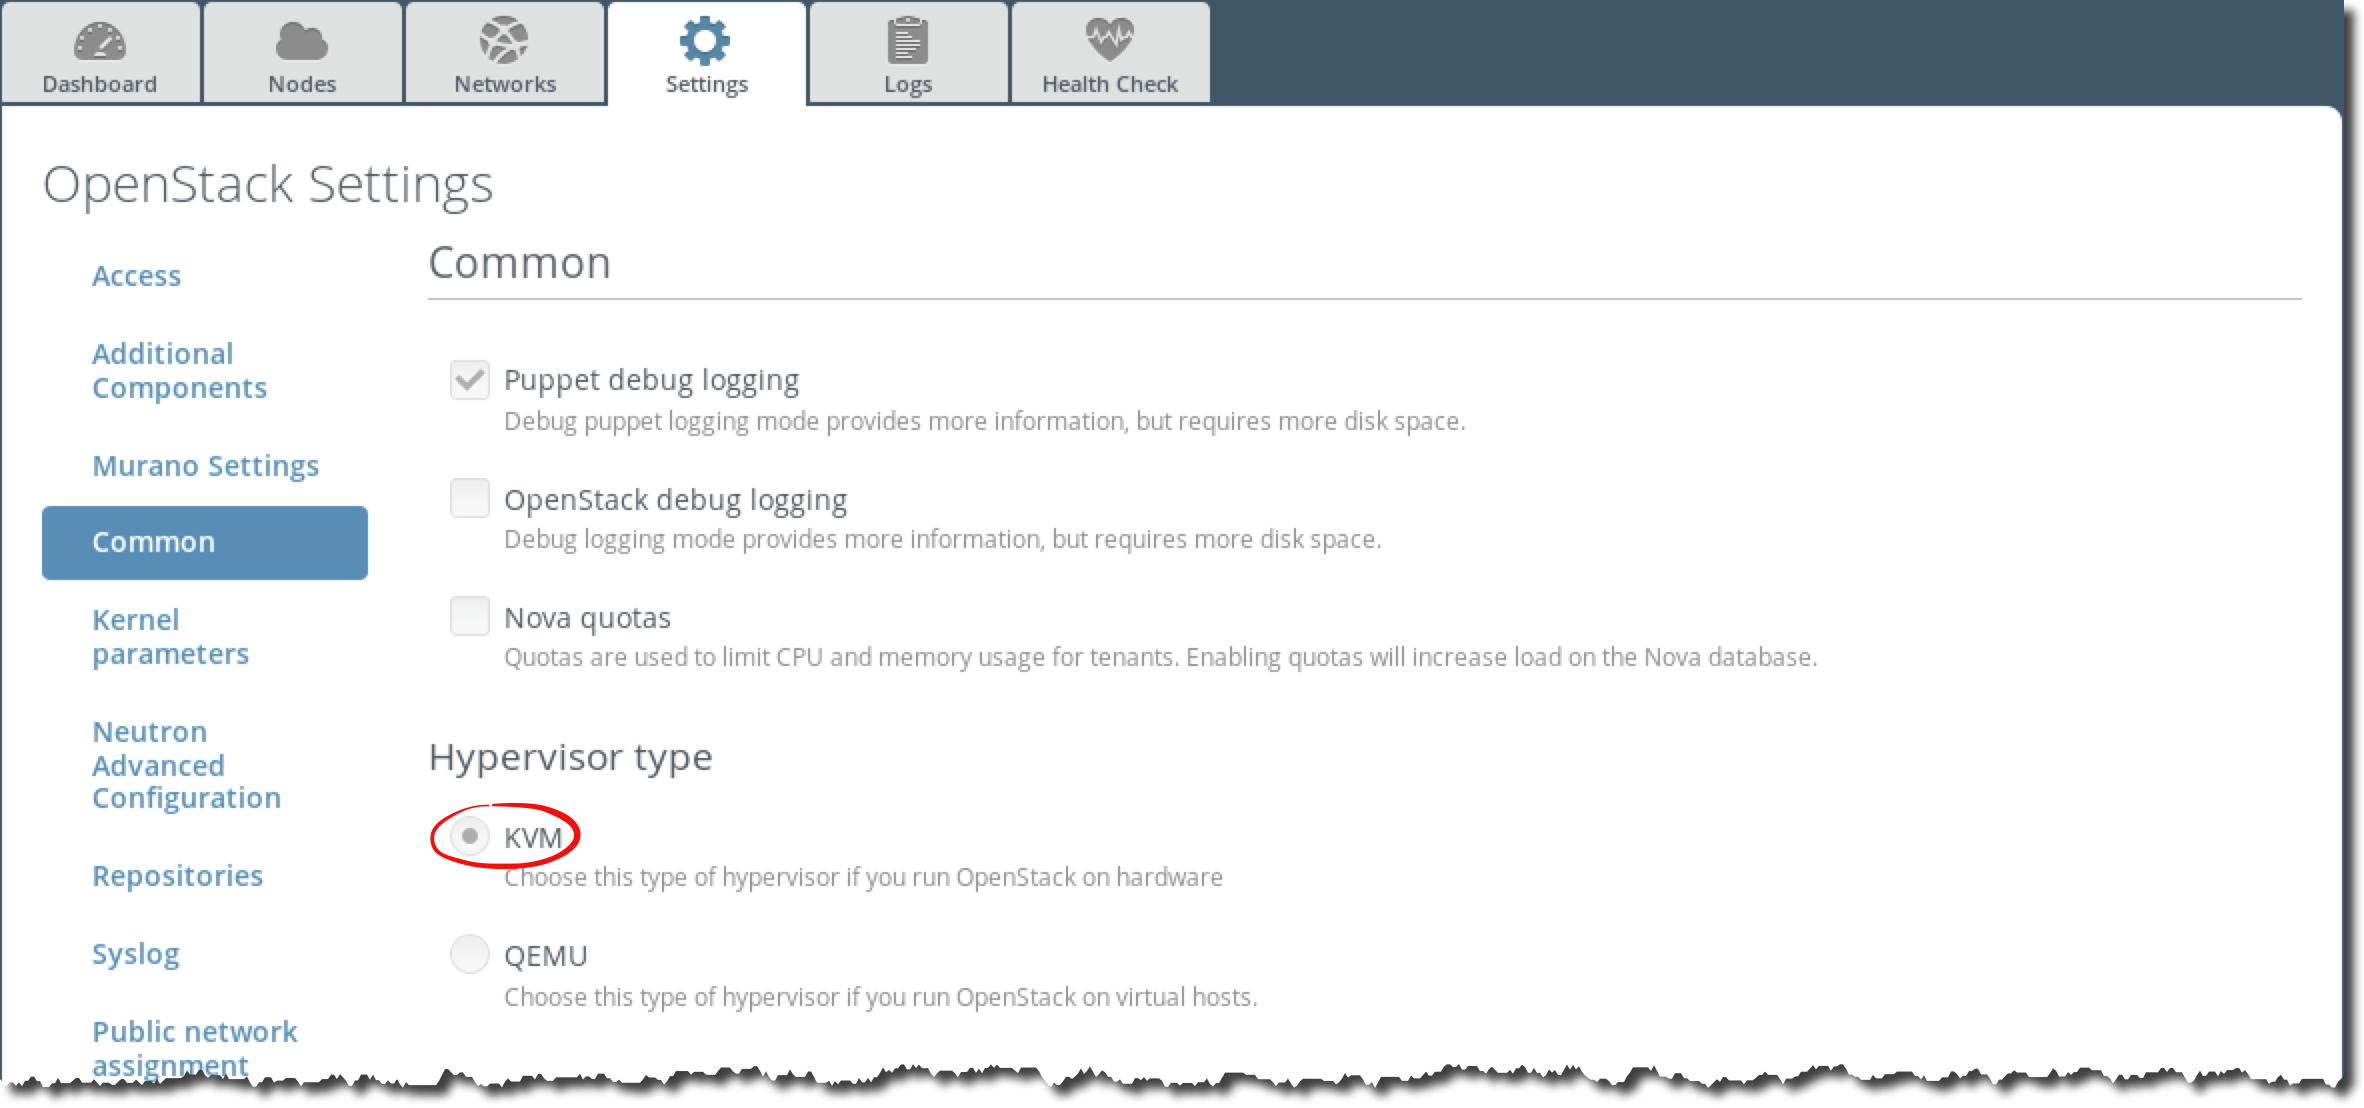
Log in to Fuel UI, choose Test environment. Choose the Settings tab.
Check that on the Common page KVM hypervisor is selected.
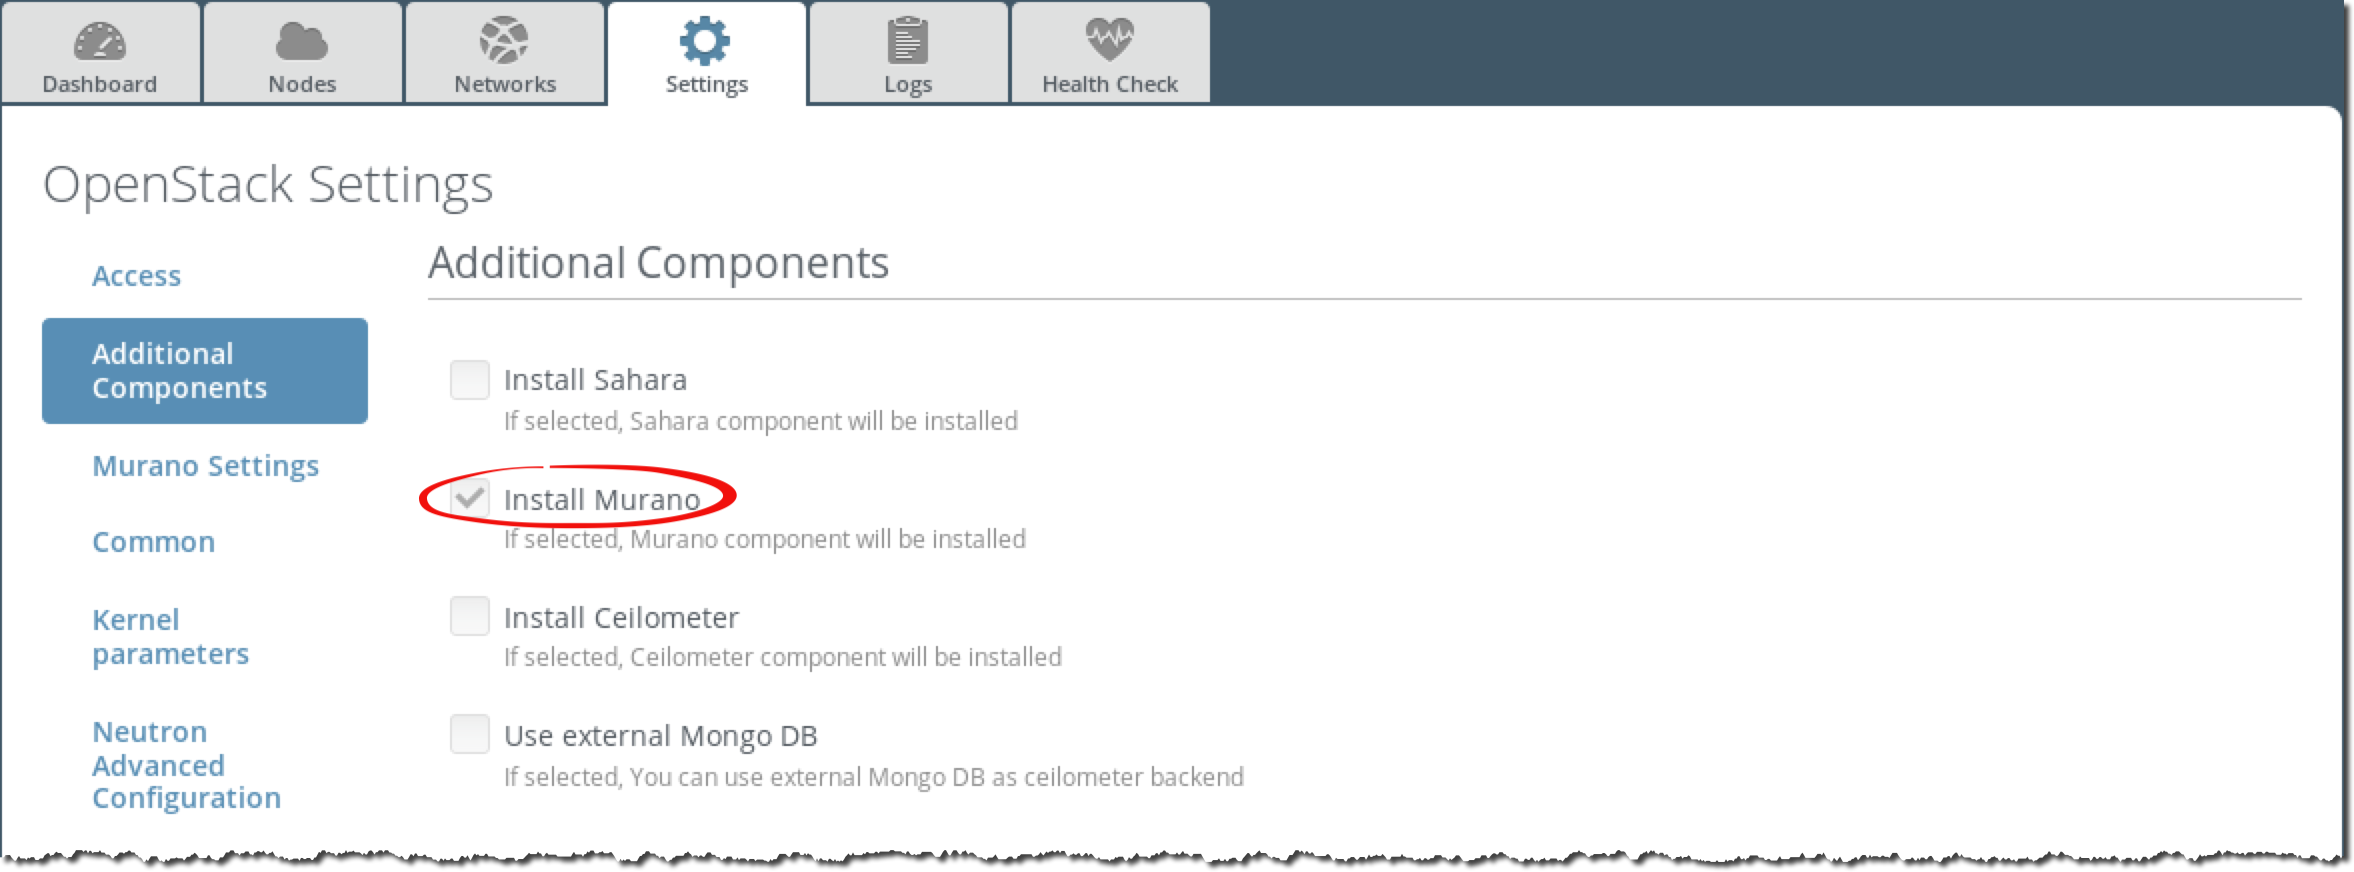
Check that on the Additional Components page the Murano checkbox is checked.
10.4. Import WordPress Package
You will deploy the WordPress application using Murano. Each application consists of one or more packages. There are predefined packages available in the Community Application Catalog (http://apps.openstack.org).
Step 1 Log in to Horizon. From the navigation menu choose Murano
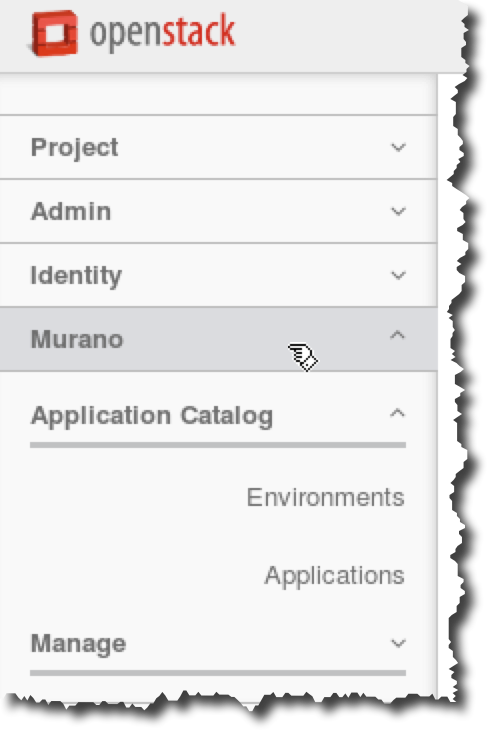
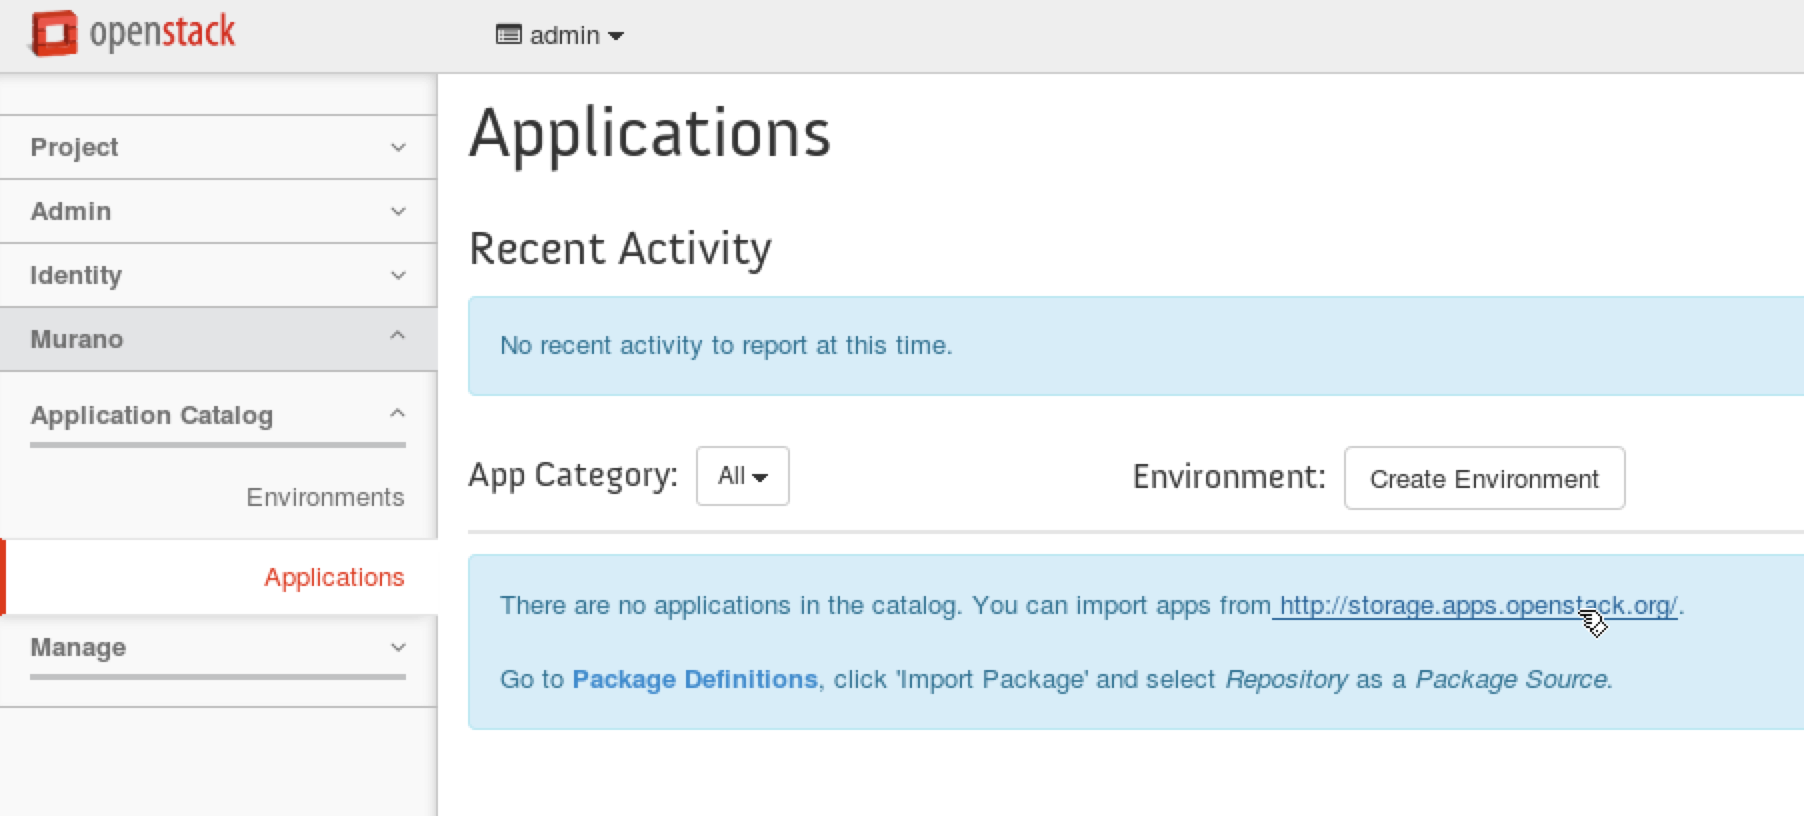
Step 2 From Murano menu, choose Applications and click on the http://storage.apps.openstack.org/ link.
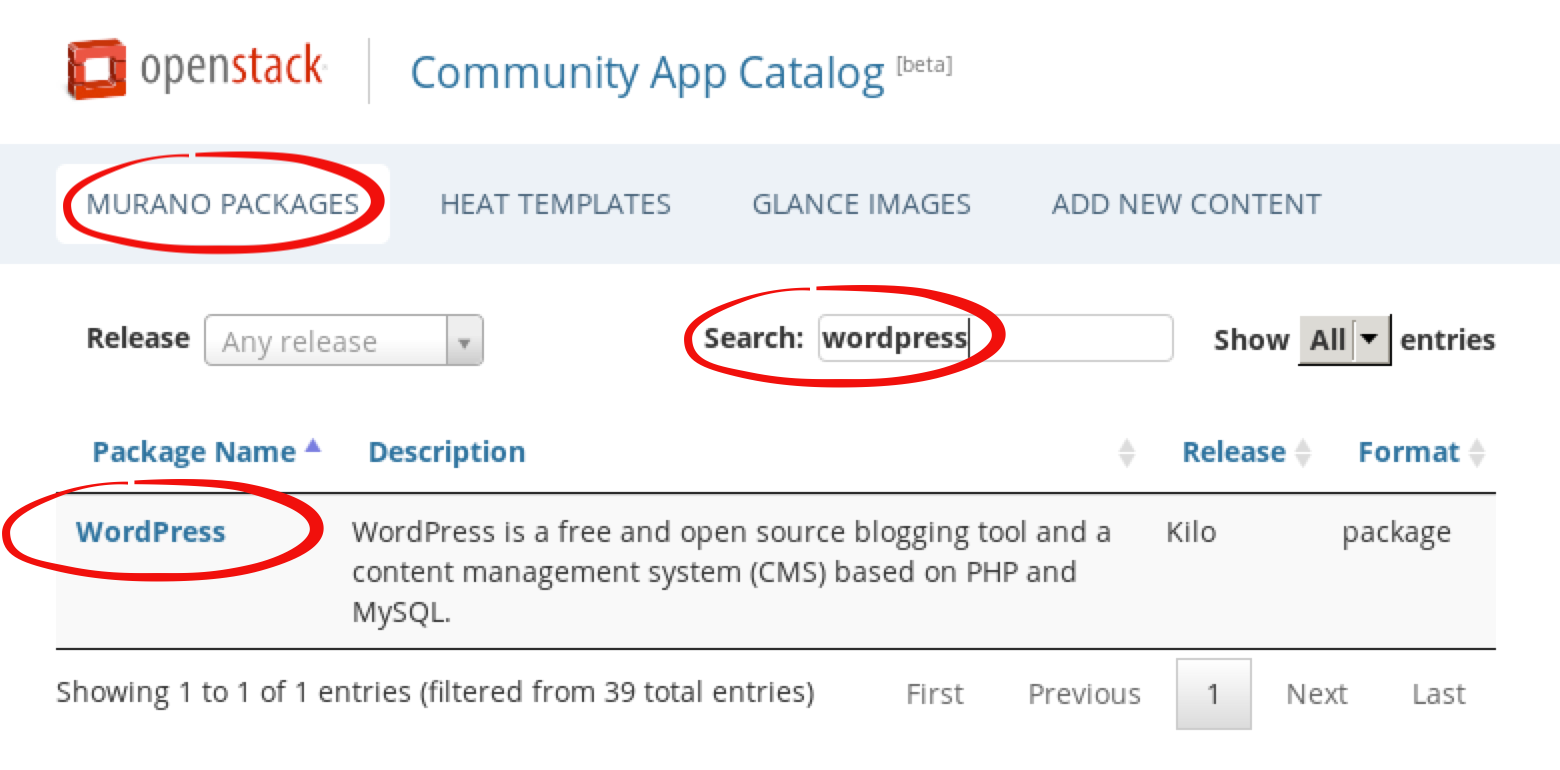
Step 3 On the Community App Catalog site choose Murano Packages. Then, in the Search field, enter wordpress and click on WordPress package in the displayed results.
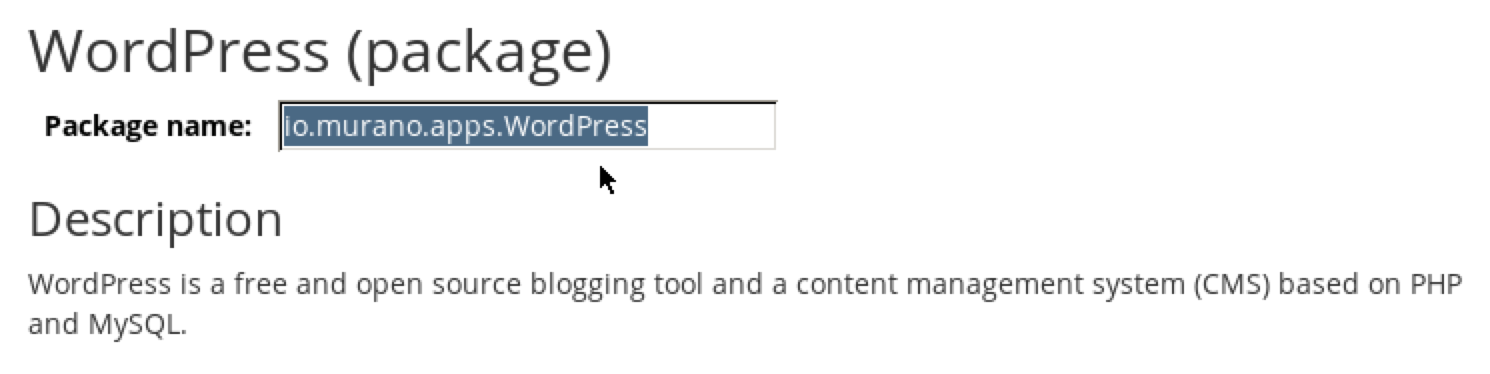
Step 4 On the WordPress page, select the content of Package name field: io.murano.apps.WordPress and copy it to the clipboard.
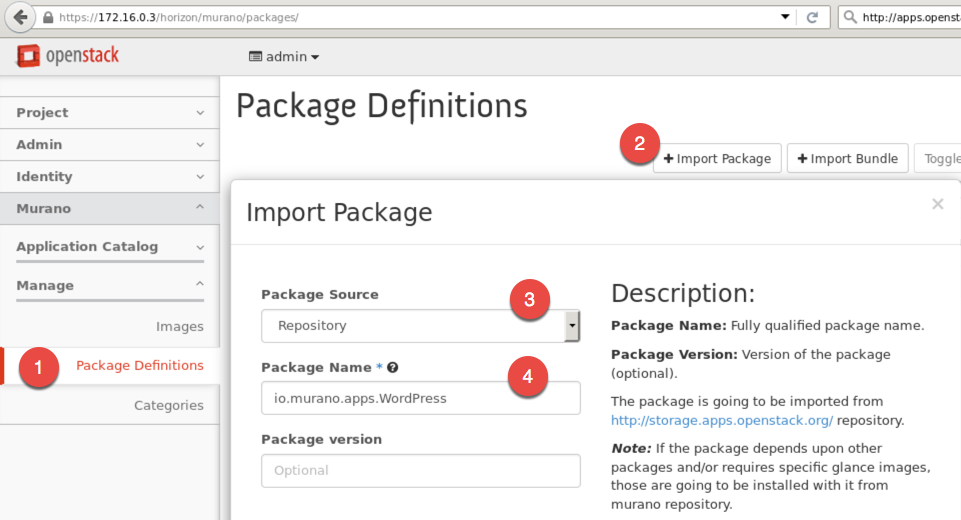
Step 5 Return to Horizon. From the Murano navigation menu choose Manage then Package Definitions. Press Import Package. Choose Repository in the Package Source field. Paste (or enter io.murano.apps.WordPress) to the Package Name field. Press Next.
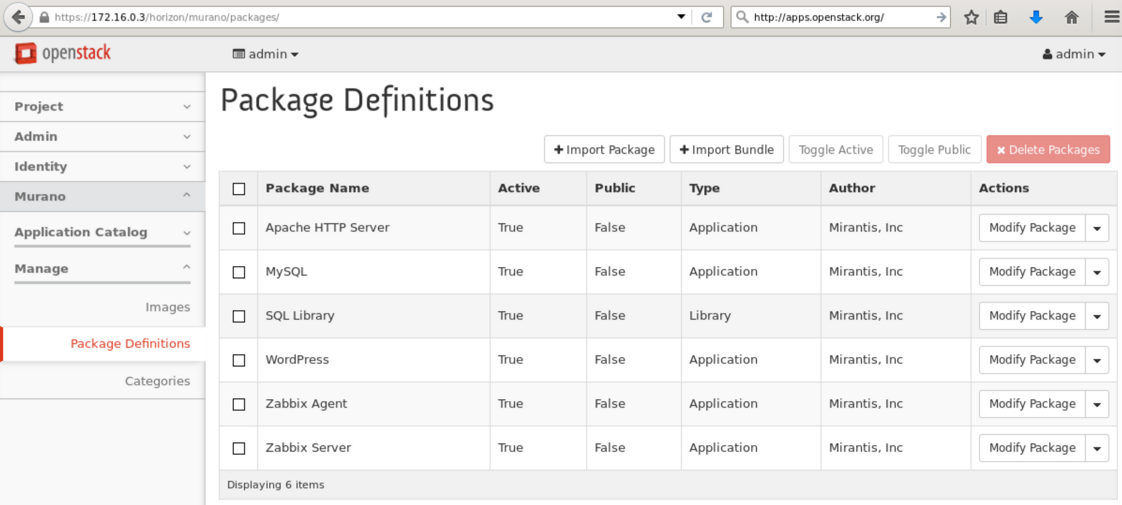
Step 6 Press the Next button on the next screen and the Create button on the final screen. Murano imports WordPress package and all the dependencies, like Apache HTTP Server and MySQL.
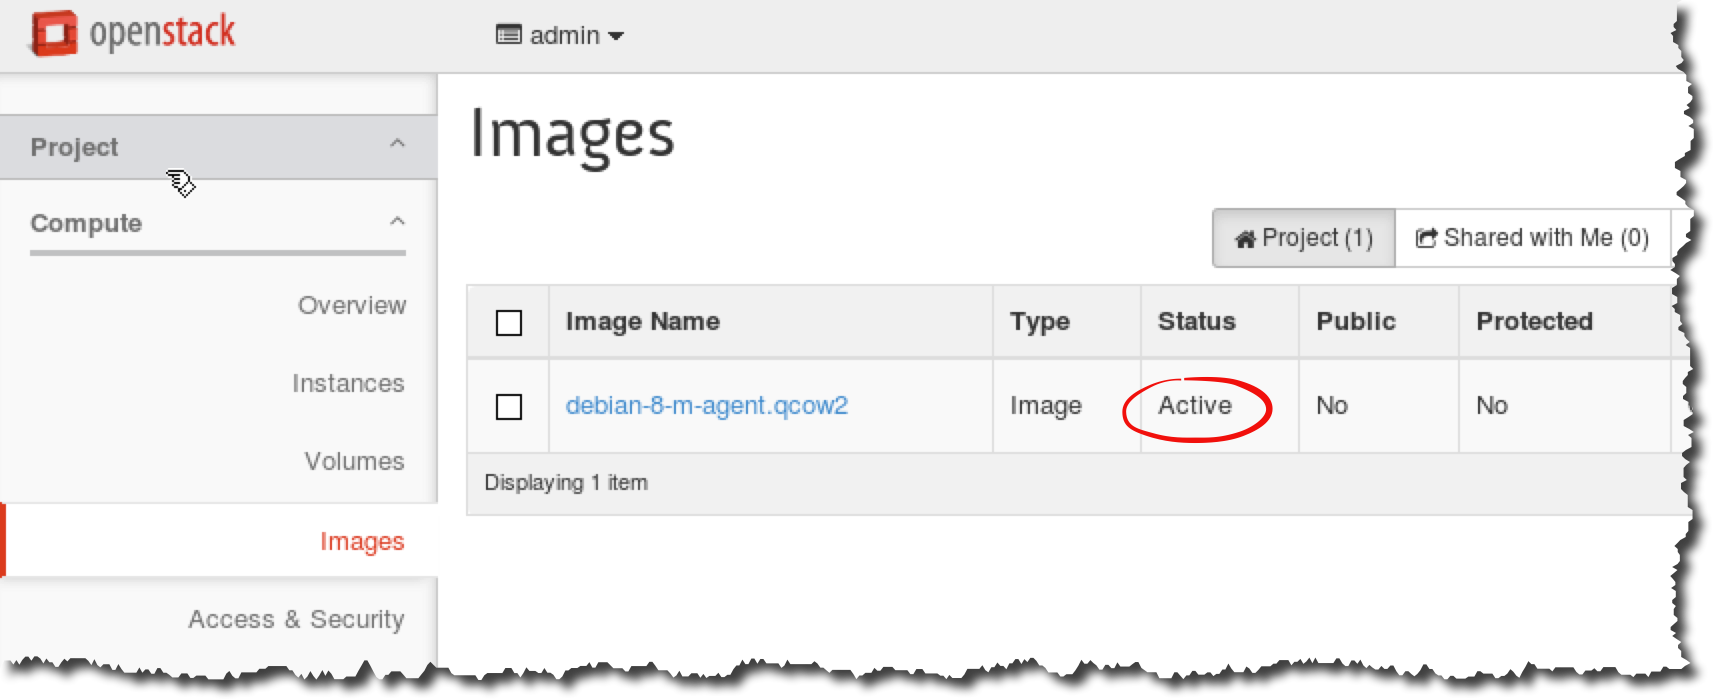
Step 7 Choose Project from the Horizon navigation menu, choose Compute then Images. Wait while debian-8-m-agent.qcow is being saved. Finally, the image should have Active as its status.
10.5. Deploy a Murano Environment with WordPress
Step 1 From the Horizon navigation menu choose Murano, Application Catalog, then Applications.
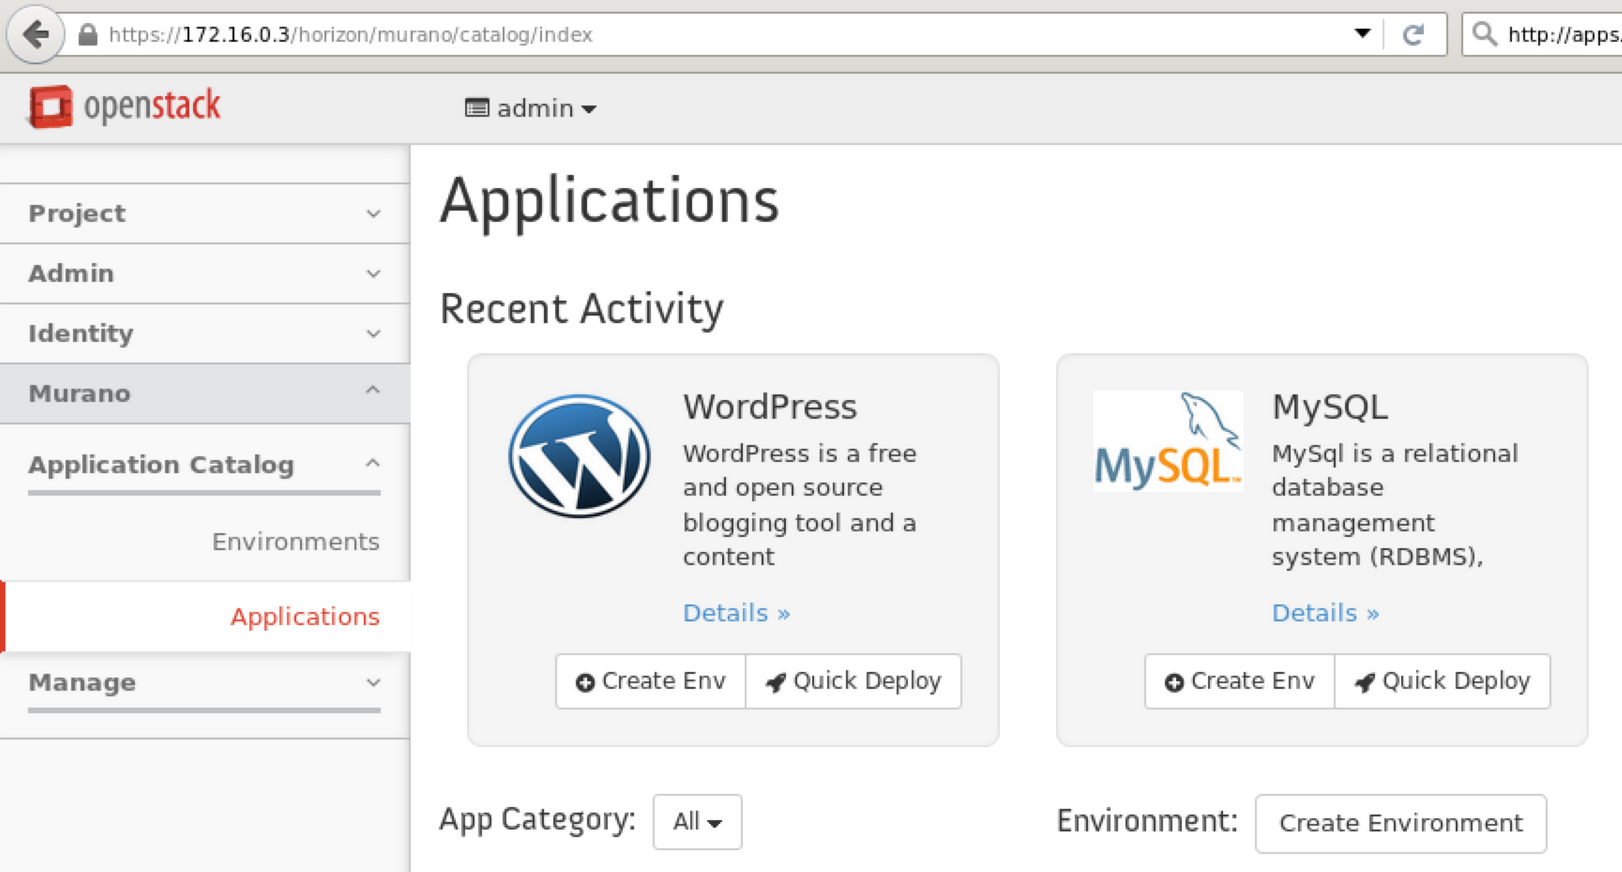
Step 2 Press the Quick Deploy button on the WordPress application widget.
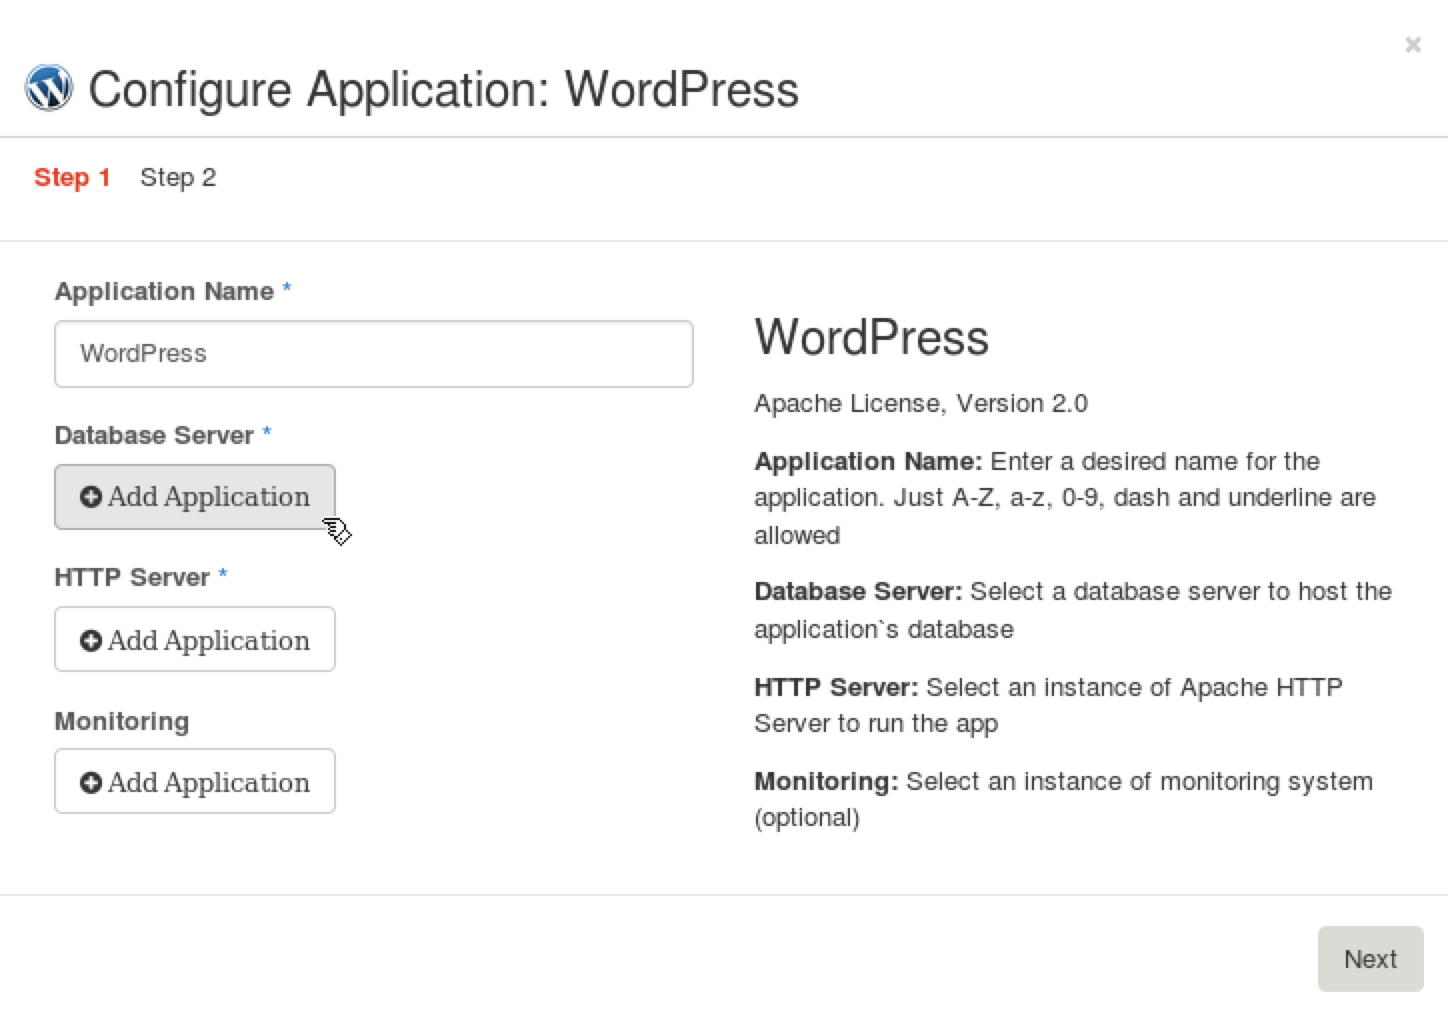
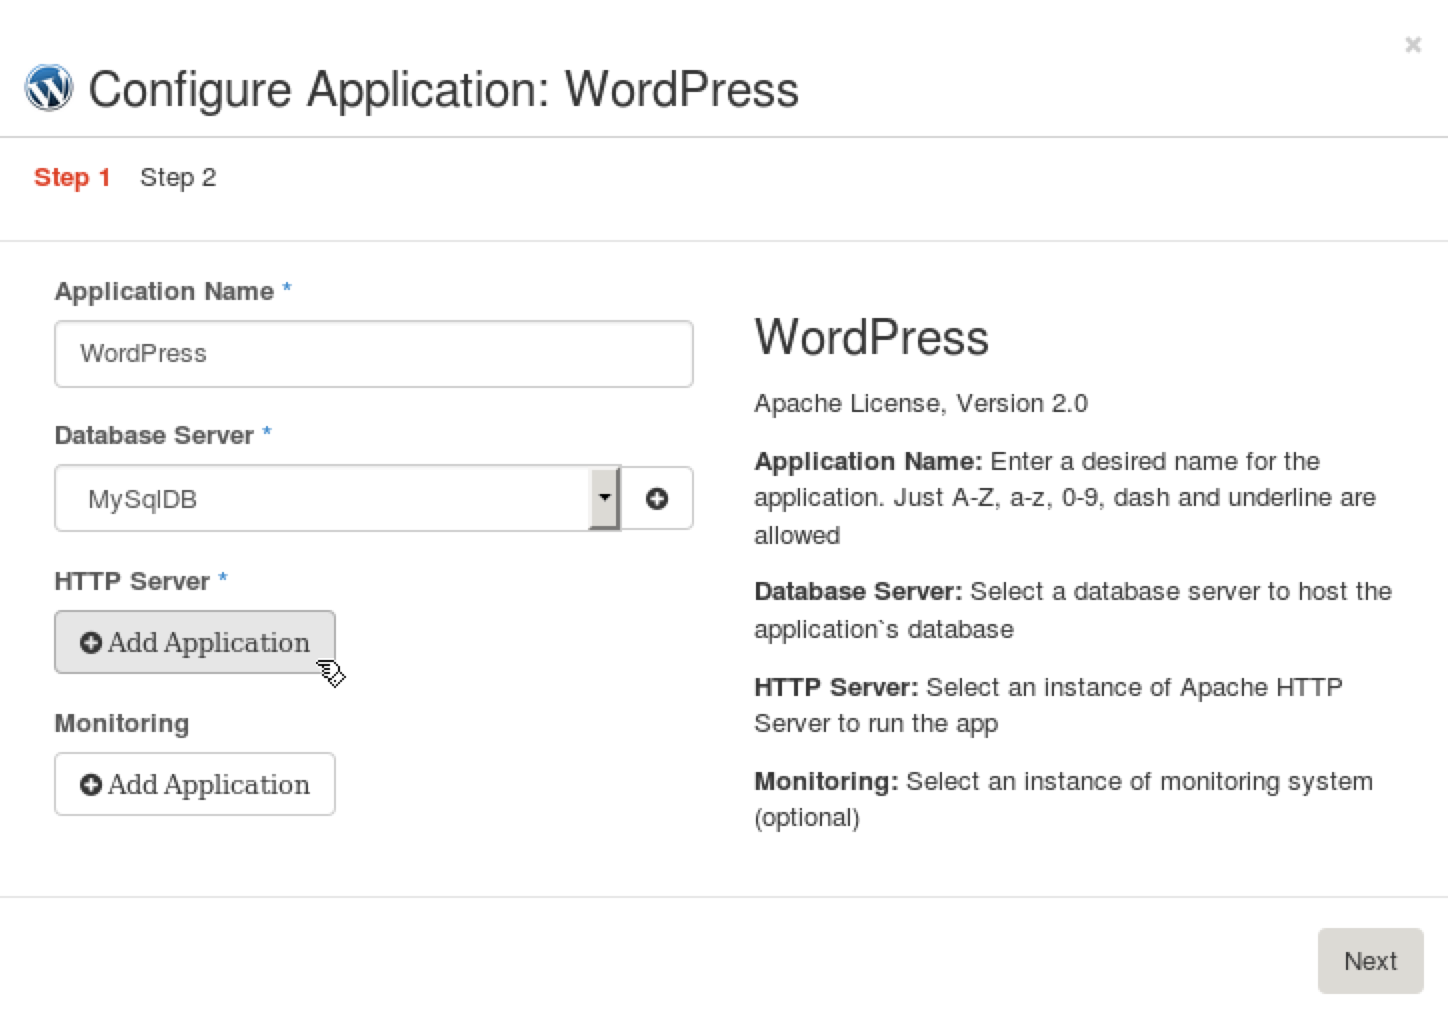
Step 3 In the Configure Applcation: WordPress wizard, press Add Applcation button, which is near the Database Server.
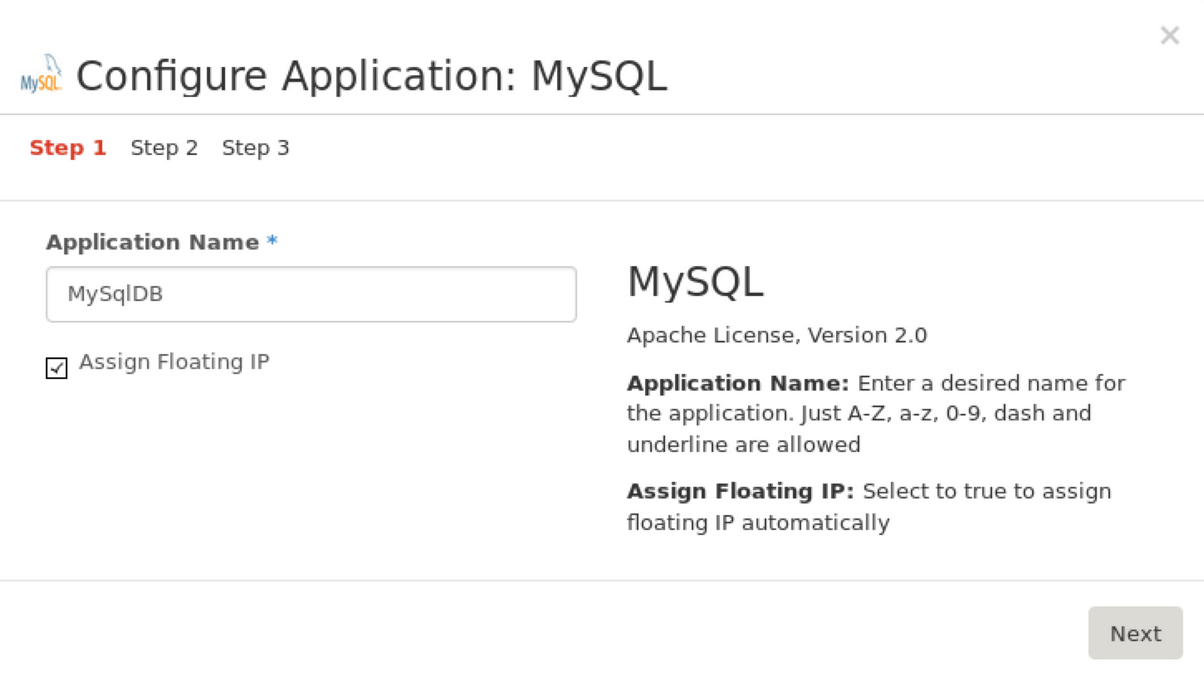
Step 4 In the Configure Applcation: MySQL wizard, check the Assign Floating IP checkbox and press Next.
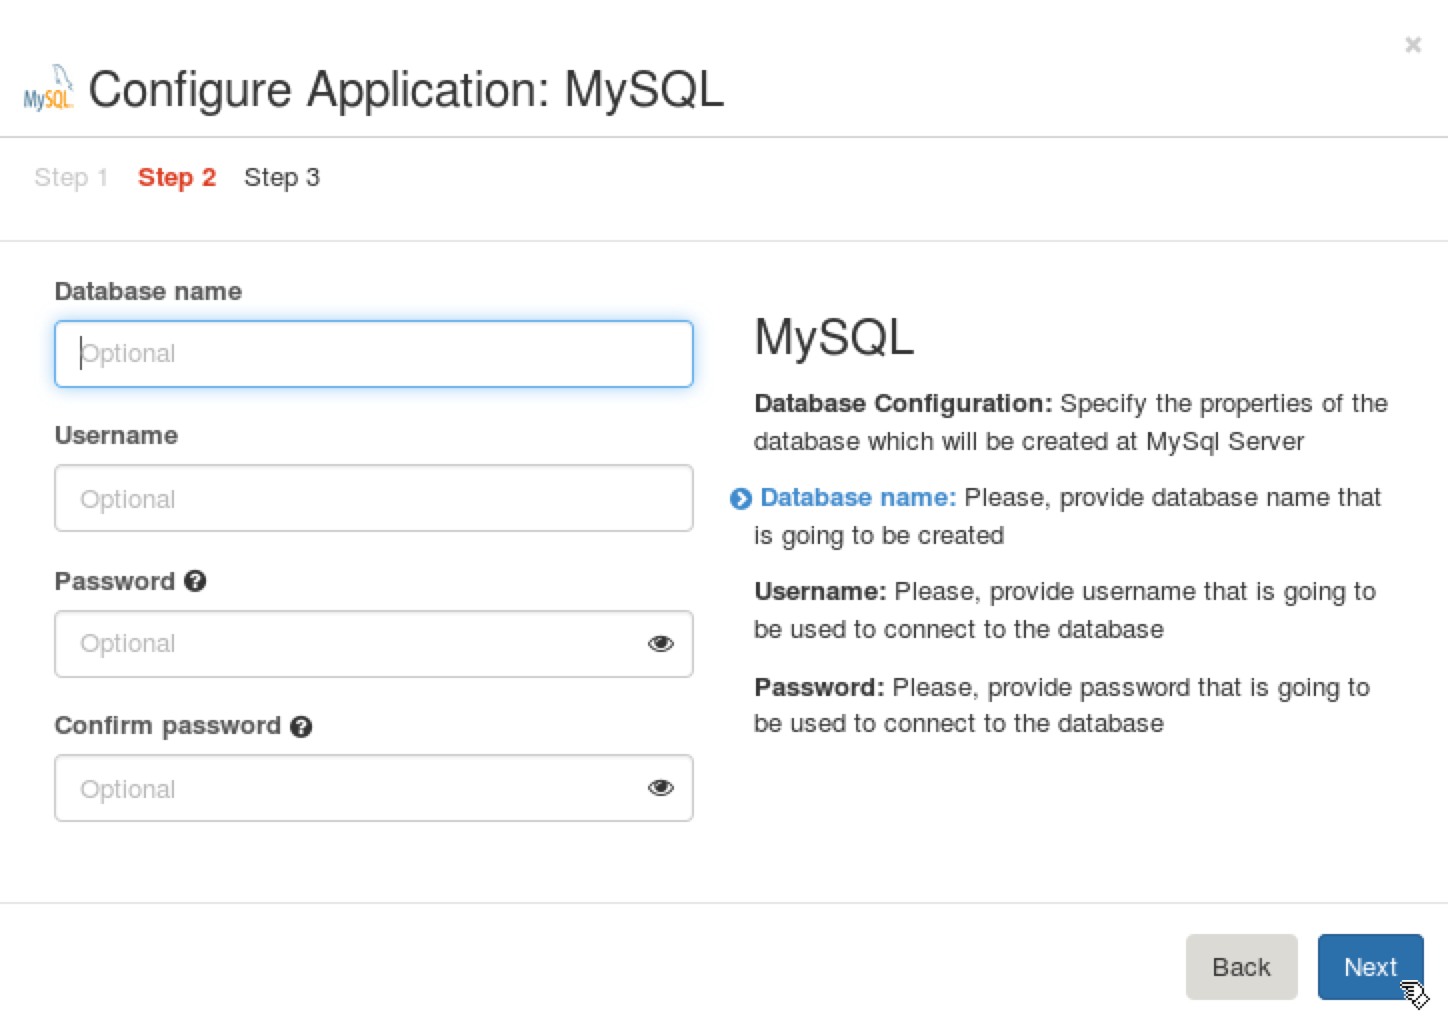
Step 5 Keep all fields empty. WordPress application will configure the MySQL database later. Press Next.
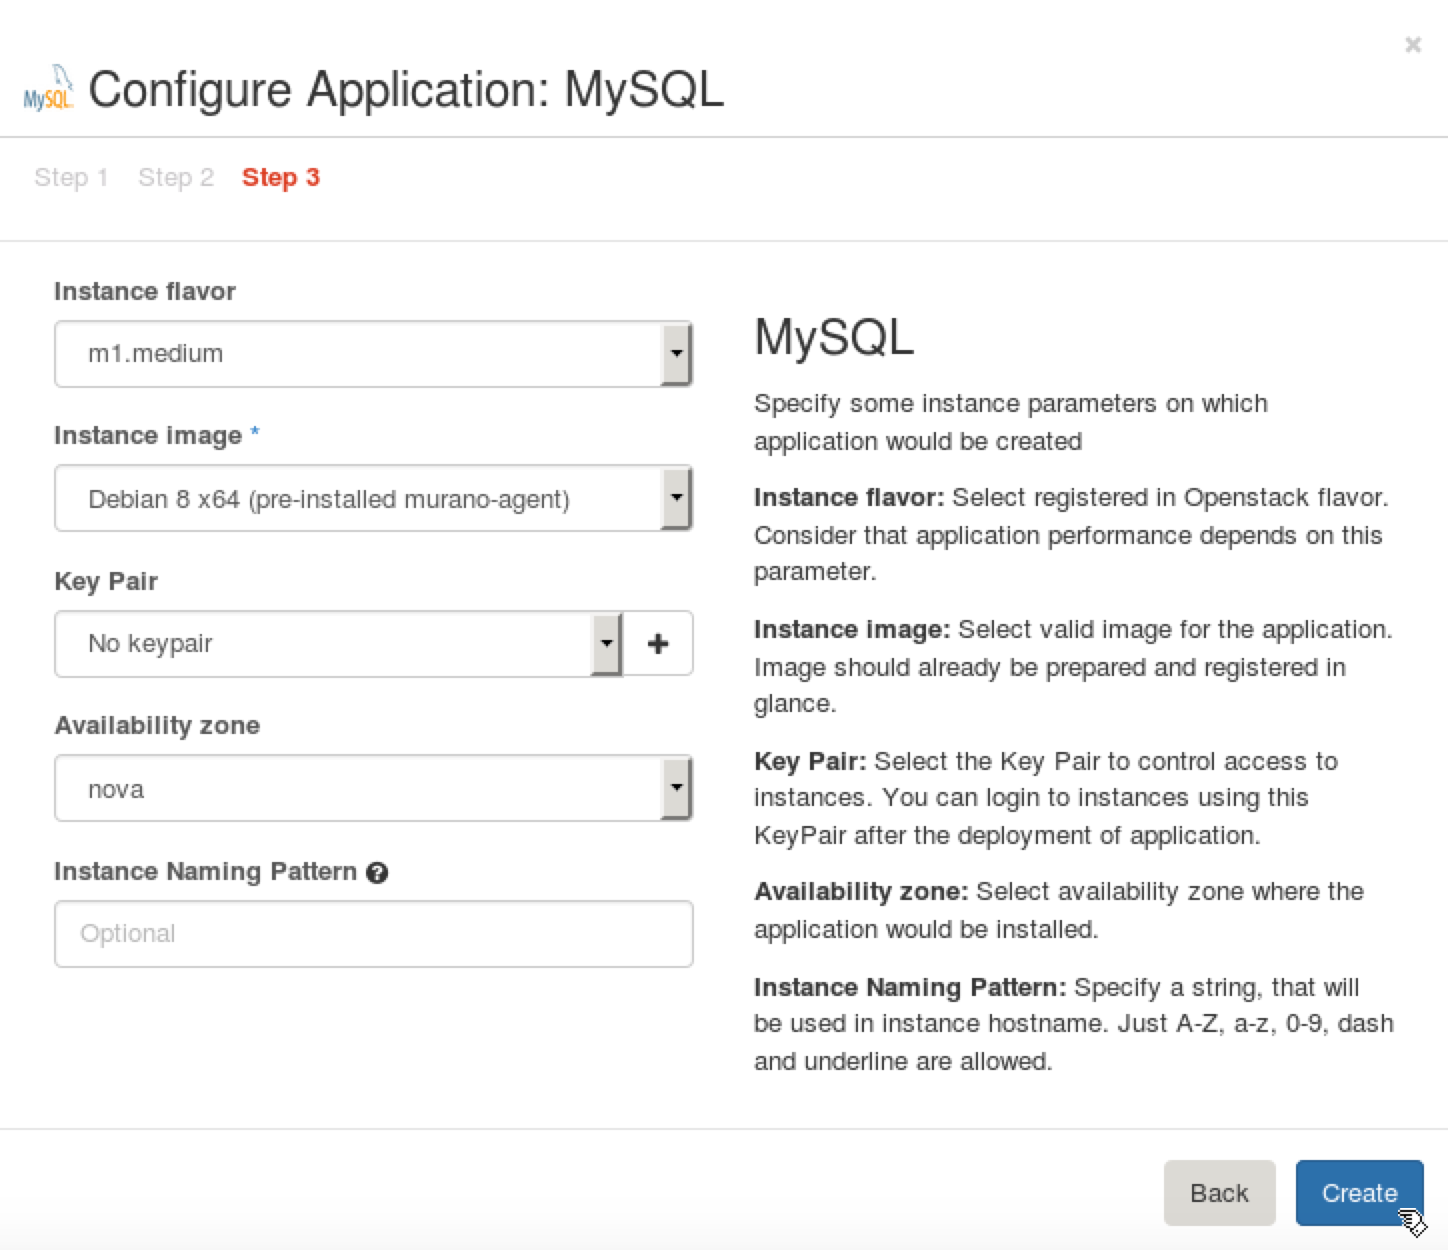
Step 6 Choose Debian 8 x64 (pre-installed murano-agent) in the Instance Image field, keeping default values for all of the other fields. Press Create.
Step 7 In the Configure Applcation: WordPress wizard, press Add Applcation button, which us near the HTTP Server.
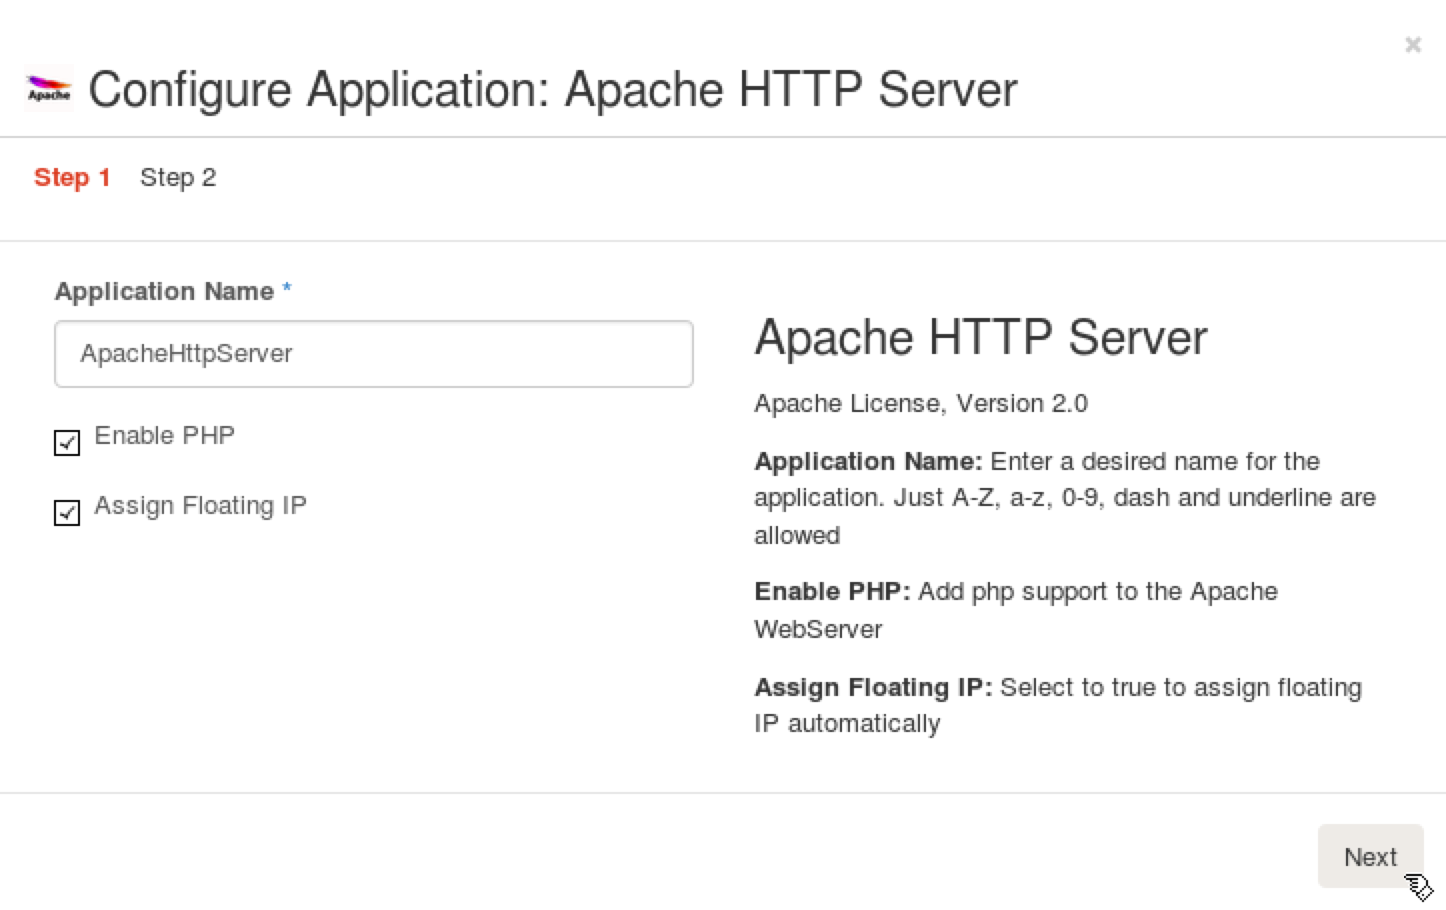
Step 8 In the Configure Applcation: Apache HTTP Server wizard, check the Enable PHP and Assign Floating IP checkboxes. Press Next.
Step 9 Choose Debian 8 x64 (pre-installed murano-agent) in the Instance Image field, keeping default values for all of the other fields. Press Create.
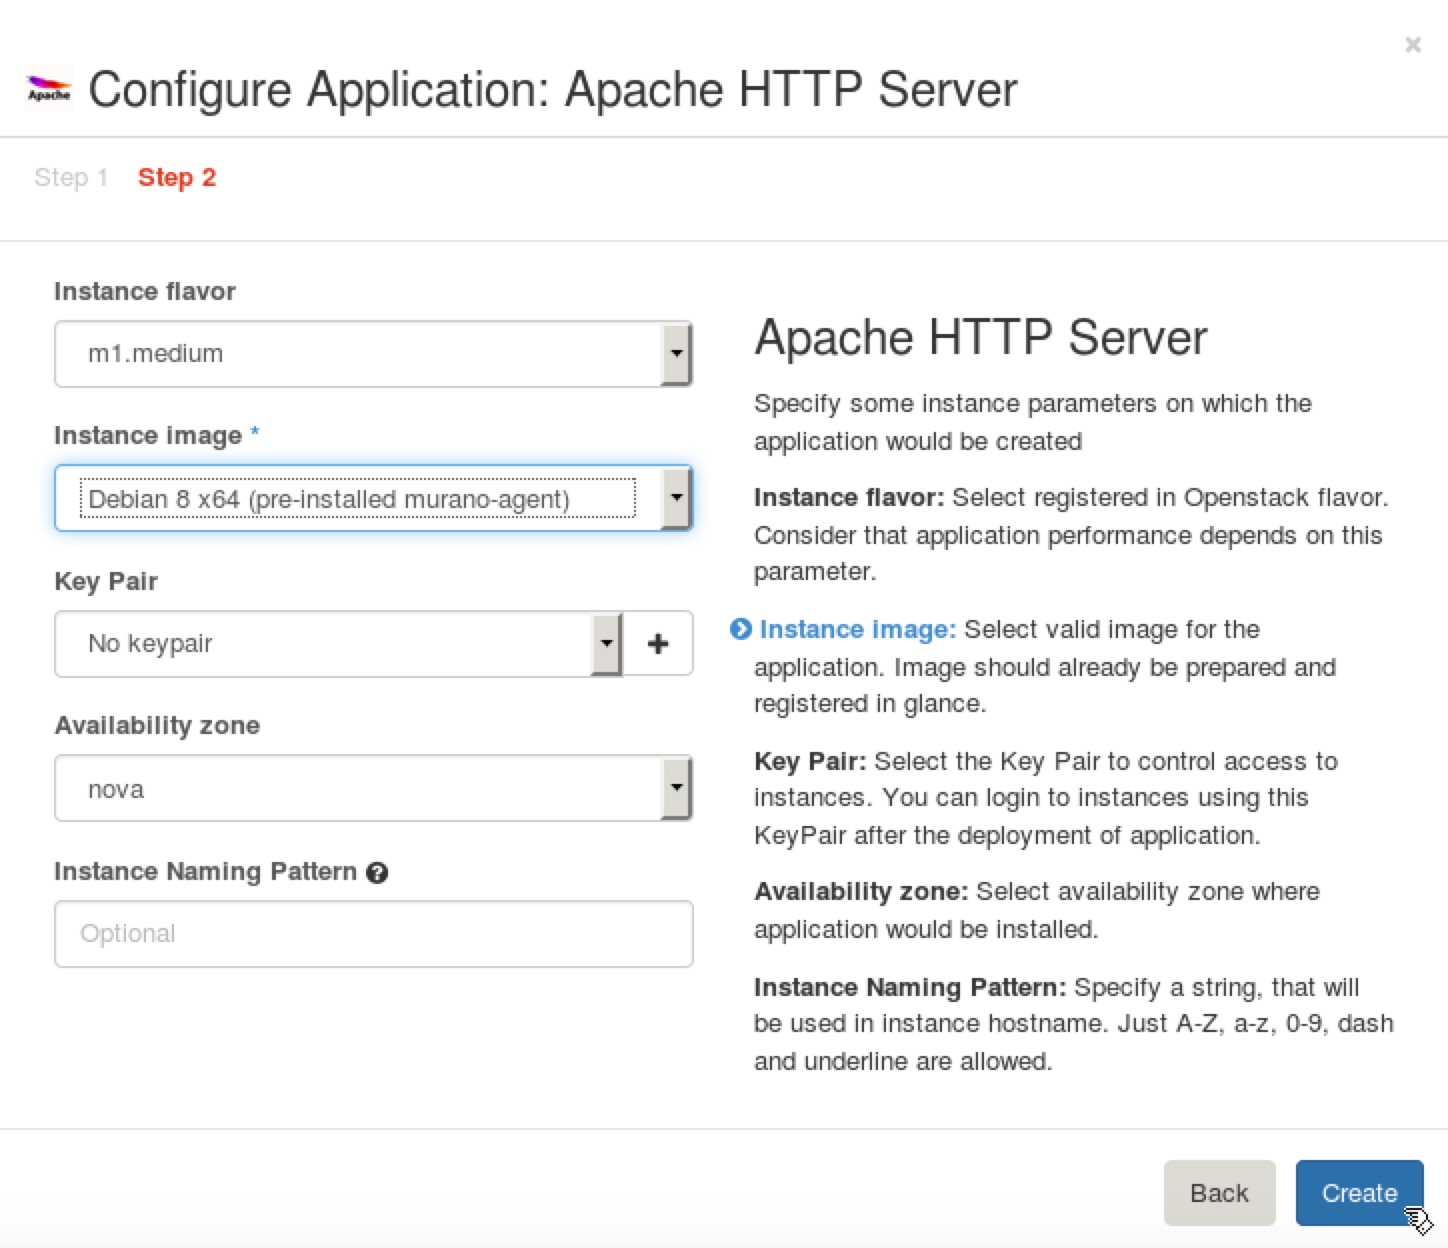
Step 10 In the Configure Applcation: WordPress wizard press Next.
Step 11 Keep the default database name and user name in the next step. Enter P@ssw0rd in the Password and Confirm password fields. Press Create.

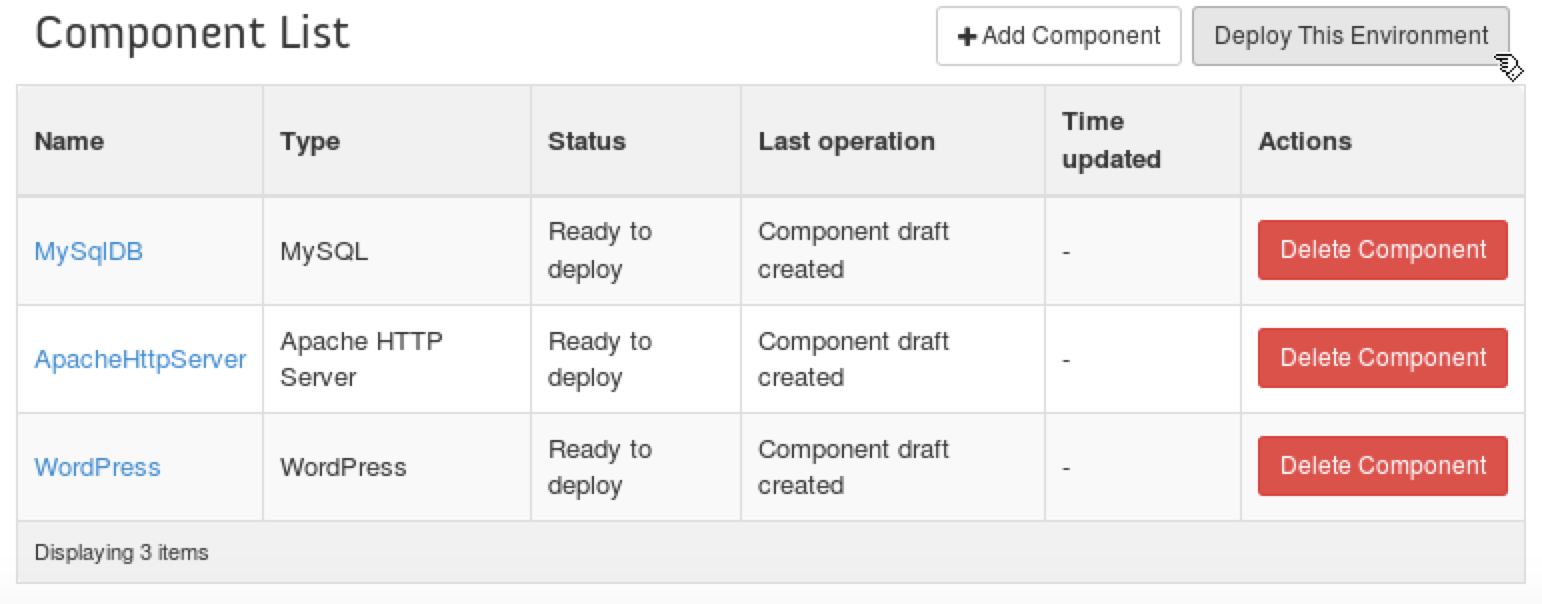
Step 12 Press Deploy This Environment.
Step 13 Wait 8-10 minutes while Murano deploys the environment.

Step 14 Murano should report a Ready status for all components.
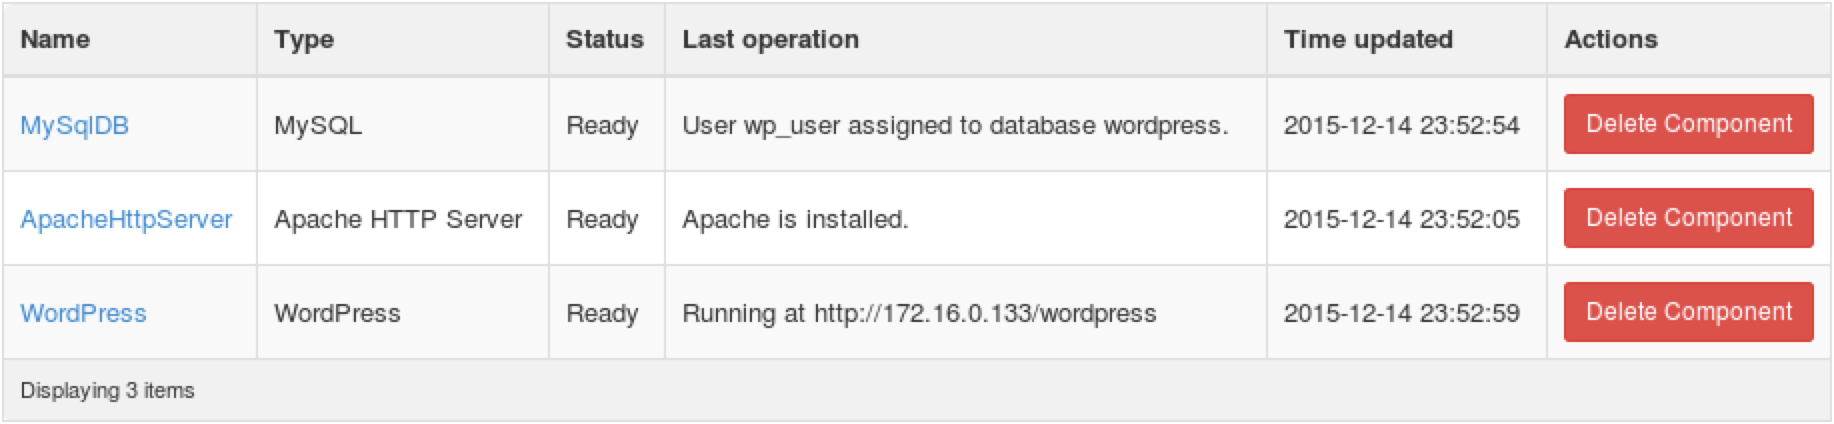
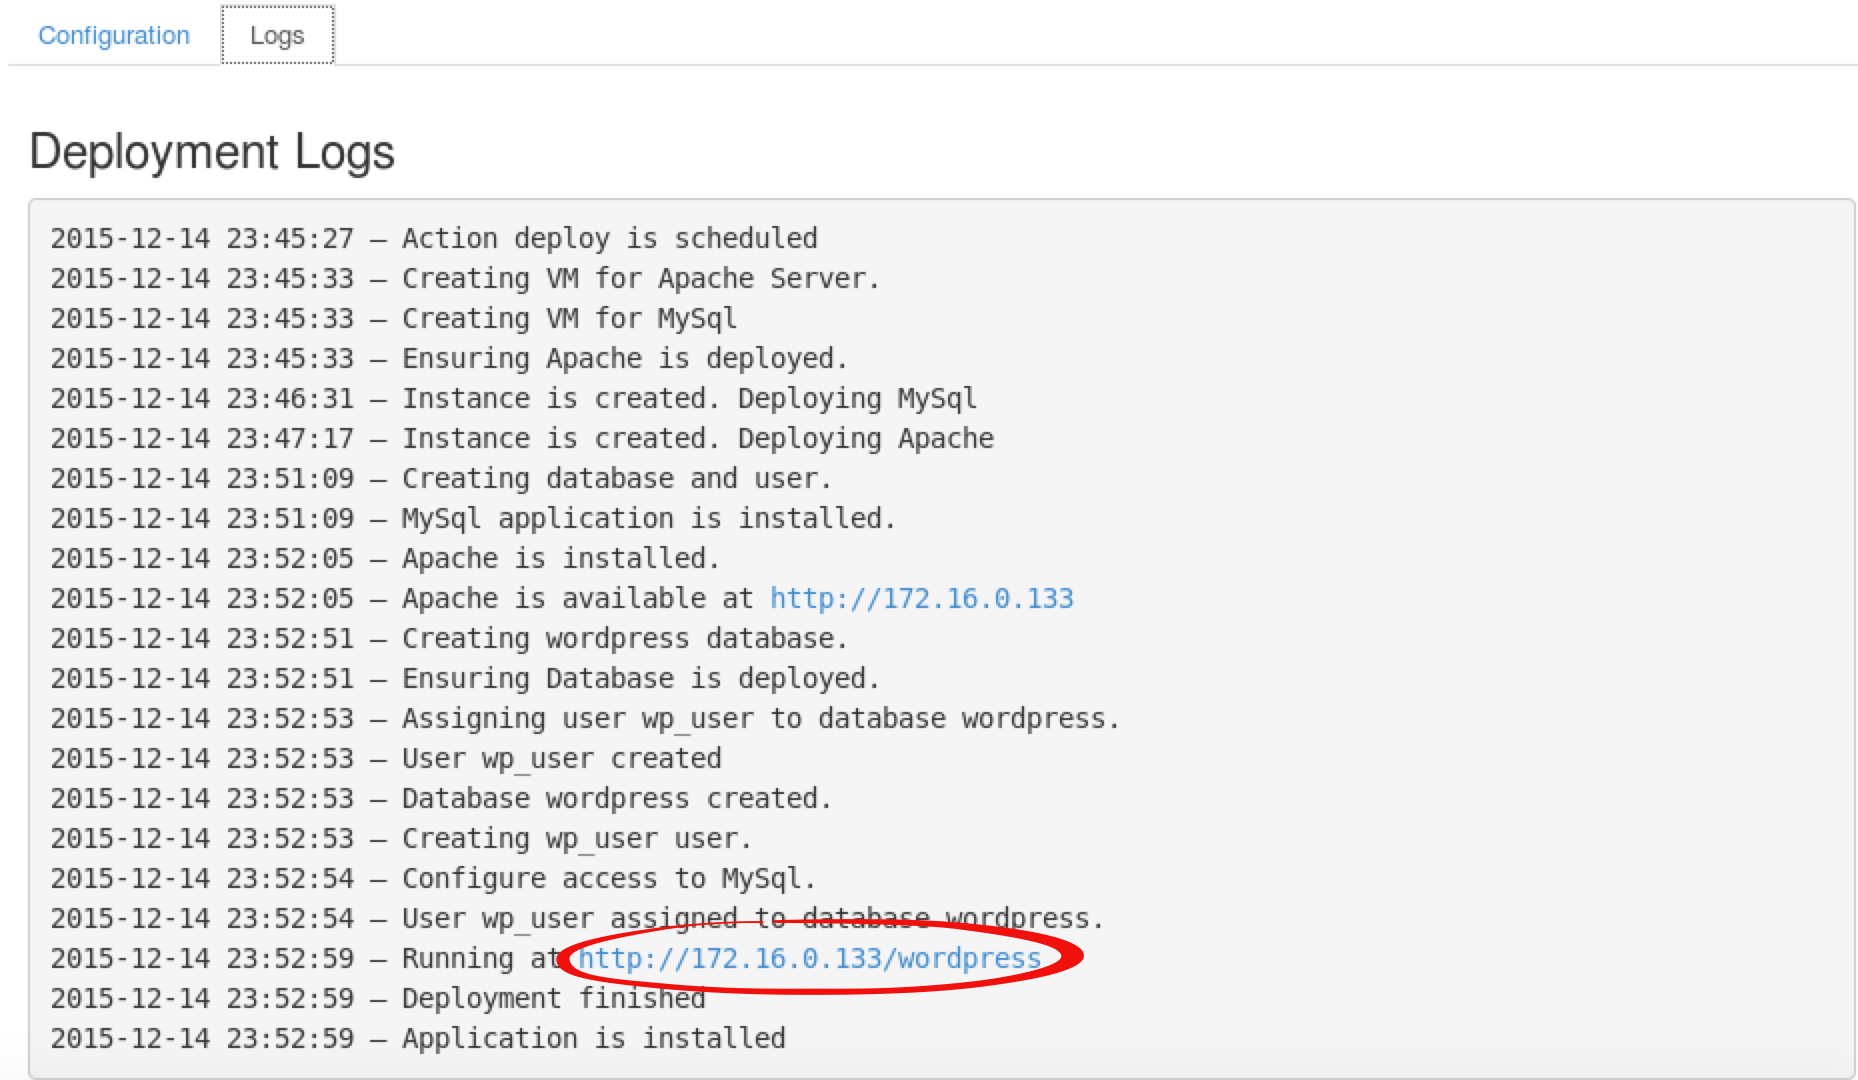
Step 15 Open the link, which is displayed in the Last operation column for the WordPress component. Alternatively, you can choose the Deployment History tab, Show Details button, Logs tab. The Deployment Logs page should contain a link to the WordPress application.
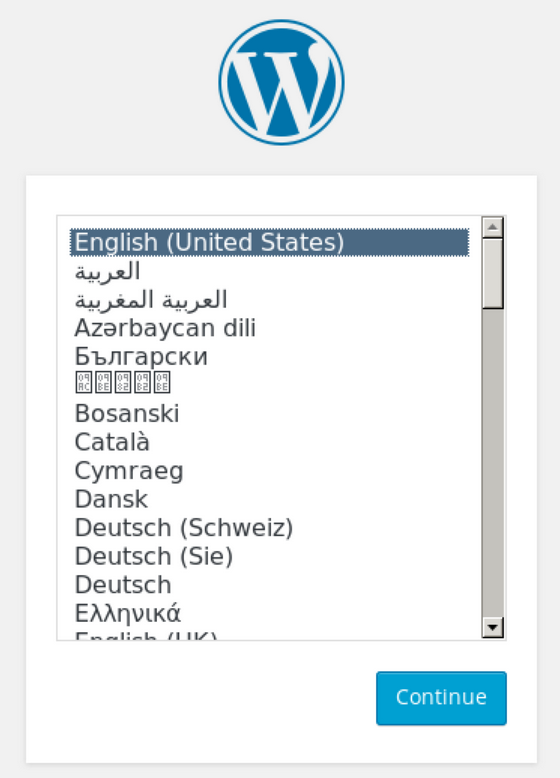
WordPress should show its initial page.
Congratulations! You have successfully deployed a Murano environment.
Checkpoint
- Check that the OpenStack environment is deployed with Murano
- Import WordPress package from Application Catalog
- Create and configure the Murano environment for WordPress application
- Deploy the Murano environment with WordPress application and its dependencies
- Check that WordPress application is working