5. HA Deployment
In this chapter you will deploy two new controller nodes. Fuel will make necessary changes to the OpenStack environment and as a result you will get a high availability (HA) for the existing environment. Later, you will shut down one controller to test if the environment continues to work with the remaining two controllers. After the test, you will boot the third controller again to join the quorum with other controllers.
Note
This is only HA for the controllers. In order to make an OpenStack environment highly available, you will need to have at least two compute nodes and at least 2 Ceph nodes, assuming that Ceph replication factor is 2. Ceph will be used for ephemeral, object and block storage, so VMs can be migrated from one compute node to another.
| Chapter Details | |
|---|---|
| Chapter Goal | Deploy a HA OpenStack environment |
| Chapter Sections | |
5.1. Prerequisites
Check that the following prerequisites have been met:
- You have access to the lab environment.
- You have created all of the required virtual networks (3.2. Create Virtual Networks)
- You have successfully installed the Fuel Master node (3.4. Install Fuel)
- You have successfully installed the OpenStack environment (4.6. Deploy Simple Environment)
5.2. Create Additional Controller Nodes
We will create two additional VMs for two additional controller nodes. Both VMs have the same configuration, specified below.
Name:       controller2
CPUs:       2
RAM:        4096MB
Disk:       60GB
Network 1:  Virtual network 'admin'  : Isolated
Network 2:  Virtual network 'public' : NAT
Name:       controller3
CPUs:       2
RAM:        4096MB
Disk:       60GB
Network 1:  Virtual network 'admin'  : Isolated
Network 2:  Virtual network 'public' : NAT
The required steps are similar to the steps from 4.2.1. Create Controller Node section.
Step 1 Launch the Virtual Machine Manager. In the main window press New to create a new virtual machine.
Step 2 In the New VM window enter controller2 in the Name field, choose Network Boot (PXE) and press Forward.
Step 3 Choose Linux for OS type field and Ubuntu 14.04 LTS (Trusty Tahr) for Version field. Press Forward.
Step 4 Enter 4096 for Memory (RAM) and 2 for CPUs. Press Forward.
Step 5 Choose Create a disk image on the computer's hard drive option, enter 60 for disk size, uncheck the Allocate entire disk now checkbox and press Forward.
Important
Please check that you have changed the default disk size to 60GB. Controller requires at least 60GB for the installation. Also, please check that you have unchecked the Allocate entire disk now checkbox. Your environment has limited available disk space. If you choose to allocate entire disk now you will run out of disk space while creating additional VMs later.
Step 6 Check Customize configuration before install. Click on Advanced options to expand it. Choose Virtual network 'admin': Isolated network. The Virtual Machine Manager will generate MAC address for NIC. Check that Virt Type is kvm, Architecture is x86_64 and Firmware is Default. Press Finish.
Step 7 Choose Input from the list. Press Add Hardware button, which is located at the bottom of the window. Choose Netwok from the list in Add New Virtual Hardware. Choose Virtual network 'public' : NAT for Host device. Keep Hypervisor default for Device model field. Press Finish.
Important
The order of network interfaces is important! You should create a new network interface after the existing one.
Step 8 Press Begin Installation button. Virtual Machine Manager will create a new VM with the specified settings and launch the VM console automatically. Installation progress can be viewed in this console.
Step 9 Repeat steps 1-8 for controller3 VM.
5.3. Deploy Additional Controller Nodes
Step 1 Log in to the Fuel UI.
Step 2 Wait while Fuel is discovering new nodes. You will get two new notifications in Fuel UI when new nodes have been discovered.
Step 3 From Fuel’s main menu, choose Environments, press on Test environment and choose the Nodes tab.
Step 4 Press Add Nodes. Choose Controller from the list of roles. Select both discovered nodes. Press Apply Changes to assign the controller role to the new controller nodes.
Step 5 Choose the Networks tab. We will use the default network configuration, provided by Fuel. Scroll down the page and press Verify Networks button.
Step 6 It will take several minutes to verify the network. You should get the message “Verification succeeded. Your network is configured correctly” when the verification is complete.
Step 7 Choose the Dashboard tab. Press Deploy Changes.
Step 8 Fuel will display a confirmation dialog. Press Deploy.
Step 9 Wait for Fuel to install the OpenStack environment. It will take around 1 hour to complete the deployment.
5.4. Verify HA environment
Step 1 Log in to Fuel UI, choose Test environment, choose the Nodes tab and check that each node is in the READY state.

Step 2 If necessary, repeat steps from 4.7. Verify Simple Environment section to make sure, that the instance is up and running and is accessible via the console and the network.
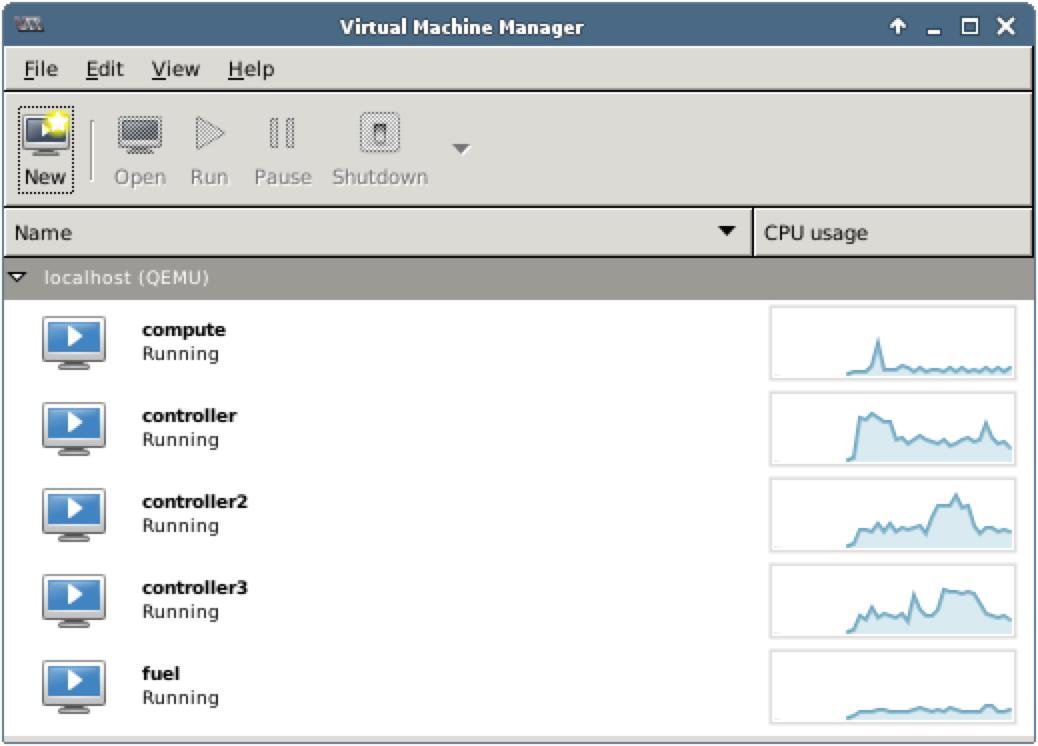
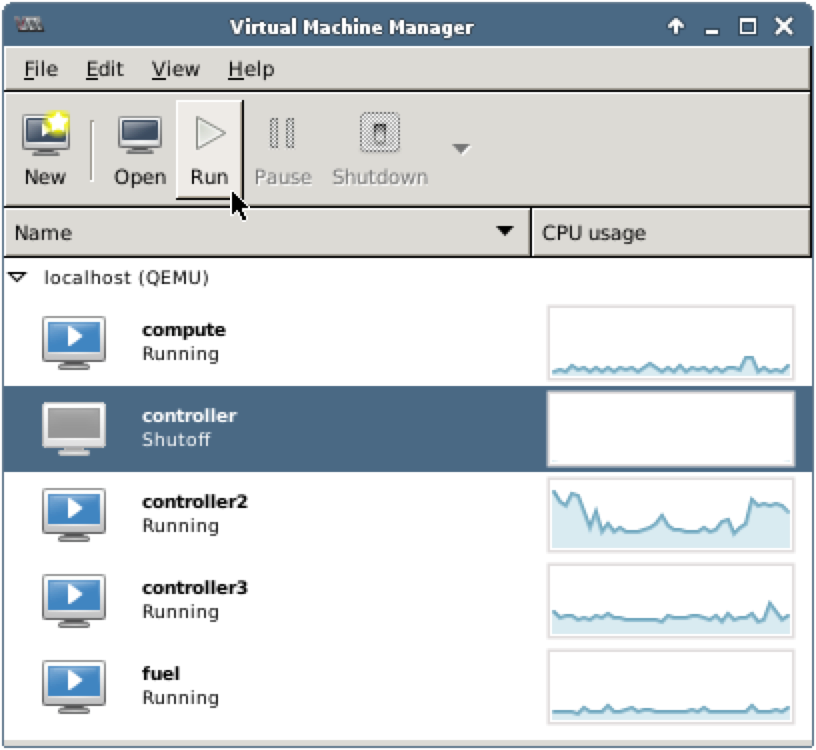
Step 3 Shut down one controller: launch Virtual Machine Manager, choose any controller VM, for example controller, press Shut Down, then Force Off (alternatively, you can right click on the controller to open a context menu, choose Shut Down, then Force Off).

Step 4 Return to Fuel UI and wait for node to change its status from READY to OFFLINE.

Step 5 Check that Horizon is working and the instance is accessible via the network, see 4.7. Verify Simple Environment section.
Step 6 Start the controller node again. Launch the Virtual Machine Manager, choose VM in a shutoff state, press Run (alternatively, you can right click on the controller to open a context menu, then choose Run).
Step 7 Return to Fuel UI, choose Test environment and wait for node to change its status from OFFLINE to READY.
Step 8 Check that Horizon is working and the instance is accessible via the network, see 4.7. Verify Simple Environment section.
Congratulations! You have successfully installed a HA OpenStack environment.
Checkpoint
- Create VMs for two additional controller nodes
- Connect controller nodes to admin and public networks
- Verify networks in Fuel
- Assign roles to nodes in Fuel
- Deploy changes to the OpenStack environment in Fuel
- Check that the HA OpenStack environment works